


 0
0Arc Raiders Augment Farm Revival MK III & Safekeeper Blueprints (Looting + Fast Routes)
- KITE
- Share
- ARC Raiders
- 01/28/26
- 3300
New Arc Raiders Augments have dropped, particularly Revival MK III and Safekeeper, and the meta shifted away from crafting and greatly increased focus towards looting. The reality is that the blueprint pool did not get more diluted with the crafting tiers, however, the more items in the rotation, the less likely you are to hit a specific schematic on a drop. We have gone multiple gaming sessions where we have sat for hours of farming just to get the right drop, and due to the current state of the game, your only option is to be more efficient.
In this guide, we incorporate the best strategies we have implemented, which are using the diruption frame from harvester events to rush the Blue Gate high value chest, then running a pure speedrun looting route Stella Montis. Lastly we will identify some of the augments and what they do, and in particular explain the impact of the 30 second heal that will dictate your loadout.
Here is how you stop wasting time and start printing Arc Raiders blueprints.
- Farming Core Strategies
- 1. Blue Gate Distraction Strategy
- 2. Stella Montis Container Speedrun
- Key Rooms & Priority Loot Locations
- High-Confidence Spawns
- Best Key Rooms (Roll Density)
- How to Survive the Farm
- Door Discipline
- The Check-and-Leave Rhythm
- Analyzing the New Augments
- 1. Revival MK III (Utility & Sustain)
- 2. Safekeeper (Looting & Insurance)
- Comparison: Which One Should You Craft?
- FAQ
- 1. Is the Blue Gate Breachable Room the only place for the Revival blueprint?
- 2. Does the Harvester event help or hurt this farm?
- 3. Why does Revival feel inconsistent in fights?
- 4. Is the rule \4+ items\ guaranteed?
- 5. What items should I collect to craft these?
- Summary
↖ Farming Core Strategies
Using two stratgies we've tailored to the map conditions and our spawn position.
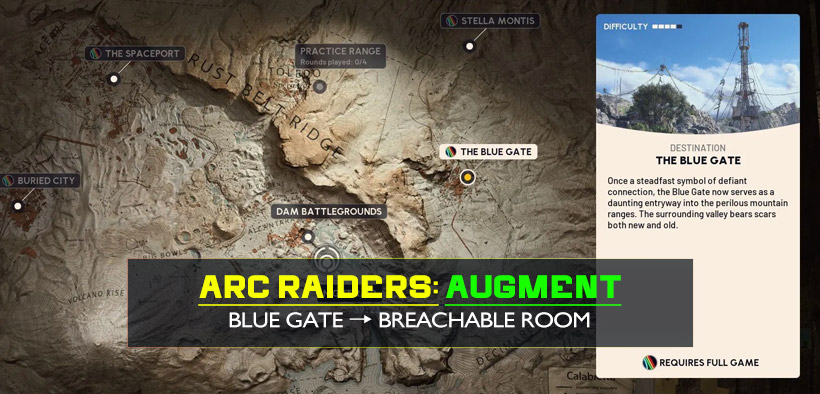
↖ 1. Blue Gate Distraction Strategy
Turning the most dangerous part of the map into your cover.
The Logic: Hot drops often spawn harvesters. Everyone drops to focus on harvesters and the loot. This leaves the fringes of the map unguarded.
The Target:Blue Gate → Breachable Room
The Execution:
1. Spawn: If you spawn by Blue Gate, ignore the event.
2. Rush to the Room: Run to your Breachable Room.
3. Use the Noise: If you hear a fight at the Harvester, ignore the fight. It'll mask the sounds of your footsteps.
If the Breachable Room looks empty, don't stick around. Instead head to the medical spawn and extract. First to arrive is your only advantage, and if you don't arrive first you turn into a target.
↖ 2. Stella Montis Container Speedrun
Maximum check rate per minute, Stella Montis is the route to take if you want to farm at the highest efficiency.
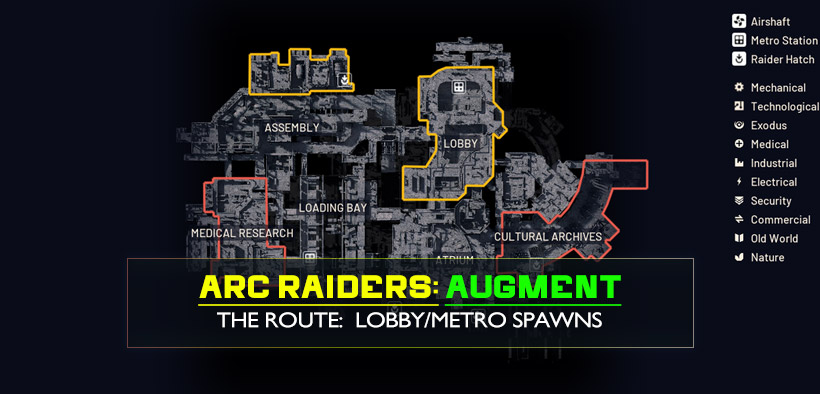
The Logic: This area has a particularly high concentration of medical and augment containers that can be linked together via ziplines.
The Route: Lobby/Metro Spawns
Stick to the edge of the tunnel and use the zipline to gain some height. Then check the first two containers that racers often overlook.
Atrium Spawns
Use the vertical shortcuts (ladders/zips) to get straight into the first augment-container room.
The Item Count Heuristic
When you open a container, you can save time by looking at the item count before reading the names.
- 3 Items: Typically, these are payout containers that we often don't check in detail when we're in a hurry.
- 4+ Items: The likelihood of a blueprint or high-tier module is much higher. Be sure to check these right away.
↖ Key Rooms & Priority Loot Locations
While the recent patch allows you to obtain blueprints from arbitrary industrial crates, ignoring that is a trap. Invest your time in more containers with higher probabilities.
↖ High-Confidence Spawns
1. Augment Containers: Your best target.
2. Medical Containers: The worst target. Usually ignored by weapon hunters.
↖ Best Key Rooms (Roll Density)
Key Rooms are coveted, because they are not suitable just because they have better loot, but also store multiple loot rolls in one location.
| Map / Area | Key Room | Why We Prioritize It |
|---|---|---|
| Stella Montis | Lobby Checkpoint Security | Super dense augment-container value. |
| Blue Gate | Confiscation Key (Security Wing) | Consistent containers + solid route pair with the Breachable Room. |
| Sandbox | Archives Key | Good concentration of medical containers. |
| Buried City | Hospital Zones | Great volume of medical containers; good for Revival farming. |
If you have these keys, use them. Storing keys does nothing for your progression, and these rooms provide the best rolls per minute in the game.
↖ How to Survive the Farm
Farming blueprints brings about the most undesirable type of PvP: close-range ambushes in hallways you can see and predict. Here is what we do to keep our survival rate high.
↖ Door Discipline
The state of a door is a piece of information. An open door signals your presence to the enemy; a closed door makes them have to do a noise to push you.
- The Rule: Enter a room and shut the door behind you.
- The Benefit: You have the initiative if you hear a door open.
↖ The Check-and-Leave Rhythm
Priority: blueprint > high-value modules > crafting bottlenecks (processors)
The Trap: Don't admin your inventory in a hot zone. Grab the blueprint and leave.
The Leave Condition: if you arrive and hear footsteps or inventory shuffling, you are not alone. Switch to a 10-second timer: check the main box and rotate.
If you have secured the blueprint, your sole objective is extraction. Optional objectives, locked doors, or friendly team-ups are unnecessary risks that threaten your win condition.
↖ Analyzing the New Augments
Once you have the blueprints, you need to consider what to craft. Here is the breakdown of what you are actually acquiring.
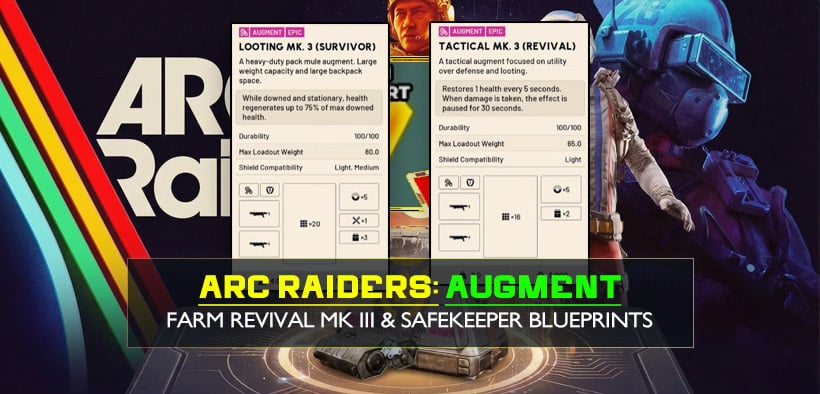
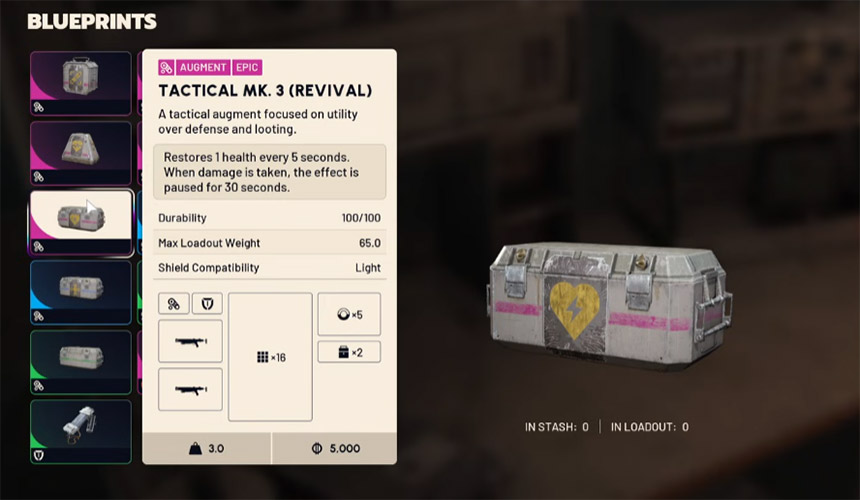
↖ 1. Revival MK III (Utility & Sustain)
This is not a tanking tool; this is a reset tool.
- Passive Healing: Restores 1 HP every 5 seconds.
- The Catch: healing pauses for 30 seconds after you take damage.
- The Hidden Gem: It has an Integrated Defibrillator (240s / 4-min cooldown).
What this means:
In a face-to-face trade, Revival does practically nothing since the damage resets the healing timer. However, if you play a style where you disengage, rotate, and re-peek, then it sustains you indefinitely. The integrated defib also opens a quick slot in your inventory to carry smoke, grenades, or a defib instead of a med.
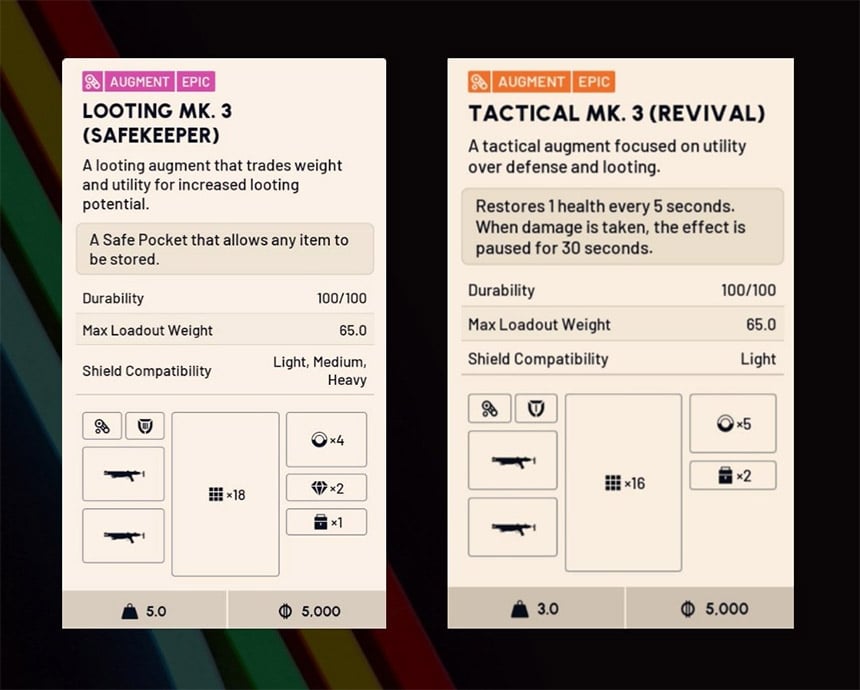
↖ 2. Safekeeper (Looting & Insurance)
Safekeeper changes the economy of your run.
Signature Feature: A safe pocket that can fit weapons.
Defense: Compatible with Light, Medium, and Heavy shields (a huge upgrade from previous looting bags).
What this means:
This is your insurance policy. If you're bringing a high-value weapon to fight a boss, or if you kill a player and loot a fully kitted gun, you can also bank it. It removes the risk of losing your best asset to a camper at the extraction.
↖ Comparison: Which One Should You Craft?
Here is a direct comparison to help you decide where to spend your materials.
| Feature | Revival MK III | Safekeeper | Survivor (Reference) |
|---|---|---|---|
| Primary Role | Team Utility & Reset Sustain | High-Value Loot Protection | General All-Rounder |
| Healing | +1 HP/5s (Pauses on hit) | None | Varies (often higher sustain) |
| Unique Utility | Integrated Defib (Free slot) | Weapon-Capable Safe Pocket | Balanced Slots |
| Best For | Squads, Rotators, Passive Players | Solos, Boss Hunters, PvP Farmers | Consistent Combat |
| Weakness | Useless in face-tank trades | Fewer utility slots than Survivor | No specialized gimmick |
If you play Duos or Trios: Craft Revival first. The free defib slot is a massive force multiplier for the team.
If you play Solo or run expensive kits: Craft Safekeeper. The ability to save your primary weapon when a run goes south is invaluable.
↖ FAQ
↖ 1. Is the Blue Gate Breachable Room the only place for the Revival blueprint?
No, but it's time-efficient for a first check. Blueprints can drop in medical rooms and augment containers throughout the map, including in Stella Montis. We consider the Blue Gate a rush, and other locations a rotation.
↖ 2. Does the Harvester event help or hurt this farm?
It helps...as long as you ignore it. If you go up to the Harvester and try to fight it, you are wasting time. Letting the Harvester pull other players creates a small window of safety for you to loot the side rooms.
↖ 3. Why does Revival feel inconsistent in fights?
30-second pauses are built into the Revival system. If you take any chip damage, the timer resets. It's designed for between fights, not during fights*.
↖ 4. Is the rule \4+ items\ guaranteed?
No. It is a heuristic, which is a mental shortcut. Heuristics are not hard snipped. However, containers with 4+ items are, in our experience, more likely to have a higher density of rare loot. If you are racing someone to a room, this mental shortcut is helpful in deciding which containers to open first.
↖ 5. What items should I collect to craft these?
The main bottlenecks are Processors (x3) and Advanced Components (x2). This is the case even if you are trying to farm blueprints—try to grab these as you will need them to craft the items once you unlock the schematic.
↖ Summary
If you want to unlock the blueprints for the Revival MK III and the Safekeeper quickly, you need to be more intentional with your looting and plan routes. You can use the Harvester event at Blue Gate as a cover to quickly breach the Breachable room, and for the best variety of loot, run the Stella Montis container loop.
After obtaining the blueprints, select your craft according to your own role. Choose Revival to have a personal defib and partake in a hit and run def strategy, or select Safekeeper to keep your best weapons insured against bad luck. The grind is tedious, but with disciplined routing and calculated risk, you can leave with the blueprint while the rest of the lobby is still contesting the event.

Most Popular Posts
- ARC Raiders Riven Tides Key Room Guide: Best Hotel Keys, Loot Routes, Secure & Crane Storage
- ARC Raiders Damage Fireflies Trial Guide: Best Farm Method on Buried City Night Raid
- ARC Raiders Riven Tides Update: New Map & Items, ARC Turbine, Rewards, and Best Early Strategy
- ARC Raiders Bettina Guide: Best Build, Buffs, and How to Use It Against ARC
- ARC Raiders Solo Search Supply Drops Guide: Best Buried City Route, Beacon Locations
- Arc Raiders Season 4 Riven Tides Update, Rewards, Safe Skins, and Release Timeline
Popular Category Lists
- Grow a Garden / (286)
- ARC Raiders / (266)
- CoD: Black Ops 7 / (166)
- Monopoly Go / (146)
- MLB 26 / (145)
- Star Citizen / (116)
- Steal a Brainrot / (89)
- ARK Survival Ascended / (74)
- Sailor Piece / (68)
- Forza Horizon 6 / (63)
- Diablo IV / (61)
- Blox Fruits / (60)
- CoD: BLACK OPS 6 / (55)
- Adopt Me / (53)
- Path of Exile 2 / (48)
- Monster Hunter Wilds / (46)
- Windrose / (44)
- Grow a Garden 2 / (42)
- Path of Exile / (40)
- Bee Swarm Simulator / (36)


