0
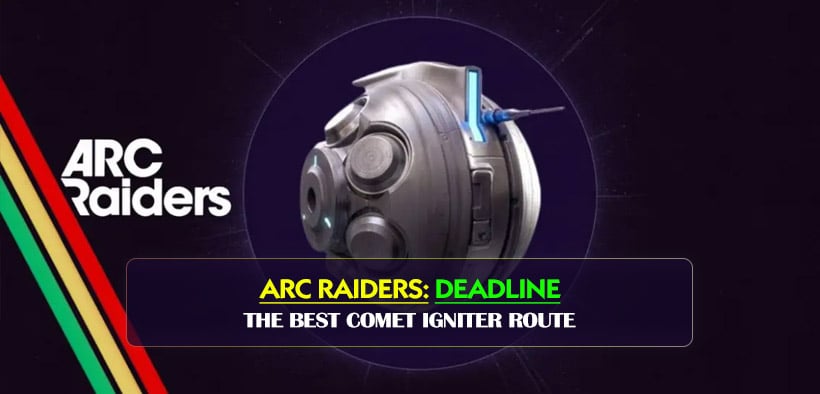
0ARC Raiders Deadline Farming Guide: The Best Comet Igniter Route
- KITE
- Share
- ARC Raiders
- 03/08/26
- 1803
ARC Raiders has a pretty clear materials winner right now: Deadline. With Wolfback crafting materials getting nerfed, the smarter route is no longer brute-forcing old explosive farms, but building around Comets instead. That shift matters because Deadline now asks for a Comet Igniter, and compared with harder arc parts like the Rocketeer Driver, that requirement is far more manageable.
What this means for us is simple: if we can kill Comets efficiently and reliably, we solve two problems at once. We get Comet Igniters from the core, and we also stack Explosive Compound, which Deadline needs anyway. That makes Comet farming one of the cleanest self-sustaining explosive loops in the game.
- Why Deadline Matters More Now
- Loadout and Setup
- Core kit
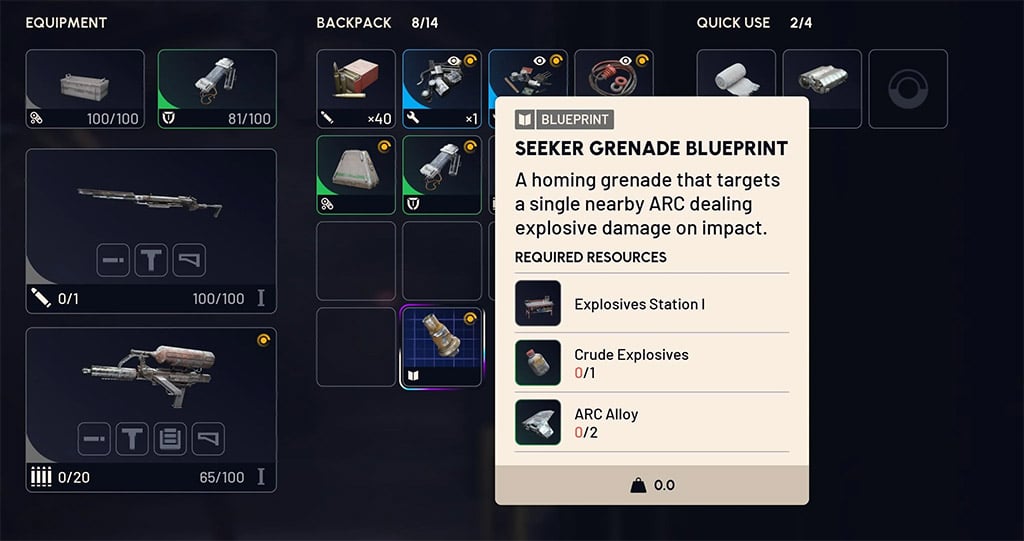
- Why Seeker Grenades are so important
- If you don't have the Seeker Grenade blueprint
- How to Kill Comets Efficiently
- The basic one-shot method
- Important loot rule
- Common mistakes
- Best Day Raid Route: Blue gate
- Why Bluegate works
- Recommended Bluegate flow
- What to expect on Day Raid
- Best High-Yield Route: Hurricane Farming
- Best maps for Hurricane
- Why Spaceport is especially useful
- Timing tip: don't panic in the first 10 minutes
- How to Use Seeker Grenades in Hurricane
- The adjustment rule
- Practical Hurricane rule set
- Threat Management While Farming
- Priority logic
- What a Good Run Looks Like
- Fast Reference
- FAQ
- How many Seeker Grenades should we bring?
- Is Day Raid or Hurricane better for farming Deadline materials?
- Where do Comets usually spawn?
- Why am I not one-shotting Comets with Seeker Grenades?
- Do Comets respawn often on normal raids?
- What loot matters most from the Comet?
- Final Notes
↖ Why Deadline Matters More Now
The big reason is accessibility.
Before the ARC Raiders material changes, some explosive paths were stronger on paper but worse in practice because the ingredient grind was too awkward. Now Deadline sits in a much better spot:
| Item | Why It Matters | Current Reality | Practical Value |
|---|---|---|---|
| Deadline | Fast burst damage vs big ARC targets | Needs Comet Igniter + Explosive Compound | High |
| Comet Igniter | Required arc part | Easier to farm than Rocketeer Driver | Very high |
| Explosive Compound | Secondary crafting material | Also drops from Comets | Excellent synergy |

The key takeaway here is that Comets feed the whole craft, not just one ingredient. That's why this farm is efficient rather than merely convenient.
↖ Loadout and Setup
If we want stable runs, we should keep the loadout simple instead of over-optimizing.
↖ Core kit
Bring:
- Any primary weapon for basic control
- Seeker Grenades
- A full-auto backup weapon for failed one-shots
- Enough ammo to finish damaged Comets safely
In our testing, the weapon itself mattered less than having a reliable follow-up option. The reason is straightforward: Seeker Grenades can absolutely one-shot Comets, but only when the angle is clean and the grenade reaches the exposed core correctly.
↖ Why Seeker Grenades are so important
A properly placed Seeker can:
- one-shot a Comet
- save ammo
- reduce time exposed in open terrain
- preserve the core loot better than messy, extended fights
But there's a catch: the Comet must not be changing direction when you throw. If it turns, the Seeker often hits armor instead of the vulnerable section. Once that happens, your clean one-shot turns into a scramble.
↖ If you don't have the Seeker Grenade blueprint
Farm Stella Montis and loot containers aggressively.
Based on the route described here, the blueprint appears to be tied to Stella Montis and the drop rate feels reasonably generous. So if you're missing it, that should be your first stop before trying to mass-farm Deadline materials.
↖ How to Kill Comets Efficiently
This part is where most runs are won or wasted.
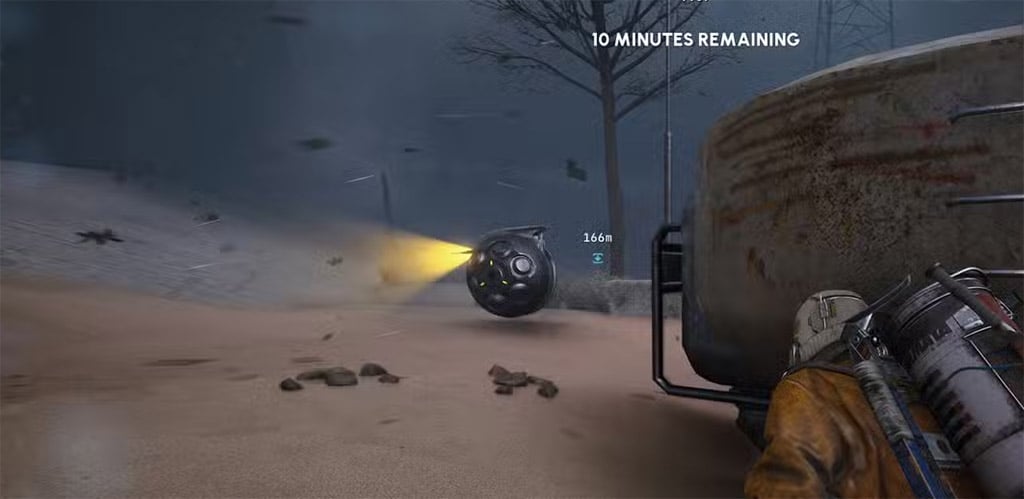
↖ The basic one-shot method
Use this sequence:
1. Tag the Comet with a shot
2. Wait until its line is stable
3. Throw the Seeker behind it
4. Let the grenade track into the vulnerable area
That behind it part is critical. If you throw too early, too close, or while it is turning, the Seeker tends to clip the side armor.
↖ Important loot rule
When the kill is clean, you want to loot the main core section first.
That section is the one that can drop:
- Comet Igniter
- Explosive Compound
There are other useful drops too, but the core is the main prize. And here's the nasty little rule many players learn the hard way: if the Comet explodes badly, that main loot section may not spawn at all. So fast kills are good, but controlled kills are better.
↖ Common mistakes
| Mistake | What Happens | Fix |
|---|---|---|
| Throwing Seeker while Comet is turning | Hits armor, no one-shot | Wait for a straighter path |
| Fighting on uneven ground | Comet bounces unpredictably | Reposition to flatter terrain |
| No backup weapon | Failed throw becomes wasted spawn | Bring full-auto insurance |
| Tunnel vision on one target | Nearby ARC punishes you | Clear immediate threats first |
A lot of missed kills are not mechanical failures. They are positioning failures disguised as aim problems.
↖ Best Day Raid Route: Blue gate
If you want the safer option, start with Blue gate Day Raid.
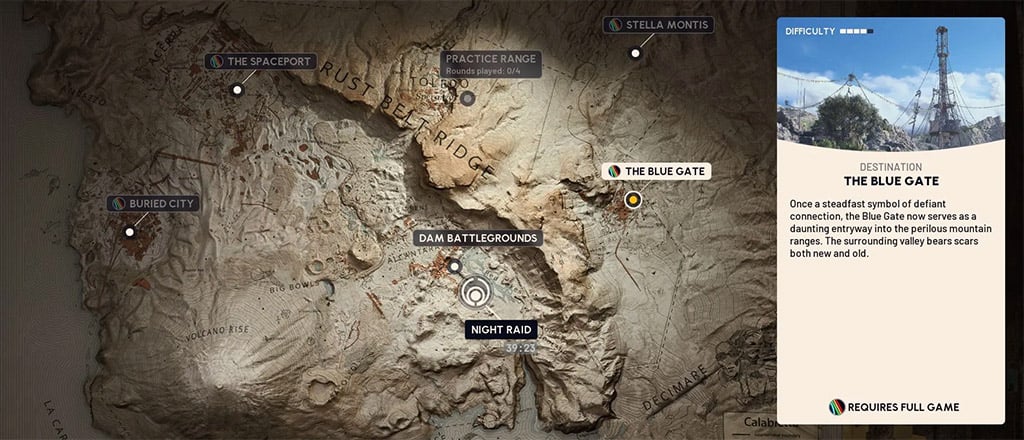
Day raids do not usually produce the highest Comet count, but they are easier to read, easier to survive, and much more forgiving while you learn the pattern.
↖ Why Bluegate works
Comets tend to appear near extract-adjacent spaces and open lanes, and Bluegate gives us several watchable approach lines from elevated positions.
The most useful pattern is to set up around Warehouse Complex and use roof access plus ziplines to keep rotating between likely spawn lanes.
↖ Recommended Bluegate flow
- Move into Warehouse Complex
- Climb to a roof with broad visibility
- Watch nearby open ground and roads
- Place ziplines to connect rotation points
- Check nearby spawn lanes, then return to your high ground
This route works because visibility is doing half the job for us. In Day Raid, spotting the Comet early is often more valuable than forcing a fight in bad terrain.
↖ What to expect on Day Raid
Here's the trade-off:
| Mode | Safety | Comet Visibility | Spawn Frequency | Best Use |
|---|---|---|---|---|
| Blue gate Day Raid | High | Good | Lower | Learning route, farming a few Deadlines |
| Hurricane | Lower | Worse overall, but manageable with method | Higher | Mass farming |
Our practical read is that Day Raid is excellent if you only need a few crafts. If you're trying to build a serious stockpile, it starts feeling slow.
↖ Best High-Yield Route: Hurricane Farming
This is where the farm really opens up.
If we want a large stack of Deadline materials, Hurricane raids are stronger, even though they are more chaotic. That sounds like a bad trade at first, but the extra Comet density usually makes up for the extra risk.
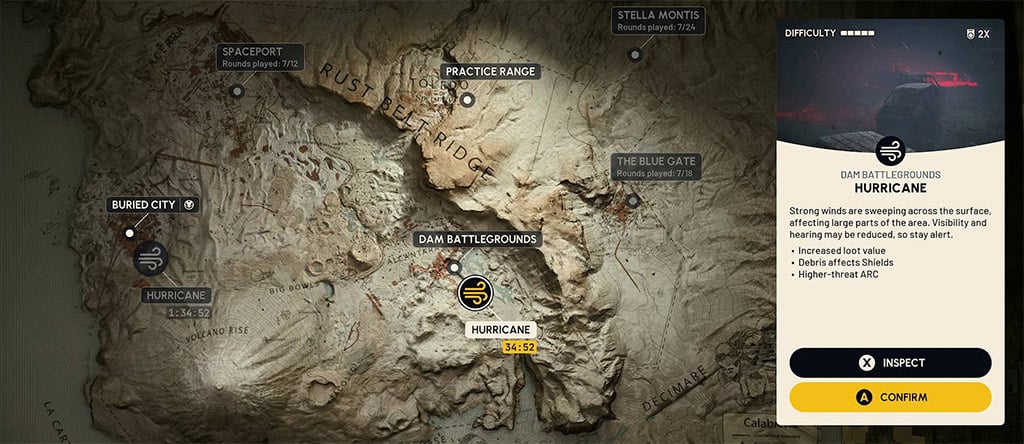
↖ Best maps for Hurricane
Two maps stand out:
| Map | Why It's Good | Notes |
|---|---|---|
| Bluegate Hurricane | Familiar layout, decent Comet concentration | Good if you already know Bluegate well |
| Spaceport Hurricane | Strong visibility from Launch Tower area | Excellent for scanning distant ARC drops |
↖ Why Spaceport is especially useful
From Launch Tower, we can often spot incoming ARC activity more clearly than on many other maps. Whether that is because of elevation, sightlines, or storm behavior, the practical result is the same: it's easier to identify movement and react early.
That matters because in Hurricane, recognition speed is everything.
↖ Timing tip: don't panic in the first 10 minutes
This is one of the most important practical observations in the guide.
From repeated runs, it often feels like:
- the first 10 minutes are relatively quiet for Comets
- the last 15 minutes become much busier
- late raid pacing can suddenly turn into multiple Comet opportunities in short succession
If you drop in and think, This farm is dead, wait longer before judging it. In practice, late-match Hurricane is where the route starts paying us back.
↖ How to Use Seeker Grenades in Hurricane
The storm changes everything.
In Day Raid, your Seeker setup is mainly about target pathing. In Hurricane, you also have to account for wind drift.
↖ The adjustment rule
If the wind is pushing right: aim your throw slightly left
If the wind is pushing left: aim your throw slightly right
That sounds obvious, but in real fights the drift is easy to under-correct. And because Comets bounce over terrain, the throw is rarely as clean as it looks in your head.
↖ Practical Hurricane rule set
- Prefer flat ground
- Throw only when the path is predictable
- Keep your backup weapon ready immediately
- Don't overcommit to a bad first throw
If you miss the one-shot, switch instantly to your firearm and burn the core. Hesitation costs more than ammo.
↖ Threat Management While Farming
Comets are not the only thing trying to ruin the run.
You may also deal with:
- Hornets
- Fireflies
- Turrets
- Bastions
- other roaming ARC pressure
↖ Priority logic
Use this order when things get messy:
1. Clear anything that interrupts your Comet kill
2. Avoid alarms that pull heavier enemies
3. Return to Comet focus only when the area is stable
This matters because farming efficiency is not just about killing Comets fast. It's about not losing your run to a side threat while chasing loot greed.
Fireflies are a good example. If one catches you in the open, the fight can become far more expensive than the Comet itself. If you see one and you have poor cover, solve that first.
↖ What a Good Run Looks Like
On a strong Hurricane raid, the route described here produced roughly:
- 11 Comet Igniters
- 19 Explosive Compound
That kind of result is a serious material swing from a single match. Even if your raid is less clean, the ratio is still favorable because both headline ingredients come from the same target type.
This is why the farm feels so efficient: you are not splitting your time across unrelated grinds.
↖ Fast Reference
Here's the full farming plan in one place.
| Goal | Best Choice | Why | If Something Goes Wrong |
|---|---|---|---|
| Learn Comet farming safely | Bluegate Day Raid | Better visibility and lower pressure | Slow pace is normal |
| Farm large Deadline stock | Hurricane | Higher Comet density | Expect more failed one-shots |
| One-shot Comets | Seeker Grenade | Best burst efficiency | Use full-auto backup |
| Find blueprint | Stella Montis containers | Reliable source path | Keep looting, drop seems fair |
| Improve Hurricane success | Spaceport Launch Tower | Better long-range spotting | Rotate when sightline is blocked |
↖ FAQ
↖ How many Seeker Grenades should we bring?
Bring several, not just one or two. In Day Raid you can get away with fewer, but in Hurricane missed throws happen because of wind and terrain. A comfortable stack gives you room to stay aggressive.
↖ Is Day Raid or Hurricane better for farming Deadline materials?
If you only need a few crafts, Day Raid is safer. If you want to build up a real stockpile, Hurricane is better because Comet spawns feel denser, especially later in the match.
↖ Where do Comets usually spawn?
They often appear around open travel lanes and extract-adjacent areas. On Bluegate, Warehouse Complex rotations are useful. On Spaceport Hurricane, scanning from Launch Tower gives strong coverage.
↖ Why am I not one-shotting Comets with Seeker Grenades?
Usually one of three reasons:
- the Comet was turning
- the terrain made it bounce
- the storm pushed your throw off-line
If you notice repeated failures, stop forcing the grenade and reposition to flatter ground.
↖ Do Comets respawn often on normal raids?
Not consistently. On standard day raids, they can feel sparse, and sometimes respawns seem slow or absent after early kills. That inconsistency is one reason Hurricane farming is stronger for bulk materials.
↖ What loot matters most from the Comet?
The main core loot section is the priority because it can give you Comet Igniters and Explosive Compound, which are the two materials that matter most for Deadline crafting.
↖ Final Notes
Right now, the cleanest explosive farm in ARC Raiders is not about chasing the rarest part in the game. It's about picking a target that pays us twice. Comets do exactly that, and Deadline benefits more than almost any other craft from this loop.
If you're just getting started, run Bluegate Day Raid until the Seeker timing feels natural. If you already trust your movement and can manage weather pressure, move into Hurricane and stay patient through the early minutes. Once the raid shifts into its later phase, the material flow gets much better, and that's when the route starts feeling less like farming and more like printing explosives.

Most Popular Posts
- ARC Raiders Riven Tides Key Room Guide: Best Hotel Keys, Loot Routes, Secure & Crane Storage
- ARC Raiders Bettina Guide: Best Build, Buffs, and How to Use It Against ARC
- Best ARC Raiders Attachments for Every Weapon: Complete Weapon Mod Guide
- ARC Raiders Turbine Boss Guide: Spawn Time, Weak Points, Best Weapons, and Loot
- Arc Raiders Patch 1.27: Regional Pricing, Augment Rework, and Expedition Catch-Up
- ARC Raiders Update Guide: Best Nomadic Envoy Trades, Rascal Grenade Launcher, Durability Buffs
Popular Category Lists
- ARC Raiders / (291)
- Grow a Garden / (286)
- CoD: Black Ops 7 / (166)
- MLB 26 / (150)
- Monopoly Go / (148)
- Star Citizen / (129)
- ARK Survival Ascended / (91)
- Steal a Brainrot / (90)
- Sailor Piece / (68)
- Forza Horizon 6 / (67)
- Diablo IV / (62)
- Blox Fruits / (62)
- Adopt Me / (58)
- Grow a Garden 2 / (57)
- CoD: BLACK OPS 6 / (55)
- Path of Exile 2 / (48)
- Monster Hunter Wilds / (46)
- Windrose / (44)
- Path of Exile / (40)
- Bee Swarm Simulator / (37)