


 0
0ARC Raiders Loadout Guides: From Low Budget Starter Builds to Secret OP Meta
- KITE
- Share
- ARC Raiders
- 01/09/26
- 1386
Raiders, with Season 2 of ARC Raiders in full swing, the Topside is more dangerous—and more competitive—than ever. We get it: running the default free kits is a safe way to learn, but let's be honest, they aren't exactly enjoyable. You are often underpowered, under-equipped, and basically acting as a loot delivery service for other players. On the flip side, relying solely on the predictable Pharaoh meta gets stale fast.

We are spent weeks in the lab and on the field, testing setups to find the sweet spot between insanely cost-effective and secretly overpowered. Whether you are a solo player looking to rebuild your economy or a squad leader coordinating a Matriarch kill, I have a build for you.
- The Economy Kings (Budget & Starter Builds)
- 1. The Silent Looter (Stealth & Profit)
- 2. The Better Than Free Run-and-Gunner
- The Versatile Fighters (PvP & General Use)
- 3. The Master Chief (The All-Rounder)
- 4. The Most Lethal Man Alive (Pure DPS)
- The Specialists (PvE & Niche Strategies)
- 5. The Ark Annihilator (PvE Farming)
- 6. The Ugly Angel Sniper Squad
- 7. The Loot Goblin (Key Room Specialist)
- FAQ
- Final Thoughts
↖ The Economy Kings (Budget & Starter Builds)
If you are broke or just want to farm without stress, these loadouts are for you. The goal here is simple: minimal investment, maximum return.
↖ 1. The Silent Looter (Stealth & Profit)
Cost: Very Low (~6k Credits) | Focus: Stealth/Farming
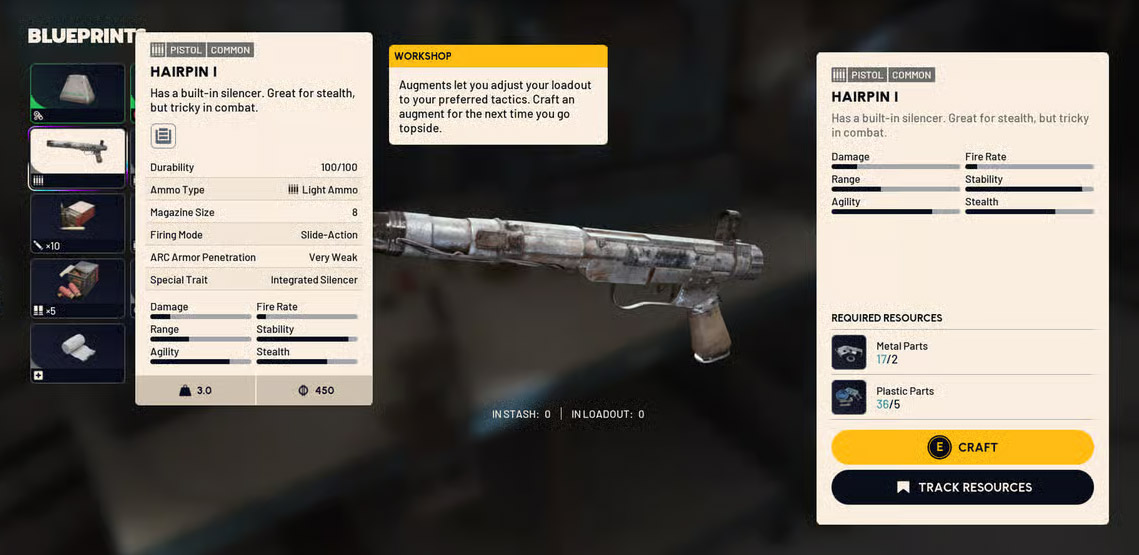
We are starting with a controversial pick. What if I told you that the Hairpin is actually a solid weapon? Unlike the spray-and-pray meta, this gun rewards map knowledge and precision.
- Weapon: Hairpin (Upgrade to Tier 4 recommended - it costs peanuts).
- Augment: Looting Mark 1 (For maximum profit).
- Shield: Light Shield.
Why It Works:
The Hairpin boasts a massive 20 base damage and a 2.5x headshot multiplier. Plus, it has a built-in silencer. This means you can farm cameras, sensors, and drones without alerting the entire lobby.
The Math:
| Target Shield Type | Shots to Kill (Body) | Shots to Kill (Head - Approx) |
|---|---|---|
| Light Shield | 6 Shots | ~3 Shots |
| Medium Shield | 7 Shots | ~3-4 Shots |
| Heavy Shield | 8 Shots | ~4 Shots |
Tactical Advice:
Since the base mag is only 8 rounds, you cannot afford to miss. Play deliberately. Also, bring Trigger Grenades. They are ridiculously cheap to craft (2 crude explosives) and are essential for countering the current grenade spam meta.
↖ 2. The Better Than Free Run-and-Gunner
Cost: Low | Focus: Aggressive CQC
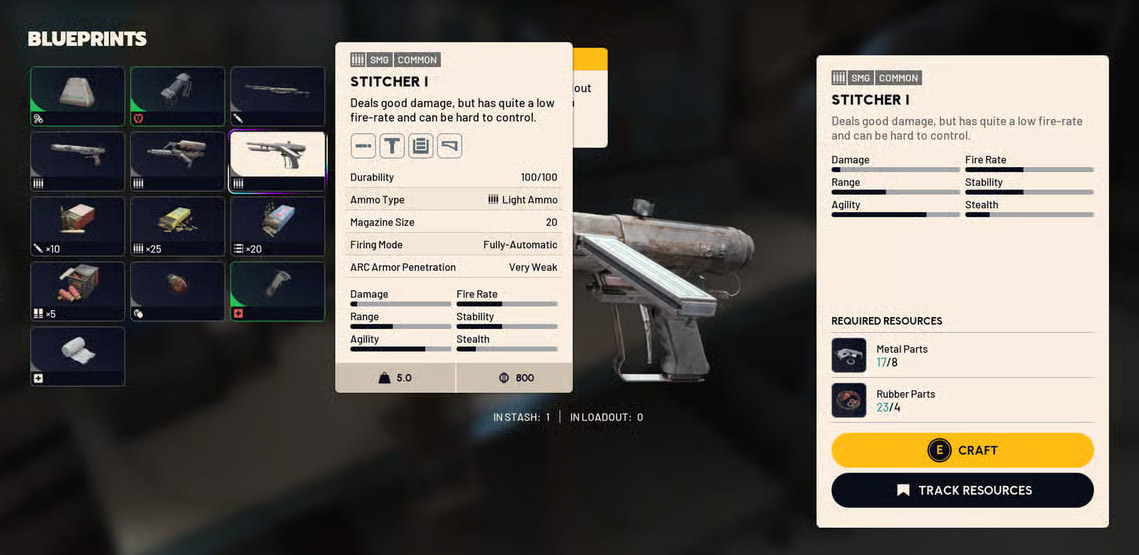
We all love a free loadout, but having no safe pocket is a liability. For a negligible amount of metal and plastic (roughly 6,000 credits), you can craft a kit that performs infinitely better.
- Weapon: Stitcher (Level 2 Upgrade + Gray Compensator + Ext Mag).
- Augment: Tactical Mark 2 (Smoke on shield break) OR Looting Mark 1.
- Explosives: Trailblazers & Showstoppers.
The Strategy:
The Stitcher has a terrifying Time-to-Kill (TTK) of 2 to 3 seconds in close quarters. By upgrading from a free kit to this budget custom kit, you gain an open Safe Pocket. This means you can secure one rare item immediately, paying for the kit instantly.
If you play aggressively, run Tactical Mark 2. When your shield breaks, it drops a smoke grenade, giving you a window to slide out, heal, or reposition—a lifesaver against shotguns.
↖ The Versatile Fighters (PvP & General Use)
Once you have some cash, you want loadouts that can handle anything. These are designed for players who want to dominate mid-range engagements.
↖ 3. The Master Chief (The All-Rounder)
Cost: Medium | Focus: Versatility

I often hear players suggest the Anvil + Toro combo. The problem? Both are slow-firing. If you miss a shot in a panic, you are dead. You need rhythm.
- Primary: Arpeggio (Green Stock + Extended Mag) OR Rattler (Tier 3).
- Secondary: Toro (Shotgun).
- Utility: Medium Shield, Fuse Grenades.
Why It Works:
The Arpeggio's burst fire provides a beautiful rhythm at medium range, covering the Toro's weakness. You poke at range, and if they rush you, you swap to the Toro to buckshot them back to the lobby.
| Weapon Combo | Range Capability | Forgiveness (Missed Shots) |
|---|---|---|
| Anvil + Toro | Long/Close | Low (High Risk) |
| Arpeggio + Toro | Mid/Close | High (Reliable) |
↖ 4. The Most Lethal Man Alive (Pure DPS)
Cost: Medium-High (Ammo Heavy) | Focus: Raw Damage
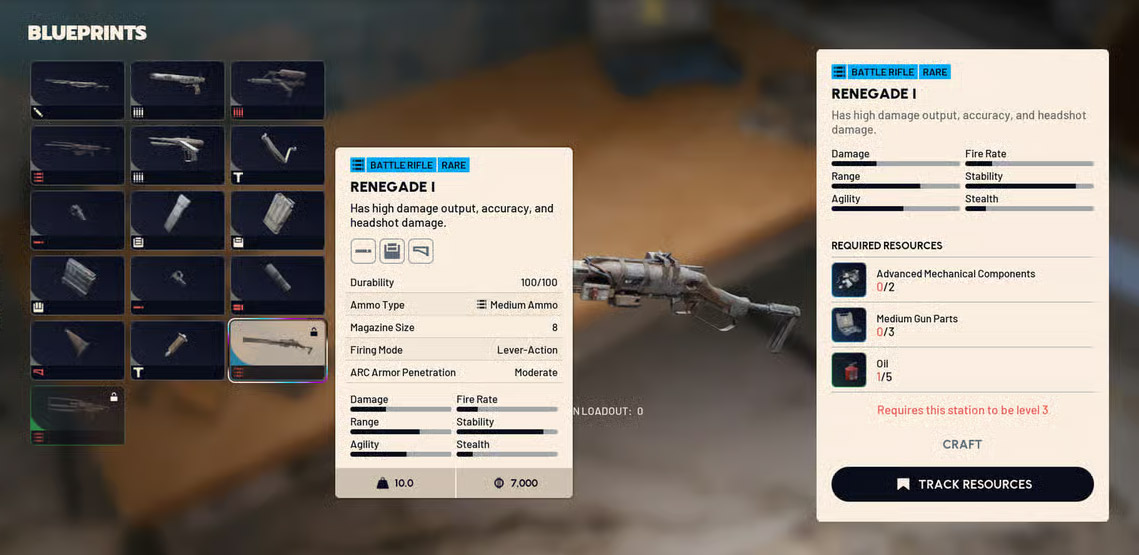
If you wake up choosing violence, this is the build. It consumes a lot of medium ammo, but the synergy is undeniable.
- Primary: Renegade (Blue Rarity).
- Secondary: Torrene (Blue Rarity).
- Augment: Combat Mark III (Aggressive).
The Super Saiyan Upgrade:
If you have the resources, swap the Torrene for a Bobcat with a Padded Stock. It turns the gun into a laser beam up to 30 meters. Combine this with a Kinetic Converter to increase fire rate, and you become a walking tank.
↖ The Specialists (PvE & Niche Strategies)
Sometimes, you have a specific goal: killing a Matriarch or looting a key room. These builds are purpose-built for those moments.
↖ 5. The Ark Annihilator (PvE Farming)
Cost: Variable | Focus: Farming Bastions/Queens
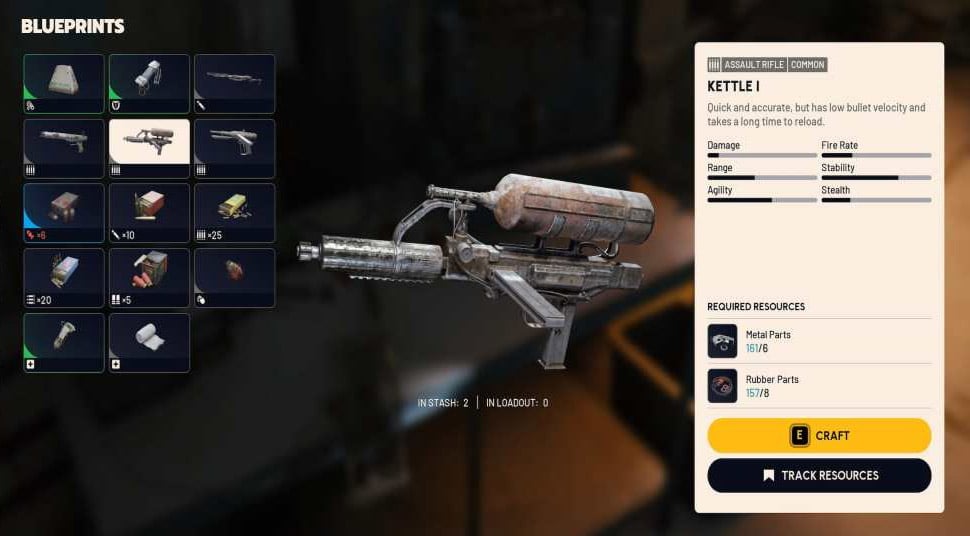
Fighting Ark requires a different mindset: destroy mobs and evade PvP. We have two versions of this:
The Budget Version (The Ark Killer):
Weapon: Kettle (Tier 3). It has a fast reload and high velocity.
Strategy: Use Trailblazer Grenades. The gas stacks! 3 Trailblazers will kill a Bastion; 2 will kill a Bombardier. It is the cheapest way to farm legendary cores.
The Premium Version:
Weapon: Batina (Upgraded capacity) + Silenced Hairpin.
Augment:Survivor (Looting Mark III).
Why Survivor? It gives you three safe pockets. This allows you to bring expensive utility (Wolfpacks, Lures) without fear of losing them.
↖ 6. The Ugly Angel Sniper Squad
Cost: High | Focus: Team Synergy
This isn't just a loadout; it's a strategy.
The Premium Version:
Renegade (Aggressive).
Osprey (Silencer + Lightweight Stock).
The 3-2-1 Technique:
The two Osprey players position on the high ground while the Renegade pushes. The snipers count down "3-2-1" and shoot the same target simultaneously. This instantly drops enemies before they can react. The Lightweight Stock is crucial here for faster Aim Down Sight (ADS) speed to acquire targets quickly.
↖ 7. The Loot Goblin (Key Room Specialist)
Cost: Low Weight | Focus: Traps & Speed
When your goal is hitting key rooms during night raids, you need speed and defense.
Weapon: Single Ventilator (Low weight) OR Silencer Anvil.
The Secret Sauce:Jolt Mine + Blaze Trap Combo.
How to Use It:
Place a Jolt Mine right next to a Blaze Trap (especially on zip lines). The Jolt shocks the enemy in place, forcing them to stand in the fire for 3-4 seconds. It melts their health bar. Alternatively, combine Jolt Mines with Gas Mines. A shocked enemy in a gas cloud has zero stamina to run, making them an easy kill.
↖ FAQ
Q: Why do you recommend upgrading cheap weapons like the Hairpin or Kettle?
A: The upgrade costs are nominal (basic metal/plastic), but the performance boost is massive. For the Kettle, Tier 3 increases bullet velocity by 50%, which is essential for hitting moving targets. For the Hairpin, it ensures consistent shots-to-kill breakpoints.
Q: Isn't running double medium ammo (Renegade + Torrene) bad for the economy?
A: It burns ammo, yes. But if you are running the "Lethal Man" build, you aren't there to loot scraps; you are there to kill players and take their ammo. Just ensure you enter the raid with full stacks.
Q: Can I use the Jolt Mine setup for PvP defense?
A: Absolutely. It is actually more effective in PvP. Players panic when they lose control of their character. Placing this combo behind a closed door or at a zip line exit is almost a guaranteed kill.
↖ Final Thoughts
The best loadout in ARC Raiders isn't just about the highest damage number on a spreadsheet; it is about defining your goal before your boots hit the ground.
If you are broke, don't be ashamed to run the Silent Looter Hairpin build—it prints money. If you are hunting the Matriarch, bring the Trailblazers and the Survivor Augment. And if you are looking to ruin someone's day, that Renegade + Torrene combo is waiting for you.

Most Popular Posts
- ARC Raiders Riven Tides Key Room Guide: Best Hotel Keys, Loot Routes, Secure & Crane Storage
- ARC Raiders Damage Fireflies Trial Guide: Best Farm Method on Buried City Night Raid
- ARC Raiders Riven Tides Update: New Map & Items, ARC Turbine, Rewards, and Best Early Strategy
- ARC Raiders Bettina Guide: Best Build, Buffs, and How to Use It Against ARC
- ARC Raiders Solo Search Supply Drops Guide: Best Buried City Route, Beacon Locations
- Arc Raiders Season 4 Riven Tides Update, Rewards, Safe Skins, and Release Timeline
Popular Category Lists
- Grow a Garden / (286)
- ARC Raiders / (266)
- CoD: Black Ops 7 / (166)
- Monopoly Go / (146)
- MLB 26 / (145)
- Star Citizen / (116)
- Steal a Brainrot / (89)
- ARK Survival Ascended / (74)
- Sailor Piece / (68)
- Forza Horizon 6 / (63)
- Diablo IV / (61)
- Blox Fruits / (60)
- CoD: BLACK OPS 6 / (55)
- Adopt Me / (53)
- Path of Exile 2 / (48)
- Monster Hunter Wilds / (46)
- Windrose / (44)
- Grow a Garden 2 / (42)
- Path of Exile / (40)
- Bee Swarm Simulator / (36)


