


 0
0MH Wilds: The Ultimate Items Loadout Guide
- Samuel
- Share
- Monster Hunter Wilds
- 04/16/25
- 2884
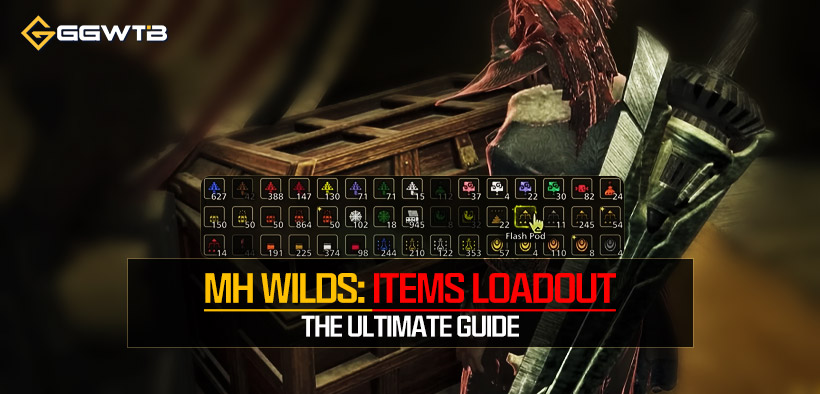
Managing loadouts and items is a deep area of strategy for every game, including Monster Hunter: Wilds. This guide will prevent overlap of buffs through an understanding of item management, providing efficient organizing strategies. Learn how to optimize healing items, conceal important items during battles, and craft while in combat.
- Hiding Essential Items
- Essential Healing Items
- Healing Items
- Sort Your Loadout
- Monster Control Items
- Farcaster
- Buffs Equivalent to Set Bonuses
- Situational Items
- Early Game Loadout
- Buff Loadout
- Item Shortcuts
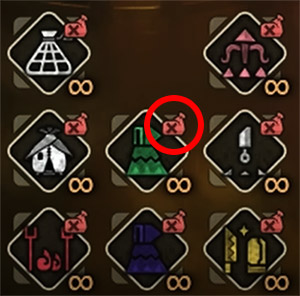
↖ Hiding Essential Items
Start optimizing your loadout by creating an empty loadout. This will enable you to recognize the items you cannot remove from the inventory. You can mark those items with an "X" so that essential items do not occupy slots on the item bar which ensures they do not clutter your pouch. These items, though stagnant in your pouch, will not clutter your item bar.
Put the items you use frequently at the top left or bottom right of the inventory. For users who prefer shortcuts, this strategic arrangement allows easy access without further shortcuts.
↖ Essential Healing Items
An efficient loadout must include core healing items regardless of your style of play. Options to heal are critical and the game provides four main types Potions, Mega Potions, Max Potions, and Ancient Potions.
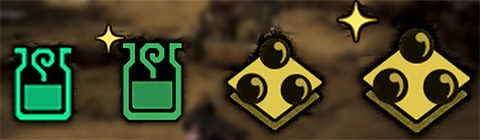
In dire situations, Mega Potions can heal combat wounds, but can take quite some time to consume.Max and Ancient Potions, on the other hand, have a limited stock and provide rapid healing. Using mid-fight crafting strategies, you can increase your supply of Max Potions to 12 and Altered Potions to 11 by using Mandagoras and catalysts.
↖ Healing Items
An efficient loadout must include essential healing items, regardless of your play style. Healing options are critical, and the game offers four main types: Potions, Mega Potions, Max Potions, and Ancient Potions.
Healing Options:
| Potion Type | Effect | Quantity Limit |
|---|---|---|
| Mega Potions | Significant healing but slow to consume | 10 |
| Max Potions | Restores health to maximum quickly | 2 |
| Ancient Potions | Restores health and stamina to maximum; hard to farm | 1 |
While Mega Potions provide substantial healing, their consumption time is lengthy. Max and Ancient Potions offer rapid healing but are limited in quantity. However, through mid-fight crafting techniques, you can increase your supply of Max Potions to 12 and Ancient Potions to 11 by utilizing catalysts and Mandagoras.
↖ Sort Your Loadout
Streamlined, efficient organization of your loadout can enhance gameplay for optimal execution and item accessibility.
- Use Shortcuts: Organizing via the rearrange shortcut such as the G key can help.
- Group Related Items: Props and parts recipes should be sectioned off into the same column for easy access.
- Example: Arrange Catalysts and Mandagoras adjacent to Max Potions for easier crafting.
↖ Monster Control Items
When it comes to controlling monsters, having the right items in your inventory is crucial. These tools allow you to manipulate and damage monsters effectively.
| Category | Details |
|---|---|
| Traps |
|
| Tran Bombs and Tran Knives |
|
| Flashpods |
|
| Barrel Bombs |
|
| Pods |
|
↖ Farcaster
The Farcaster is an essential piece of equipment for every hunter. It provides a crucial escape option during combat, allowing for swift retreat to camp, and can be further augmented with a Farcaster.
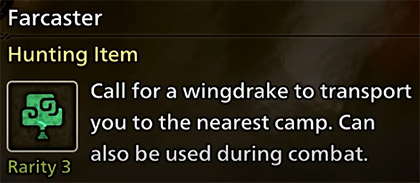
When compared to standard map fast travel, the advantage the Farcaster has is that it can be used even when downed, and the user is subsequently able to avoid damage. It is a must-have for every hunter due to the unrecoverable circumstances a hunter might find themselves in.
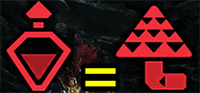
↖ Buffs Equivalent to Set Bonuses
As you progress in Monster Hunter Wilds, you'll notice the importance of item buffs in enhancing your attack and defense capabilities. Several items in the game can provide these buffs, matching the effects of complete armor set bonuses.
Essential Buffing Items:
| Category | Details |
|---|---|
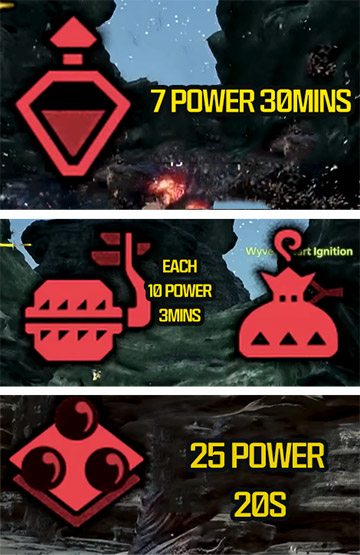
| Power Charm & Armor Charm |
|
| Demon Rock (Skill: Mushroommancer) |
|
| Might Seed & Demon Powder |
|
| Might Pill |
|
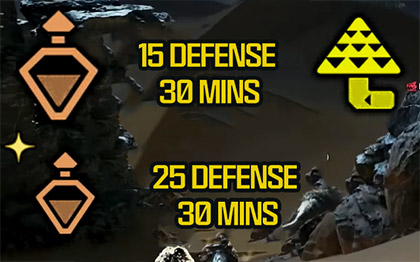
Defensive Buffing Items:
| Category | Details |
|---|---|
| Armor Skin & Partial Room |
|
| Adamant Seed & Hard Shell Powder |
|
Special Buffs:
- Skill: Mushroommancer
- Toadstool Mushroom: Enhances natural health recovery, similar to Immunizer.
- Devil's Blight Mushroom: Reduces stamina consumption, akin to Dash Juice.

↖ Situational Items
Situational items are those that are not necessary for every battle but can be crucial in specific scenarios. Players should select two to three of these items based on the monster and weapon choice, but they remain highly situational.
| Item | Effect |
|---|---|
| Nullberry | Removes light sources from your character. |
| Antidote & Herbal Medicine | Cure poison effects. |
| Energy Drink | Helps counteract sleep. |
| Cleanser | Removes webbing or frost. |
| Cool Drink & Hot Drink | Counteract harsh environmental effects. |
| Jerky | Stops bleeding. |
| Dash Shoes | Reduce stamina consumption; requires Dash Extract. |
| Purple Powder | Cures teammates' poison (less useful as players should carry their own). |
| Chart Lizard | Acts like an ancient potion and cures poison. |
| Smoke Bomb | Allows for sneak attacks by losing the monster. |
| Poison Bomb | Poisons the monster. |
| Small Barrel Bomb | Useful for certain weapons like the long sword. |
| Screamer Pot | Limited use against specific monsters. |
| Vfish Fin & Vetfish Fin Plus | Reduce sharpening animation time. |
| Sushi Fish & Great Sushi Fish | Heal bleeding and restore HP. |
↖ Early Game Loadout
For players at the beginning of their journey, a well-rounded loadout is essential. By saving this loadout, players can quickly access these items via the manage loadout feature.
| Item | Description |
|---|---|
| Mega Potions | Primary healing item, craftable up to 10 additional units. |
| Nberry & Antidote | Address low-rank monster blights. |
| Life Powder | For team support. |
| Farcaster & Large Barrel Bombs | Essential for strategic retreats and damage. |
| Traps (Pitfall) | Two traps plus two craftable options for controlling monster movements. |
| Dung Pods & Flash Pods | Manage monster aggression and provide tactical advantages. |
| Tran Bombs or Tran Blades | For capturing monsters effectively. |
↖ Buff Loadout
Players can combine their primary armor set with these items for optimal performance. Additionally, depending on the ammo type used, ensure crafting materials are included in the loadout. The ammo pouch differs from the item pouch; thus, organize and restock accordingly.
- Charms: For testing various effects.
- Power Shroom, Element Peel, Hard Shell Powder: Enhance defense.
- Mega Demon Rock, Might Seed, Demon Powder: Boost attack capabilities.
- Devil's Blight: Offers special buffs.
↖ Item Shortcuts
Players can modify how they access their inventory with these shortcuts via the item radial menu. For controller configurations as well as keyboard, each default 8 assigned sets can be further customized using the radial menu.
Loadout Configuration
- 1st Loadout: Traps, transblades, lowering pods, mega bombs, and farcaster for monster engagements.
- 2nd Loadout: The Main mantle config ENABLES A MANTLE TO BE EQUIPEED QUICKLY without needing to change the current weapon state. This allows a toggle for item bar navigation.
- 3rdLoadout: Healing items and other consumables such as flash pots, weather stones, and rations.
- 4th Loadout: Players can AQUIRED TWO POTS consumer AND construct five MORE pots mid fightwhen crafted with shortcuts.
- 5th Loadout: Crafting catalysts during the fight to create more catalysts for crafting max pots. This also includes Flashbots crafting to enable bulk crafting without needing to re-equip.
Note:
Special Shortcuts: Special strategies, such as maximum health restoration and status recovery, can be found on the sixth page of shortcuts. Players are, however, cautioned against using these due to potential unintended consumable use that could threaten player safety.
We would like to note that we tried our best to create a guide that will help you better manage your item loadout in MH Wilds. We look forward to our more detailed guides including the weapons build and other gameplay strategies.
Most Popular Posts
- MH Wilds Artian Weapons Guide: Materials, Craft and Upgrades
- Monster Hunter Wilds Bow Builds: Mastering the Dragon Piercer Build Guides
- MH Wilds: All Weapons Tier List & Ranking | Speedrun Clear Time
- MH Wilds New Endgame Builds: Zoh Shia Armor Set
- How to Obtain Rare Monster Hunter Wilds Commission Tickets?
- Monster Hunter Wilds Best Endgame Angelbein Bow Build Guides
Popular Category Lists
- Grow a Garden / (286)
- ARC Raiders / (262)
- CoD: Black Ops 7 / (166)
- Monopoly Go / (146)
- MLB 26 / (144)
- Star Citizen / (111)
- Steal a Brainrot / (89)
- Sailor Piece / (68)
- ARK Survival Ascended / (66)
- Diablo IV / (61)
- Forza Horizon 6 / (60)
- Blox Fruits / (60)
- CoD: BLACK OPS 6 / (55)
- Adopt Me / (53)
- Path of Exile 2 / (48)
- Monster Hunter Wilds / (46)
- Windrose / (44)
- Path of Exile / (40)
- Grow a Garden 2 / (38)
- Bee Swarm Simulator / (36)


