


 0
0Monster Hunter Wilds Sword and Shield Damage Ultimate Build Guide
- Layla
- Share
- Monster Hunter Wilds
- 03/15/25
- 1699
In Monster Hunter Wilds, the Sword and Shield is undoubtedly one of the most adaptable and powerful weapons in the game. It has a blend of high speed, mobility, and defense, all while providing offensive options. This guide will take you step-by-step through the procedure of optimizing the Sword and Shield to do the most damage, outlining weapon choice, armor selection, decorations, and combat tactics. You will be able to improve your hunting strategy regardless of whether you are an expert or a beginner.
- Weapon Choice: Arian Sword and Shields
- Gore Magala Arc Falcon Skin Set
- Talisman and Sample Decorations
- Performance Tips
- Build Skills
- Final Thoughts
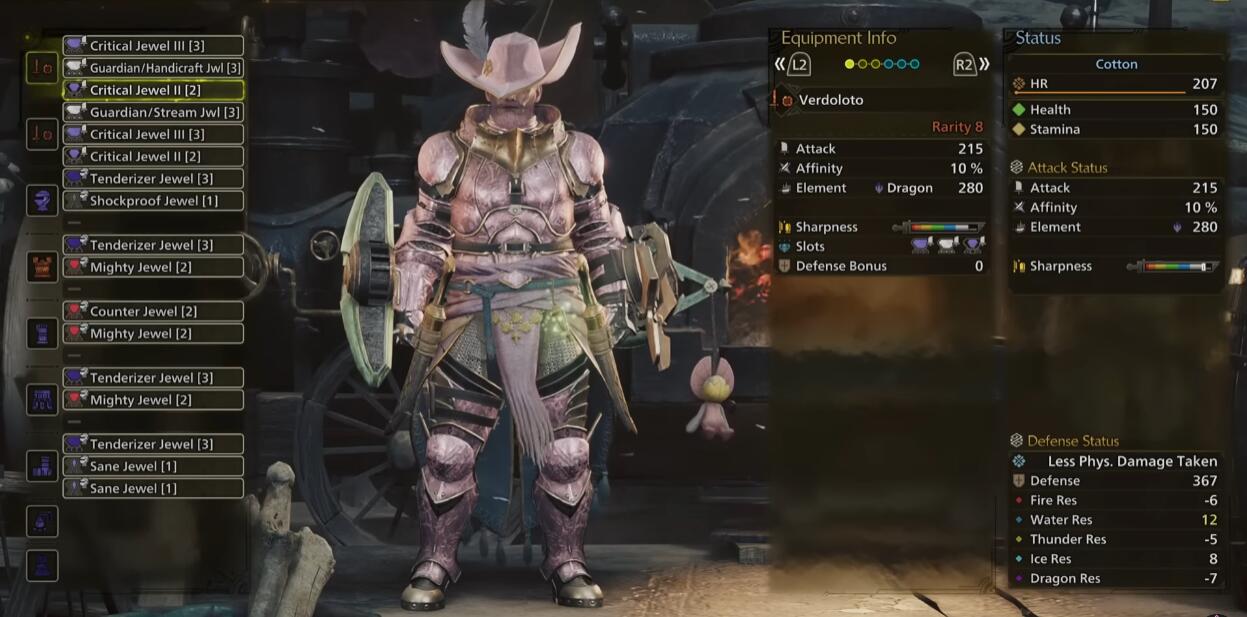
↖ Weapon Choice: Arian Sword and Shields
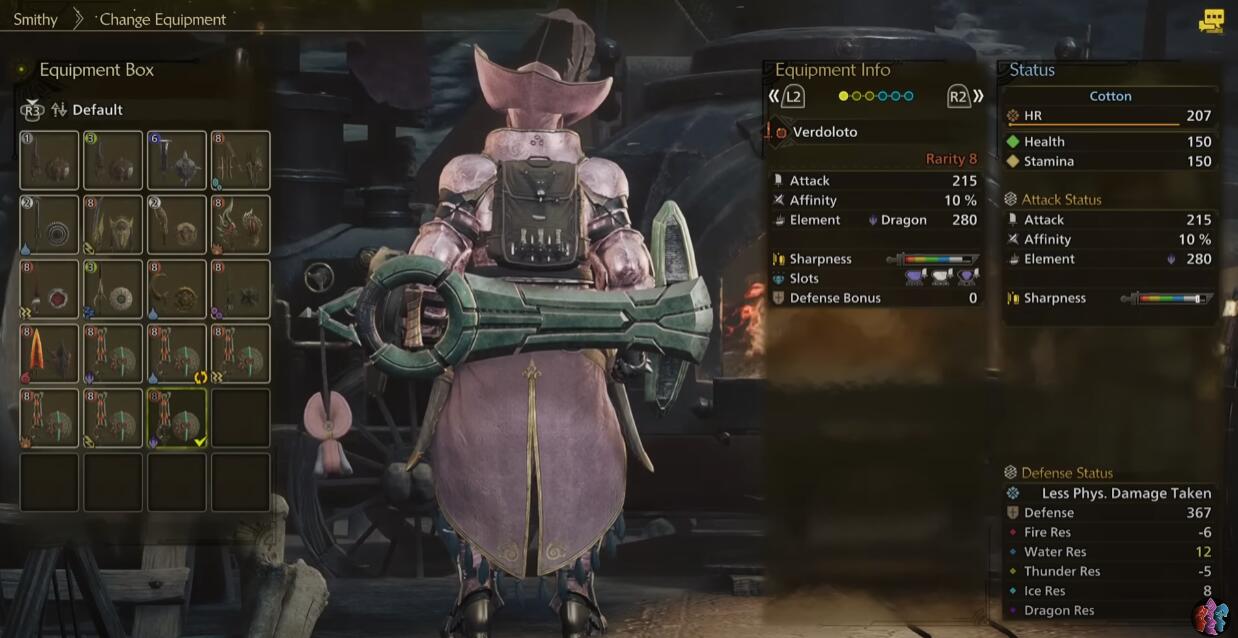
The Arian sword and shield set is the weapon of choice for this build. These weapons most Arian blades and shields options since they provide both elemental diversity and raw damage.
This is what makes them one of the best alternatives:
Raw Attack Power: Arian weapons boast higher base attack than crafted counterparts which is a plus for damage focused builds.
Elemental Versatility: Arian weaponry may be forged for all elemental types while maintaining a high value of attack, making harvesting the elemental weaknesses of monsters very effective.
Customization: Equip your Arian weapon with three attack parts for maximum damage. This makes sure that your weapon's raw attack scales consistently, since attack values unlike affinity percentage are capped.
For reinforcement rolls, your primary focus can be on three attack boost rolls. The ideal configuration attempts to have four attack boosts with one sharpness boost to extend white-sharpness by 30 hits. While it is best to have Arian weapons fully upgraded, crafted monster weapons can thoughtfully act as a stop gap, ranging in damage by 5-10%.
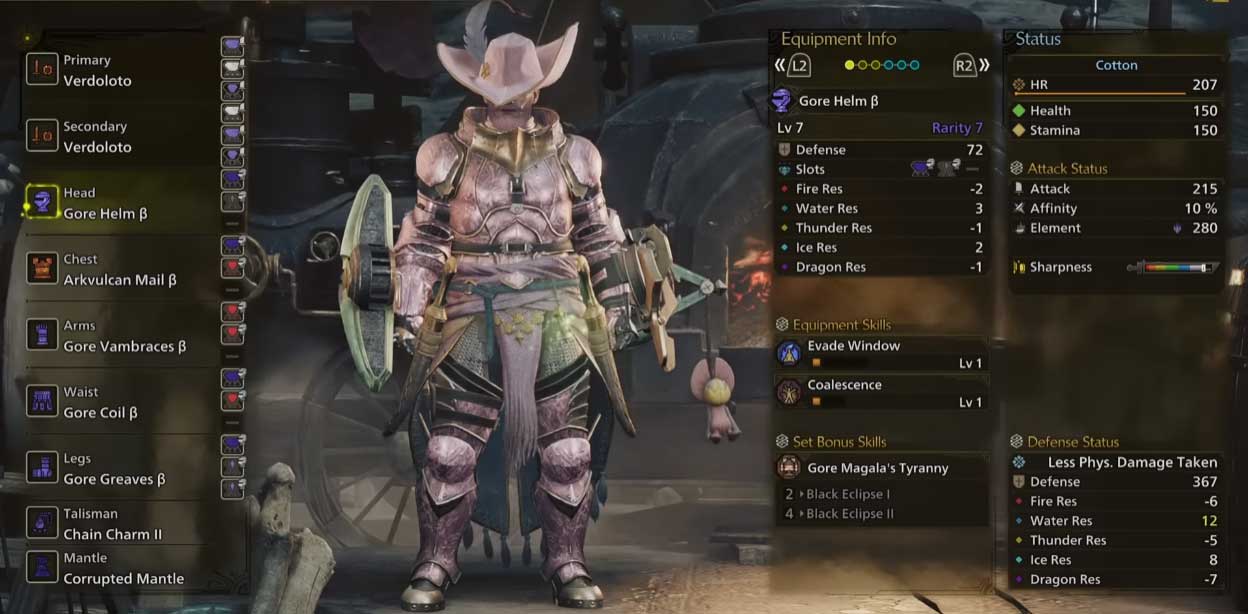
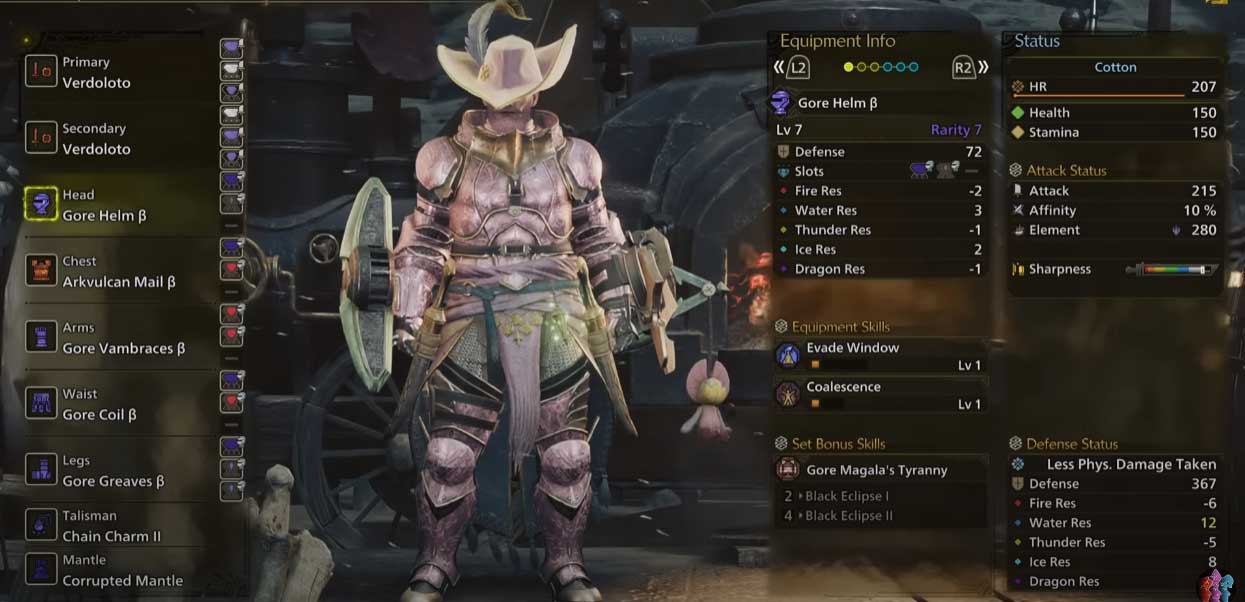
↖ Gore Magala Arc Falcon Skin Set
The set of armor that goes with the Gore Magala and Arc Falcon Combination is most effective as it includes Gore Magala Beta armor (glaive helmet, gloves, waist and legs) and Arc Falcon Beta chestpiece. These combined give powerful synergies of skills increasing both raw attack and affinity.
Key Features of the Armor Set:
Fouret Bonus (Gore Magala):
Unlocks Frenzy when large monster is attacked.
Cleansing Frenzy offers +15 raw attack and 10% affinity for 90 seconds.
Fighter switches from Frenzy to Cleansing for consistent hunt buffs.
Arc Falcon Beta Chest:
Explicitly allocated for Weakness Exploit along with plenty of decoration slots to gain maximal affinity for weak point attacks.
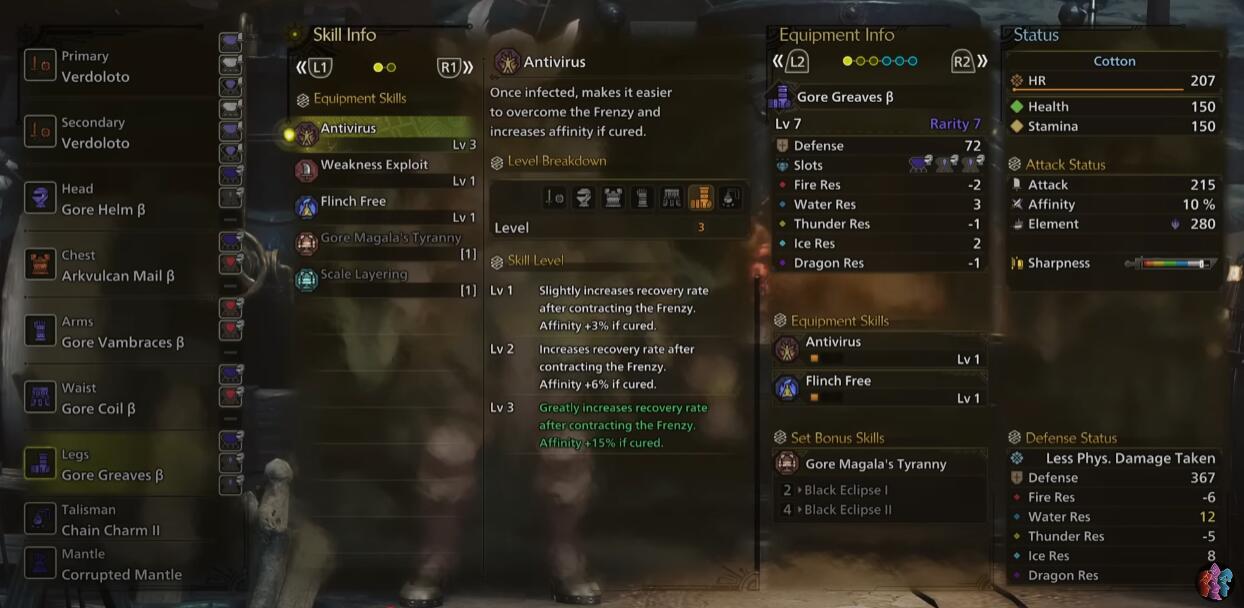
Antivirus Skill:
Advanced via decoratives to offer an extra 10% affinity while Frenzy is Cleansed.
Skill Breakdown:
This armor setup supports the following critical skills:
| Skill | Level | Description |
|---|---|---|
| Weakness Exploit | 5 | Grants greater affinity for attacking weak points on the target. |
| Critical Boost | 5 | Increases damage dealt on critical hits. |
| Offensive Guard | 3 | After a precise block, offensive guard will add a 15% attack boost for the next 12 seconds. |
| Maximum Might | 3 | A maximum of 30% affinity is yielded if the stamina is full or nearly full. |
| Burst | 2 | Grants a raw attack buff after hitting consecutively more than once. |
↖ Talisman and Sample Decorations
The Talisman is one of the more defining aspects in building the set. In this case, the burst charm will be suggested; however, a weakness exploit charm can be applied depending on the available decorations.
Decorative Expectations:
| Skill | Level | Description |
|---|---|---|
| Critical Boost | 3 | One of the requirements comes with maxed out critical hit damage. |
| Offensive Guard | 3 | Gained attack from off block hurts their blast. |
| Weakness Exploit | 4 | Adaptive versatile skill for a completed target busting weak spot. |
| Maximum Might | 3 | Deals consistent high affinity damage as long as the player manages with proper stamina. |
| Antivirus | 2 | Completes the set bonus for the Gorm Magala armor pieces. |
The optional decorations are:
Sharpness Management: Equip Razor Sharp or Master's Touch if your weapon does not have any sharpness rolls.
Guard or Guard Up: For those still learning how to perfect guard, these skills add some extra defensive utility.
Counter Strike (1): Useful for average players, grants a temporary attack boost upon being knocked back.
↖ Performance Tips
To improve the performance of this build, you will need to learn certain gameplay mechanics specific to Sword and Shield.
1. Offensive Guard Activation Requires Perfect Guard
To execute offensive guard multi times throughout a match, you will need to perform a perfect guard which is one of the most important steps for the perfect execution chain of moves. You can perform a perfect guard by executing a block just before an attacked hits or by using Guard Slash (Right Trigger + Circle). You can also deal some good damage back with counter-attacks.
2. Corrupted Mantle Exploitation
Standard attacks hit 2 more times with the bent guard, dealing significantly more hits. While active, generally best combo for you is Triangle -> Triangle -> Triangle -> Circle and so on. With the additional hit the mantle deals during the combo, players can benefit from extra damage ticks that the mantle adds.
3. Optimal Stamina Usage
To sustain Maximum Might uptime, reduce stamina expenditures:
Reposition with the Sliding Swipe instead of rolling and sprinting.
Center on staving off guards without perfecting them to avoid stamina drain.
↖ Build Skills
Here is the full skill list for this particular build:
| Skill | Level | Description |
|---|---|---|
| Critical Boost | 5 | Increases damage dealt on critical hits. |
| Weakness Exploit | 5 | Grants greater affinity for attacking weak points on the target. |
| Offensive Guard | 3 | After a precise block, offensive guard will add a 15% attack boost for the next 12 seconds. |
| Maximum Might | 3 | Deals consistent high affinity damage as long as the player manages with proper stamina. |
| Antivirus | 3 | Completes the set bonus for the Gorm Magala armor pieces. |
| Burst | 2 | Grants a raw attack buff after hitting consecutively more than once. |
| Constitution | 3 | Reduces stamina depletion when performing certain actions like dodging or blocking. |
| Evade Window | 2 | Increases the invulnerability window when dodging. |
| Counter Strike | 1 | Boosts attack power temporarily after being knocked back or downed. |
| Coalescence | 1 | Increases attack, element, and status effect buildup after recovering from a blight. |
| Flinch Free | 1 | Prevents minor reactions to attacks from allies. |
| Shock Absorber | 1 | Reduces knockback and reactions to small monster attacks or environmental hazards. |
These skills further augment the raw attack and affinity as well as provide some level of utility and defense to complement a range of playstyles.
↖ Final Thoughts
The efficiency of this Monster Hunter Wilds Sword and Shield build is remarkable. With these tips, you can adapt to multiple encounters while maximizing damage. Prioritizing attack numbers, elevation to affinity, attack consistency, and skill rotations ensures hunter performance spikes for both solo and team missions. After adopting these strategies, every hunt can become a display of tactical beauty if coupled with practice mastering the Perfect Guard mechanics.
Most Popular Posts
- MH Wilds Artian Weapons Guide: Materials, Craft and Upgrades
- Monster Hunter Wilds Bow Builds: Mastering the Dragon Piercer Build Guides
- MH Wilds: All Weapons Tier List & Ranking | Speedrun Clear Time
- MH Wilds New Endgame Builds: Zoh Shia Armor Set
- How to Obtain Rare Monster Hunter Wilds Commission Tickets?
- Monster Hunter Wilds Best Endgame Angelbein Bow Build Guides
Popular Category Lists
- Grow a Garden / (283)
- ARC Raiders / (252)
- CoD: Black Ops 7 / (164)
- Monopoly Go / (145)
- MLB 26 / (134)
- Star Citizen / (101)
- Steal a Brainrot / (88)
- Sailor Piece / (67)
- CoD: BLACK OPS 6 / (55)
- Forza Horizon 6 / (55)
- Blox Fruits / (55)
- ARK Survival Ascended / (51)
- Path of Exile 2 / (48)
- Adopt Me / (48)
- Diablo IV / (47)
- Monster Hunter Wilds / (46)
- Windrose / (43)
- Path of Exile / (40)
- Battlefield 6 / (34)
- Bee Swarm Simulator / (33)


