


 0
0Windrose Stronghold Build Guide: Best Organized Base Layout for Crafting, Farming, and Dock Access
Good Windrose base should do more than look impressive from the outside. It should help us craft faster, store smarter, move around easily, and avoid the classic survival-game problem of where did I put that one material?
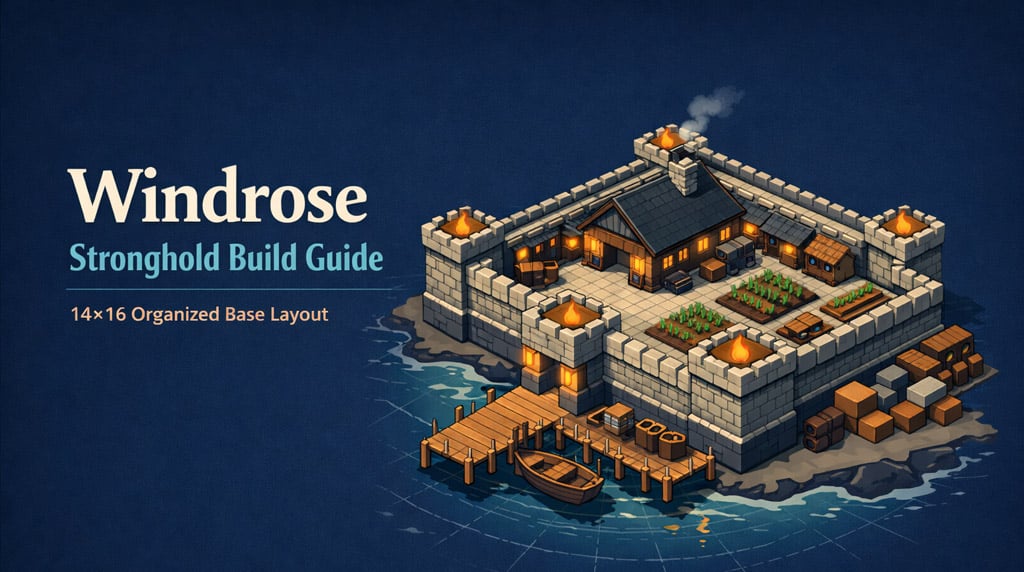
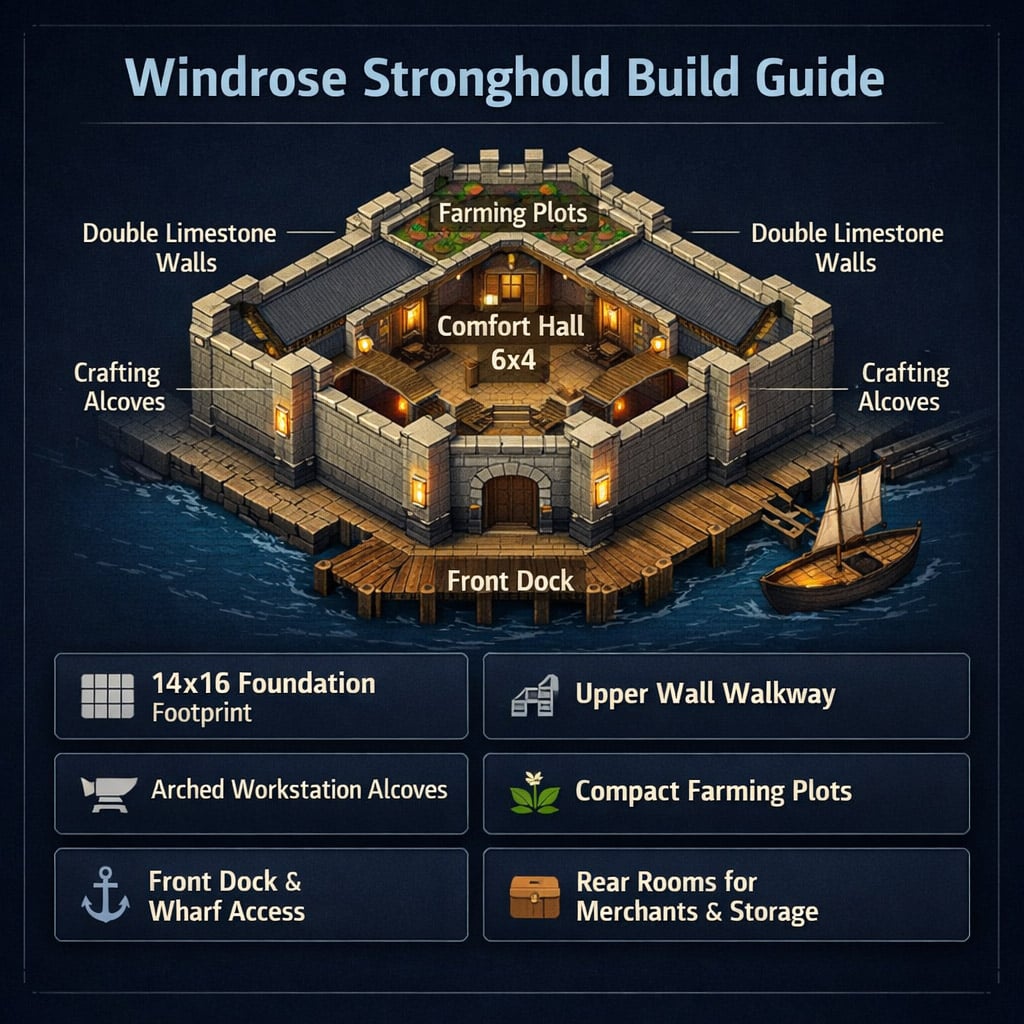
This stronghold layout is built around a 14×16 footprint, with double-thick limestone walls, arched workstation bays, two rear utility rooms, a compact farming area, and a raised central hall for comfort items. After testing this kind of layout in survival crafting games, the biggest advantage is simple: everything has a clear place, but the base still feels like a real fort rather than a spreadsheet made of stone.
- Build Overview
- Materials and Build Pieces
- Step 1: Lay the 14×16 Foundation
- Foundation Check
- Step 2: Build the Double-Thick Walls
- Step 3: Add the Upper Walkway
- Step 4: Create Workstation Alcoves
- Step 5: Add Rear Rooms and Side Doors
- Step 6: Build the Front Gate and Dock Area
- Front Gate Fixes
- Step 7: Build the Central Comfort Hall
- Step 8: Add Farming and Interior Details
- Recommended Storage Layout
- Common Mistakes to Avoid
- FAQ
- What is the best stronghold size in Windrose?
- Why use double-thick walls?
- Can this build work with cheaper materials?
- Where should the workstations go?
- How do I fix a front door that will not snap?
- Is the central hall required?
- How much farming space should I add?
- Final Thoughts
↖ Build Overview
This design works best as a mid-game or late-game stronghold. You can start it earlier with cheaper materials, then upgrade the walls, pillars, and roof once you have more resources.
| Section | Recommended Size / Setup | Main Purpose |
|---|---|---|
| Main foundation | 14×16 | Full stronghold footprint |
| Outer walls | Double-thick, 2 walls high | Defense, structure, walkway space |
| Central hall | 6×4 | Comfort items, fireplace, rare storage |
| Farming area | 4 small plots | Food production inside the walls |
| Wall alcoves | Built into inner wall | Workstations, storage, decoration |
| Front platform | Around 3 blocks deep | Wharf, fast travel, pier access |
| Rear rooms | Back-left and back-right | Friends, merchants, private storage |
The key idea is to make the perimeter walls functional. Instead of placing all workstations randomly in the courtyard, we build small arched pockets into the walls. This keeps the center clean and makes the base easier to use every day.
↖ Materials and Build Pieces
You do not need to copy every material exactly, but the following pieces give the stronghold its clean fortress look.
| Build Part | Suggested Piece | Notes |
|---|---|---|
| Foundation | Stone foundation | Strong visual base |
| Main walls | Large limestone walls | Best for the outer fort shape |
| Detail walls | Small limestone walls | Useful around doors and arches |
| Walkway | Large floor planks | Bridges the double-wall gap |
| Railings | Rope fences / rope railings | Prevents annoying falls |
| Arches | Semi-arch stone | Perfect for workstation bays |
| Pillars | Rectangular stone pillars | Adds depth and support |
| Central building | Plaster walls | Good contrast against limestone |
| Roof | Large roof tiles | Simple, clean central hall roof |
| Dock | Wharf and standard pier | Connects base to travel and ship access |
If you are short on stone, build the layout first and decorate later. In practice, the pillars and extra trim can wait. The foundation, walls, entrance, and central hall matter more.
↖ Step 1: Lay the 14×16 Foundation
Start at the front center with a small 2×2 foundation marker. This makes it easier to keep the entrance aligned.
From there:
1. Build the foundation 14 blocks wide.
2. Extend it 16 blocks deep.
3. Fill in the full rectangle.
4. Add a small rounded detail at the front corners by placing about five foundation pieces around each corner, starting one block back from the edge.
This small corner shaping helps the fort feel less boxy. It is not required, but it makes the final structure look much better.
↖ Foundation Check
| Direction | Count |
|---|---|
| Width | 14 foundations |
| Depth | 16 foundations |
| Main shape | Filled rectangle |
| Front corners | Slight rounded/radius detail |
If the foundation count is wrong, fix it now. Once the walls go up, small mistakes become much more annoying.
↖ Step 2: Build the Double-Thick Walls
Use large limestone walls for the main perimeter.
Build the outer wall first, then add a second inner wall layer. Both should be about two wall pieces high.
Leave space at the front for the main entrance. The doorway does not need to be perfect yet; we will clean it up later with arches and a double door.
| Wall Layer | Height | Purpose |
|---|---|---|
| Outer wall | 2 high | Fortress shell |
| Inner wall | 2 high | Supports alcoves and walkway |
| Gap between walls | 1 block area | Used for top walkway |
The reason we use double-thick walls is that they give us room to build a proper upper path. They also make the base feel heavier and more secure, which fits the stronghold style.
↖ Step 3: Add the Upper Walkway
Place stairs near the front entrance so we can reach the top of the wall easily. Then use large floor planks to bridge the space between the two wall layers.
Run the walkway around the full perimeter.
After that, add safety barriers:
| Area | Recommended Barrier |
|---|---|
| Outer edge | Small limestone walls |
| Inner edge | Rope fences |
| Stair sides | Rope railings |
This is one of those small quality-of-life details that matters more than expected. Without railings, we will keep slipping off while decorating or moving around the base.
↖ Step 4: Create Workstation Alcoves
Now we turn the inner wall into usable space.
Remove sections of the inner wall and replace them with arched openings. A simple pattern works well:
- Leave one wall section.
- Create one arch.
- Leave one wall section.
- Create a door or another arch.
- Repeat along the side walls.
Each arch can hold a workstation, storage chest, or decorative display.
| Alcove Location | Best Use |
|---|---|
| Left wall | Crafting stations |
| Right wall | Repair, refining, storage |
| Back wall | Advanced stations or trophies |
| Near entrance | Frequently used tools |
| Rear corners | Merchant rooms or private rooms |
For each alcove, use small limestone walls above the gap and a semi-arch stone inside the opening. Add small pillars underneath or beside the arch if you want a more finished look.
From experience, this layout saves a lot of walking. When workstations are built into the walls, the courtyard stays open and the base feels much easier to manage.
↖ Step 5: Add Rear Rooms and Side Doors
The back-left and back-right corners are great places for small rooms. They can be used for merchants, friends, extra storage, or themed decoration.
Keep these rooms simple:
| Room Feature | Recommended Setup |
|---|---|
| Doorway | Stone frame or open arch |
| Lighting | Wall torches |
| Interior use | Bed, merchant spot, storage, decor |
| Exterior style | Match limestone wall design |
For the side doors, add small stairs outside so the entrance connects smoothly with the ground. If the doorway does not line up perfectly, use small limestone pieces and frames to hide the awkward edges.
This gives the stronghold better flow. We do not want every trip in and out of the base to go through the main gate.
↖ Step 6: Build the Front Gate and Dock Area
The front gate is the visual anchor of the stronghold, so take a little extra time here.
Build an arch over the main entrance, then place a large double door. If the door does not snap correctly, turn snapping off and center it manually with the foundation line.
↖ Front Gate Fixes
| Problem | Quick Fix |
|---|---|
| Door will not snap | Turn snapping off |
| Door looks off-center | Align it with the foundation center |
| Door clips into wall | Pull it back slightly |
| Entrance looks flat | Add pillars and torches |
Once the gate is done, extend a platform out from the front by about three blocks. This area is perfect for your wharf, fast travel point, and pier.
| Front Area | Suggested Placement |
|---|---|
| Wharf | One side of the platform |
| Fast travel point | Near the wharf |
| Pier | Extending toward ship access |
| Fences | Along side edges only |
| Front path | Keep open |
Keeping the front open makes the base easier to use, especially when moving between your ship, fast travel point, and storage.
↖ Step 7: Build the Central Comfort Hall
The central building should be raised slightly above the courtyard. A 6×4 foundation works well because it is large enough for comfort items but not so large that it blocks movement.
Place it near the middle of the stronghold, then add stairs at the front.
| Central Hall Part | Recommended Setup |
|---|---|
| Size | 6×4 |
| Walls | Plaster walls |
| Door | Large double door |
| Windows | Narrow or double sash windows |
| Roof | Large roof tiles |
| Interior focus | Comfort, fireplace, rare storage |
Use plaster walls here because they contrast nicely with the limestone outer fort. That contrast helps the central hall stand out as the home part of the stronghold.
For the roof, use large roof tiles and finish the ends with triangular wall pieces or pediments. If the roof pieces overlap a little, that is fine as long as the outside looks clean.
↖ Step 8: Add Farming and Interior Details
In front of the central hall, leave space for a small farming area. A practical setup is two farm plots on the left and two on the right.
Add rope fences around the plots, but leave one side open for access.
| Courtyard Feature | Setup |
|---|---|
| Farm plots | 4 total |
| Fence type | Rope fence |
| Access | Leave one side open |
| Nearby storage | Food and seed storage close by |
Inside the central hall, build a small fireplace recess on the back wall. Use pillars or beams to frame it, then place your fireplace foundation in the center.
This makes the hall feel intentional rather than empty. It also gives you a natural place to group comfort items.
↖ Recommended Storage Layout
A strong base becomes frustrating if storage is random. Here is a simple organization system that works well.
| Storage Type | Best Location |
|---|---|
| Stone and building materials | Near wall alcoves |
| Wood and planks | Near crafting stations |
| Food and seeds | Near farming area |
| Rare items | Inside central hall |
| Ship supplies | Near dock entrance |
| Merchant goods | Rear room or side alcove |
The main rule is simple: store items near the place where you use them. If you craft with it often, keep it close to the crafting alcoves. If it belongs to travel, keep it near the dock.
↖ Common Mistakes to Avoid
| Mistake | Why It Hurts the Build | Better Choice |
|---|---|---|
| Making the base too large | More walking, more empty space | Keep the 14×16 footprint |
| Skipping the inner wall | No room for alcoves or walkway | Build double-thick walls |
| Placing workstations randomly | Courtyard becomes messy | Use wall alcoves |
| Forgetting railings | Easy to fall from walkway | Add rope fences early |
| Overdecorating the center | Movement becomes cramped | Keep central paths open |
| Ignoring lighting | Alcoves and doors look flat | Add wall torches consistently |
The biggest mistake is building for looks only. A stronghold should feel good to use after several hours, not just look good for a screenshot.
↖ FAQ
↖ What is the best stronghold size in Windrose?
A 14×16 foundation is a strong size for this design. It gives enough space for walls, crafting alcoves, farming, a central hall, and dock access without making the base feel too spread out.
↖ Why use double-thick walls?
Double-thick walls allow us to build an upper walkway and carve alcoves into the inner side. This makes the walls useful for crafting, storage, and movement instead of being purely decorative.
↖ Can this build work with cheaper materials?
Yes. The layout matters more than the exact materials. You can start with cheaper pieces and later upgrade to limestone, plaster walls, roof tiles, and decorative pillars.
↖ Where should the workstations go?
Place workstations inside the wall alcoves. Put your most-used stations near the entrance or courtyard center, and place advanced or less-used stations along the back wall.
↖ How do I fix a front door that will not snap?
Turn snapping off, line the door up with the foundation center, place it manually, then use arches or pillars to hide any small clipping.
↖ Is the central hall required?
It is not required, but it makes the base much more useful. It gives us a protected space for comfort items, rare storage, and a fireplace while also making the courtyard look more complete.
↖ How much farming space should I add?
Four small plots are enough for this compact stronghold. If you need more food production, expand outside the walls or add a dedicated farm nearby.
↖ Final Thoughts
This Windrose stronghold works because it balances style with daily use. The 14×16 layout keeps everything compact, the double-thick walls create space for walkways and alcoves, and the central hall gives the base a proper home area.
Build the foundation and walls first, then add alcoves, doors, the dock, and the central hall. Once the structure works, finish it with pillars, lighting, railings, and storage labels. The result is a strong, organized base that feels good to live in, craft in, and expand over time.

Most Popular Posts
- Best Windrose Builds Guide: S-Tier Weapons, Stats, Gear, and Talents
- Windrose Dock Warehouse Build Guide: Practical Harbor Storage + Defensive Sea Wall Tips
- Windrose Combat Guide: Guard, Weapon Scaling, Stats, and Boarding Tips
- Windrose Stronghold Build Guide: Best Organized Base Layout for Crafting, Farming, and Dock Access
- Windrose Swamp Guide: All Swamp Items, Farming Routes, Crafting Uses, and Best Weapons
- Windrose Swamp Biome Guide: Prepare, Use the Bleed Sword, Beat Hans, and Reach the Swamp
Popular Category Lists
- Grow a Garden / (286)
- ARC Raiders / (283)
- CoD: Black Ops 7 / (166)
- MLB 26 / (149)
- Monopoly Go / (148)
- Star Citizen / (128)
- Steal a Brainrot / (90)
- ARK Survival Ascended / (85)
- Sailor Piece / (68)
- Forza Horizon 6 / (66)
- Diablo IV / (62)
- Blox Fruits / (62)
- Adopt Me / (57)
- CoD: BLACK OPS 6 / (55)
- Grow a Garden 2 / (54)
- Path of Exile 2 / (48)
- Monster Hunter Wilds / (46)
- Windrose / (44)
- Path of Exile / (40)
- Bee Swarm Simulator / (37)


