


 0
0ARC Raiders Blueprints Locations Guide: Containers, Events, and Best Farming Routes
- KIVRI
- Share
- ARC Raiders
- 01/22/26
- 2734
Blueprint farming in ARC Raiders feels random until you notice the real rule: most blueprints are tied to a loot pool, and that loot pool is usually determined by container type, sometimes by map, and occasionally by a specific event. Once we stopped running to the same room every raid and started matching our target blueprint to the right container pool, our hit rate—and sanity—improved fast. Here's the structured playbook we use.
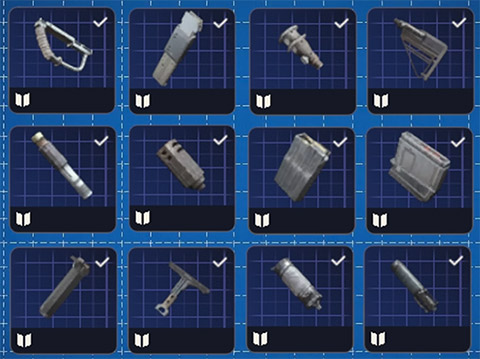
{thumb_img}
- Main Guide
- 1) The Blueprint System That Actually Matters
- 1.1 The 3-layer rule (container → map → event)
- 1.2 Our field method (how we avoid superstition)
- 2) Blueprint Categories, Where They Drop, and Where We Farm Them
- 2.1 Master cheat sheet (loot pool mapping)
- 3) Medical Blueprints (Vita Spray, Vita Shot, Defib): How We Farm Them Efficiently
- 3.1 What to open (definition that saves time)
- 3.2 Best density picks (where we go)
- 3.3 Route logic (if/then)
- 4) Augment Blueprints + Complex Gun Parts: Stop Fixating on One Room
- 4.1 Where augment blueprints actually come from
- 4.2 Our preferred approach (comparison)
- 4.3 Hotspot picks we use
- 5) Weapon Blueprints & Gun Parts: Raider Containers and Why You Feel Unlucky
- 5.1 Raider container list (what counts)
- 5.2 Uncovered Caches: higher-feeling blueprint rate (our sample)
- 5.3 If you're missing a single weapon (like Anvil)
- 6) Attachment Blueprints: Level 2 vs Level 3+ (Different Mindsets)
- 6.1 Level 2 attachments (+ Vertical Grip 3): residential pool
- 6.2 Level 3+ attachments: conditions matter more than your favorite building
- 7) Event-Only Blueprints (Hard Locks): Don't Farm Them Off-Event
- 7.1 Event-only list and how we treat them
- 7.2 Key-room strategy for Vulcano (conditional)
- 8) Stella Montes Map-Only Blueprints: Make Every Container Count
- 8.1 The Stella Montes-only pool (what to chase there)
- 8.2 Our repeatable Stella Montes loop
- 9) Explosives & Utility: Industrial vs Residential vs Electrical Pools
- 9.1 Explosive set: industrial containers
- 9.2 Smoke grenade: residential pool (not industrial)
- 9.3 Tagging Nade / Barricade / Remote Raider Flare: electrical containers
- 9.4 Fireworks box (status note)
- 10) Quest and Endgame Blueprints (Equalizer & Jupiter): Plan for the Real Cost
- 10.1 Quest blueprints
- 10.2 Equalizer & Jupiter: boss/puzzle-only
- FAQ
- 1) Do blueprints have exact fixed spawn points?
- 2) Why do I keep getting the same blueprint again and again?
- 3) Is it worth fighting over one high-value room?
- 4) What's the best map for medical blueprints?
- 5) How do I farm Tagging Nade / Barricade / Remote Raider Flare?
- 6) Can I farm Bobcat/Vulcano/Snaphook/Tempest/Wolfpack anytime?
- Summary
↖ Main Guide
Before we dive in, here are the six sentence types we'll deliberately use to keep this guide practical and readable:
- Definition/explanation sentences
- If/then conditional sentences
- Cause → effect → this means sentences
- Comparison/choice sentences
- Step-by-step process sentences
- Data/case-backed sentences
↖ 1) The Blueprint System That Actually Matters
The fastest way to waste time is to treat spawn locations like fixed pixels on the floor. In practice, blueprints are best understood as loot pools.
↖ 1.1 The 3-layer rule (container → map → event)
- Container-driven pools (most common): Medical drawers behave like medical drawers no matter where they are on the map.
- Map-driven pools (special cases): Some blueprints are map-locked (e.g., specific items on Stella Montes).
- Event-driven pools (hard locks): Some blueprints only exist during certain raid conditions/events.
This means your route planning should start with what container you need, then pick the map/area with the highest density of that container type.
↖ 1.2 Our field method (how we avoid superstition)
We track two numbers during farming sessions:
- Containers opened per raid (speed + density)
- Blueprints per 100 containers (rough, not official odds)
In our logs, high density + low fighting beats one famous room + constant contest almost every time.
↖ 2) Blueprint Categories, Where They Drop, and Where We Farm Them
This table is the cheat sheet we wish we had early on. After the table, we'll break down each category with routes and if/then decisions.
↖ 2.1 Master cheat sheet (loot pool mapping)
| Blueprint Target | Primary Drop Source (Loot Pool) | Best Places to Farm (Density Picks) | What This Means in Practice |
|---|---|---|---|
Vita Spray / Vita Shot / Defib | Medical-style containers | Buried City (Hospital), Stella Montes (Medical Research), Dam Battlegrounds (Testing Annex/Research Admin) | If you see medical drawers/cabinets, open them even outside medical zones. |
Augment blueprints | Medical-style containers and augment containers | Bluegate (Security Wing incl. upstairs), Stella Montes (Lobby/Business Center augment boxes) | If you only rush one basement room, you cap your attempts/hour. |
Complex gun parts | Mostly augment containers | Same as augment farming | If you want complex parts, treat augment boxes as your main loop. |
Weapon blueprints + gun parts | Raider containers (weapon boxes, ammo boxes, grenade cases, raider backpacks, medical bags) + Uncovered Caches | Any map with many raider containers; prioritize Uncovered Caches events | If you're missing one weapon, you're fighting a big pool—optimize volume. |
Level 2 attachments (+ Vertical Grip 3) | Residential containers | Bluegate Village, Buried City residential blocks, Stella Montes lobby/business suitcases & bins | If it looks like civilian clutter, it's usually the right pool. |
Level 3+ attachments | Event/map-condition biased + residential heavy | Locked Gate condition (best), also Night/Storm variants | If you can choose conditions, do—conditions can matter more than the exact building. |
Bobcat | Event-only | Locked Gate condition | If it's not Locked Gate, don't hope for it—run something else. |
Vulcano | Event-only | Hidden Bunker event; key rooms can feel strong | If you're stuck, stock keys and spend them during Hidden Bunker runs. |
Snaphook | Event-only | Electromagnetic Storm (inside storm area) | If you're outside the storm, you're effectively at zero chance. |
Tempest + Wolfpack | Event-only | Night Raid; residential-heavy routes | If it's day, stop forcing it—switch to Night Raid sessions. |
Stella Montes map-specific set (Seeker Nade, Aphelion, Deadline, Trailblazer, Gas Mine, Pulse Mine) | Map-only: any container on Stella Montes | Loot-anything routes on Stella Montes | If you're on another map, you're wasting rolls. |
Explosive set (Explosive Mine, Blaze Nade, Jolt Mine, Showstopper) | Industrial containers | Bluegate Maintenance Wing, Dam Primary Facility, Stella Montes Loading Bay | If you're in industrial zones, prioritize lockers/crates/shipping containers. |
Smoke Grenade | Residential containers | Same as L2 attachments routes | If you farm industrial, you'll miss it—swap to residential loops. |
Tagging Nade / Barricade / Remote Raider Flare | Electrical containers | Server cabinets, wall cabinets, androids, computers (any map) | If the room looks IT closet, it's your slot machine. |
Light Stick | Broad pool (often feels anywhere) | Day raids (volume runs) | If you want low friction, do fast daytime container sweeps. |
Quest blueprints | Quest rewards | Follow quest-tree dependencies | If you only want the blueprint, target prerequisite quests—not the whole chain. |
Equalizer + Jupiter | Boss/puzzle-only | Queen core loot; Harvester puzzle center containers | If you want these, plan for fights/puzzle time—no container route replaces it. |


↖ 3) Medical Blueprints (Vita Spray, Vita Shot, Defib): How We Farm Them Efficiently
Medical blueprints are a classic container beats location situation.
↖ 3.1 What to open (definition that saves time)
Medical-style containers are the white/blue medical drawers, cabinets, and similar clinic storage objects.
If you find a medical drawer in a random building, treat it like a hospital roll.
↖ 3.2 Best density picks (where we go)
- Buried City: Hospital is packed with medical containers; then rotate toward nearby research buildings for more drawers.
- Stella Montes: Medical Research is the motherlode; most containers in the area share the pool.
- Dam Battlegrounds: Testing Annex has floors with heavy medical density; Research/Admin upstairs adds extra attempts.
If you're specifically missing one of the three, then we don't tour the whole map. We pick the map where we can open the most medical containers in the fewest minutes.
↖ 3.3 Route logic (if/then)
- If you spawn far from a medical cluster, then take the closest small set of medical drawers and pivot to a safer cluster rather than sprinting through hot lanes.
- If a medical building is heavily contested, then rotate to a secondary medical cluster and prioritize attempt volume over ego duels.
↖ 4) Augment Blueprints + Complex Gun Parts: Stop Fixating on One Room
A lot of players bottleneck themselves by treating one famous augment room as the only option.
↖ 4.1 Where augment blueprints actually come from
- Medical-style containers can drop augment blueprints, in addition to augment boxes.
- Augment-style containers (augment boxes) are obvious candidates and are also where we see complex gun parts most consistently.
This means augment farming is best done with a hybrid route: open augment boxes and scoop any medical drawers you pass.
↖ 4.2 Our preferred approach (comparison)
- Instead of rushing one basement room every raid,
- we'd rather run a loop that hits 8–15 eligible containers with minimal contest.
↖ 4.3 Hotspot picks we use
- Bluegate (Security Wing): Don't just loot the downstairs; the upstairs and adjacent areas add more eligible containers.
- Stella Montes (Lobby + Business Center): Multiple augment containers exist across these areas; it's a strong alternative when Bluegate is chaos.
↖ 5) Weapon Blueprints & Gun Parts: Raider Containers and Why You Feel Unlucky
When a loot pool contains many blueprints, you can do everything right and still keep rolling duplicates.
↖ 5.1 Raider container list (what counts)
We treat these as the shared raider blueprint pool:
- Weapon boxes
- Ammo boxes
- Grenade cases
- Raider backpacks
- Medical bags
- Uncovered Caches (special event containers)
↖ 5.2 Uncovered Caches: higher-feeling blueprint rate (our sample)
In our tracking (small sample, not official):
| Container Type | Sample Size (Opened) | Blueprint Hits | Hits per 100 | Note |
|---|---|---|---|---|
| Uncovered Caches | 120 | 11 | 9.2 | Best feels good blueprint generator per time spent. |
| Standard raider containers (mixed) | 680 | 24 | 3.5 | More total hits, but depends on how fast your loop is. |
This means if an Uncovered Caches event is available, we prioritize it because it compresses the grind.
↖ 5.3 If you're missing a single weapon (like Anvil)
- If the pool is ~10 items deep, then each successful blueprint roll still has a big chance to be the wrong one.
- Therefore: optimize number of rolls, not pray in one building.
Practical move: run faster, lower-risk routes that open more raider containers per raid.
↖ 6) Attachment Blueprints: Level 2 vs Level 3+ (Different Mindsets)
Attachments are where many players accidentally farm the wrong conditions.
↖ 6.1 Level 2 attachments (+ Vertical Grip 3): residential pool
Residential containers include things like:
- Trash cans
- Wardrobes
- Suitcases
- Desk drawers and civilian storage
Best farming zones
- Bluegate Village: Dense residential containers, easy to chain.
- Buried City residential blocks: High volume; multiple buildings with repeatable sweeps.
- Stella Montes Lobby/Business Center: Suitcases and bins count—don't ignore them.
If you find a neighborhood full of junk containers, then slow down and vacuum them—this is exactly the loop you want.
↖ 6.2 Level 3+ attachments: conditions matter more than your favorite building
For higher-tier attachments, we've had the best results when raid conditions boost the effective pool.
Best condition to target: Locked Gate
Other workable options: Night Raid / Storm variants (less consistent in our experience)
This means: if you have limited play time, schedule your attachment grind around conditions rather than forcing it every raid.
↖ 7) Event-Only Blueprints (Hard Locks): Don't Farm Them Off-Event
These are the wrong day = zero chance items.
↖ 7.1 Event-only list and how we treat them
| Blueprint | Only Available During | Where to Loot | Rule of Thumb |
|---|---|---|---|
| Bobcat | Locked Gate | Any container on the map | If it's not Locked Gate, we don't spend mental energy on it. |
| Vulcano | Hidden Bunker | Any container; key rooms often feel strong | If you're stuck, spend saved keys during this event. |
| Snaphook | Electromagnetic Storm | Containers inside the storm | If you're outside the storm, you're not rolling the right table. |
| Tempest, Wolfpack | Night Raid | Residential-heavy routes | If it's day, switch goals. |
↖ 7.2 Key-room strategy for Vulcano (conditional)
- If you've got a stack of Spaceport keys, then Hidden Bunker runs are the time to burn them.
- If you're broke on keys, then focus on fast container volume first; keys are a multiplier, not the foundation.
↖ 8) Stella Montes Map-Only Blueprints: Make Every Container Count
Some blueprints are effectively taxed to one map.
↖ 8.1 The Stella Montes-only pool (what to chase there)
These can drop from any container on Stella Montes:
- Seeker Nade
- Aphelion
- Deadline
- Trailblazer
- Gas Mine
- Pulse Mine
This means we don't overthink container type for these—on Stella Montes, volume wins.
↖ 8.2 Our repeatable Stella Montes loop
- Start at Lobby/Business Center (suitcases, bins, desks).
- Pivot through adjacent corridors and any side rooms with dense container clusters.
- Avoid long, open rotations if the raid is noisy; keep it compact and repeatable.
↖ 9) Explosives & Utility: Industrial vs Residential vs Electrical Pools
This is where container identity really pays off.
↖ 9.1 Explosive set: industrial containers
We see these more often in industrial-style containers:
- Explosive Mine
- Blaze Nade
- Jolt Mine
- Showstopper
Where we farm
- Bluegate Maintenance Wing
- Dam Primary Facility
- Stella Montes Loading Bay (shipping containers are plentiful)
If a locker/crate is sitting in an industrial zone, then it's worth your time; the same locker in a key room can behave differently, so pay attention to context.
↖ 9.2 Smoke grenade: residential pool (not industrial)
Smoke Grenade behaves like the residential attachment pool.
If you've been grinding industrial for smoke, then you've been pulling the wrong lever—swap to Village/residential loops.
↖ 9.3 Tagging Nade / Barricade / Remote Raider Flare: electrical containers
Electrical-style containers include:
- Server cabinets
- Breachable wall cabinets
- Androids
- Computers
If you find an IT closet cluster, then slow down and clear it fully; these blueprints tend to live there.
↖ 9.4 Fireworks box (status note)
We treat the Fireworks Box as uncertain availability across patches/conditions. We don't build a core route around it; we only take it opportunistically while farming industrial pools.
↖ 10) Quest and Endgame Blueprints (Equalizer & Jupiter): Plan for the Real Cost
Some blueprints aren't about container farming—they're about clearing content.
↖ 10.1 Quest blueprints
If you only care about blueprint rewards, then use a quest-tree dependency approach:
- Identify the blueprint reward quest.
- Complete only the prerequisite chain required to unlock it.
- Skip branches that don't advance the blueprint you want.
↖ 10.2 Equalizer & Jupiter: boss/puzzle-only
These come from:
- Killing the Queen and looting the Queen core
- Completing the Harvester puzzle and looting the center containers
This means you should treat these as mission runs, not loot-route runs:
- Bring the gear to survive contact.
- Budget time for the puzzle/fight.
- Expect third-party interference.
↖ FAQ
↖ 1) Do blueprints have exact fixed spawn points?
Most of the time, no. They behave like loot pools tied to container types, with some map-only and event-only exceptions. If you farm a spot instead of a pool, you'll get inconsistent results.
↖ 2) Why do I keep getting the same blueprint again and again?
Because many containers roll from a large shared pool. If your target is 1 out of ~10 possible blueprint outcomes, duplicates are normal. The fix is not a new spot—it's more rolls per hour.
↖ 3) Is it worth fighting over one high-value room?
If you're consistently winning it fast, yes. If you're trading deaths or losing the race, no. If you're contested, then rotate to a secondary dense area and increase attempts with lower risk.
↖ 4) What's the best map for medical blueprints?
We've had the cleanest results with Stella Montes (Medical Research) and Buried City (Hospital) because they concentrate medical containers into short, repeatable loops.
↖ 5) How do I farm Tagging Nade / Barricade / Remote Raider Flare?
Treat them as electrical container drops. If you see server racks, computers, wall cabinets, or androids, then clear the whole cluster; partial looting leaves a lot of rolls behind.
↖ 6) Can I farm Bobcat/Vulcano/Snaphook/Tempest/Wolfpack anytime?
No. These are event-locked.
- Bobcat → Locked Gate
- Vulcano → Hidden Bunker
- Snaphook → Electromagnetic Storm (inside storm)
- Tempest/Wolfpack → Night Raid
↖ Summary
Blueprint farming gets dramatically easier once we stop chasing myths and start matching goal → pool → density route. If you're hunting medical items, we live in medical drawers; if you're chasing augments and complex gun parts, we chain augment containers and scoop medical along the way; if you're missing one weapon, we maximize raider-container rolls and prioritize Uncovered Caches when they're up. Event-only and map-only blueprints are the hard guardrails—when the condition isn't active, we change the goal instead of burning raids on zero-odds attempts.

Most Popular Posts
- ARC Raiders Riven Tides Key Room Guide: Best Hotel Keys, Loot Routes, Secure & Crane Storage
- ARC Raiders Damage Fireflies Trial Guide: Best Farm Method on Buried City Night Raid
- ARC Raiders Riven Tides Update: New Map & Items, ARC Turbine, Rewards, and Best Early Strategy
- ARC Raiders Bettina Guide: Best Build, Buffs, and How to Use It Against ARC
- ARC Raiders Solo Search Supply Drops Guide: Best Buried City Route, Beacon Locations
- Arc Raiders Season 4 Riven Tides Update, Rewards, Safe Skins, and Release Timeline
Popular Category Lists
- Grow a Garden / (286)
- ARC Raiders / (266)
- CoD: Black Ops 7 / (166)
- Monopoly Go / (146)
- MLB 26 / (145)
- Star Citizen / (116)
- Steal a Brainrot / (89)
- ARK Survival Ascended / (74)
- Sailor Piece / (68)
- Forza Horizon 6 / (63)
- Diablo IV / (61)
- Blox Fruits / (60)
- CoD: BLACK OPS 6 / (55)
- Adopt Me / (53)
- Path of Exile 2 / (48)
- Monster Hunter Wilds / (46)
- Windrose / (44)
- Grow a Garden 2 / (42)
- Path of Exile / (40)
- Bee Swarm Simulator / (36)


