


 0
0ARC Raiders Coins & XP Route: Farming Bastions & Bombarders for Profit
- KIVRI
- Share
- ARC Raiders
- 01/22/26
- 977
Most Coins routes in ARC Raiders fall apart for one boring reason: we don't control spawns or raid timing. If we spawn far out, or load in late, the premium rooms are already vacuumed clean—and our best route becomes a jog through empty drawers.
So we stop betting the run on untouched loot rooms and switch to something spawn-proof: one reliable high-value kill per raid (Bastion or Bombarder) powered by Deadline or Trailblazer explosives. Here's the full loop—materials, maps, loadouts, and what we actually earn when things go right and when they don't.
- 1. Make the Run Independent of Loot RNG
- 2. Tools of the Method: Deadline vs Trailblazer (Pick One)
- 3. How We Get Blueprints & Materials (Stella Montis)
- 3.1 What we're farming on Stella
- 3.2 The Two-Room Fuel Sprint (fast, repeatable)
- 3.3 What this means for craft consistency
- 4. Buried City: The Consistent Coins + XP Loop (Spawn-Proof Version)
- 4.1 The rule that keeps profits high
- 4.2 Loadout we run (cheap, repeatable)
- 5. Routes by Spawn: Top-Side vs Bottom-Side Decisions
- 5.1 If you spawn top-side (or spawn late)
- 5.2 If you spawn bottom-side
- 6. What We Actually Earn (Realistic Numbers)
- 6.1 Per-run expectations
- 6.2 Hourly expectations (when executed cleanly)
- 7. Optional Profit Booster: Power Cells → Energy Ammo (Min-Max Only)
- FAQ
- Takeaways
↖ 1. Make the Run Independent of Loot RNG
We're aiming for repeatable income + XP, not highlight reels.
Why loot routes feel inconsistent
Spawn distance decides whether we reach high-tier rooms first. Late spawns mean the best rooms are already open and empty. Furthermore, PvP interruptions can erase a 10-minute loot session instantly.
What we change
Because Bastion/Bombarder parts are valuable every time, we can treat the raid like this:
1. Loot whatever is convenient (marked or unmarked rooms).
2. Kill exactly one Bastion/Bombarder using Deadline or Trailblazer.
3. Vacuum the parts (money) + enjoy the kill and loot XP (levels).
4. Extract fast.
This means even a bad spawn still has a consistent floor: one big kill. We stop hoping for luck and start manufacturing profit.
↖ 2. Tools of the Method: Deadline vs Trailblazer (Pick One)
These two explosives are the engine of the strategy. We choose based on risk tolerance and craft friction.
Comparison table: Deadline vs Trailblazer
Here's the decision at a glance, then we'll turn it into a loadout.
| Option | Best For | Main Craft Pain | Run Risk | Why We Use It |
|---|---|---|---|---|
| Trailblazer grenades | Most players, consistent farming | Synthesized Fuel requirement | Lower | Easier, safer kills with fewer oh no moments. |
| Deadline explosives | Players who want simpler crafting | Arc Circuitry requirement | Higher | Craft is simpler, but executions are riskier up close. |
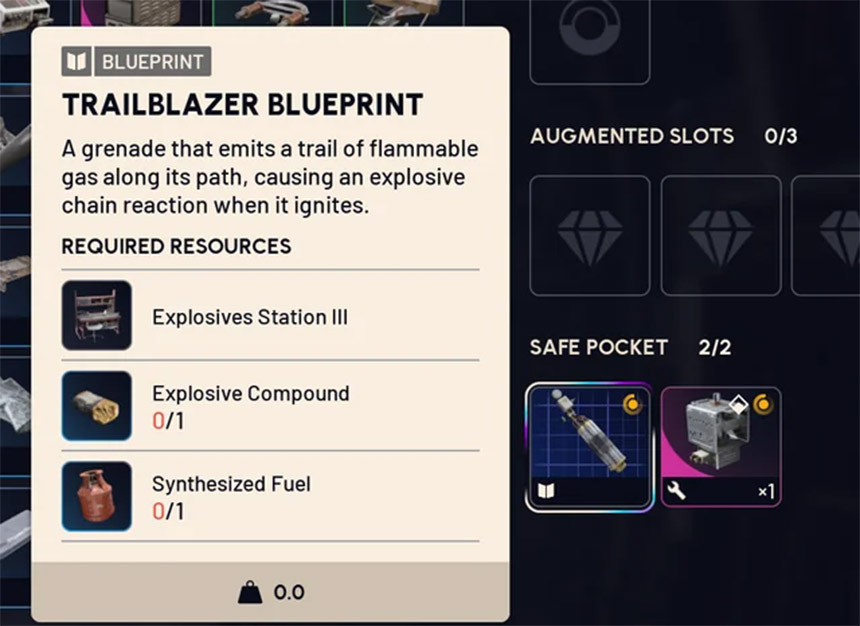
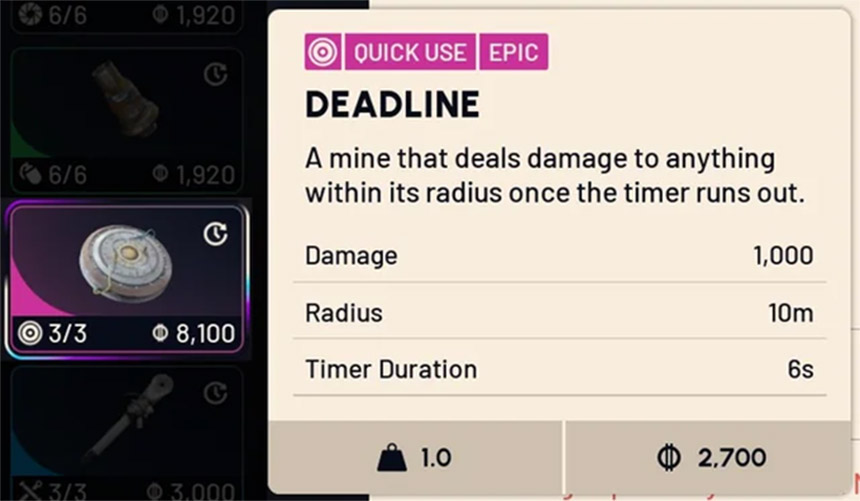
Practical pick: If you're learning the loop or hate coin-flip fights, we default to Trailblazer. If your crafting pipeline is already flush and you're comfortable with higher risk, Deadline can be efficient.
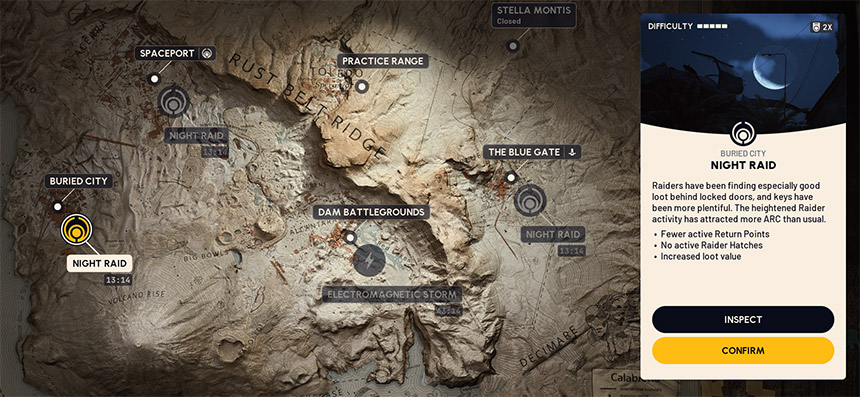
↖ 3. How We Get Blueprints & Materials (Stella Montis)
If you don't have the explosives yet, Stella Montis is where the whole plan starts.
↖ 3.1 What we're farming on Stella
We're looking for:
Blueprints for Deadline / Trailblazer (can appear across many loot containers).
Explosive Compounds (or the ingredients to make them).
Oil (often part of the chain).
Synthesized Fuel (the big bottleneck for Trailblazer).
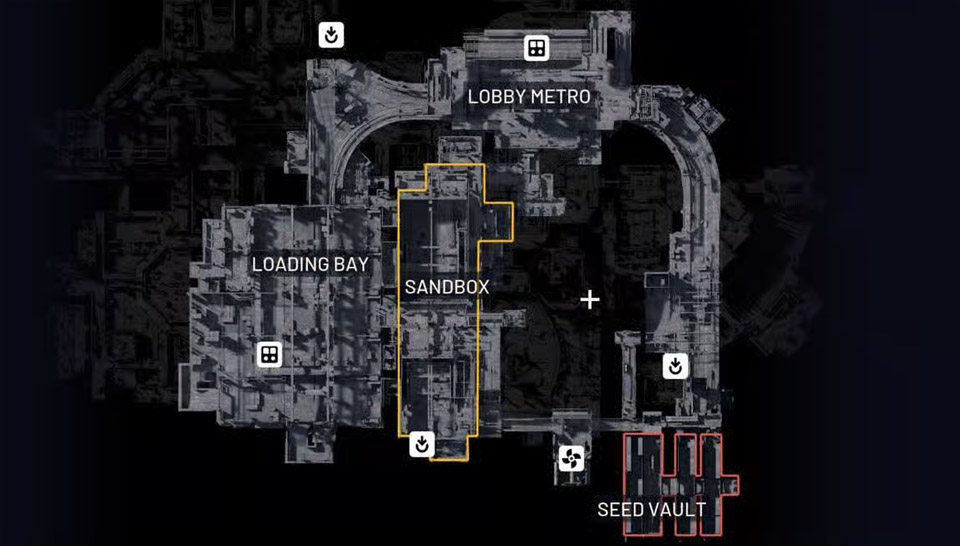
↖ 3.2 The Two-Room Fuel Sprint (fast, repeatable)
When we need Synthesized Fuel quickly, we run a short loop that targets two reliable fuel rooms near the Metro extract area:
Room A: Metro Admin (unmarked high-tier room)
Check counters and desks specifically for Synthesized Fuel spawns. Loot drawers if untouched for blueprint chances.
Room B: Lobby third-floor room
Fuel spawns tend to sit on desks here.
If you find nothing, don't tilt—variance happens. If you notice the area is already looted, then treat it as a fuel-only sprint: check surfaces, grab fuels/oil, and leave.
↖ 3.3 What this means for craft consistency
Because we can deliberately replenish fuel, we're not forced to save grenades for perfect raids. We can run the Buried City kill loop regularly without running dry.
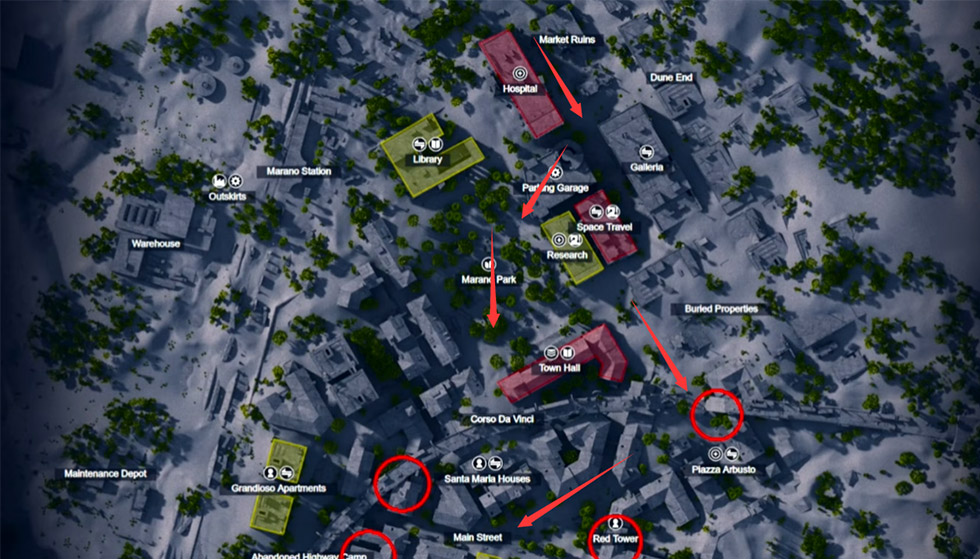
↖ 4. Buried City: The Consistent Coins + XP Loop (Spawn-Proof Version)
Buried City works because it's compact, high-density, and it reliably hosts big ARK targets along common routes.
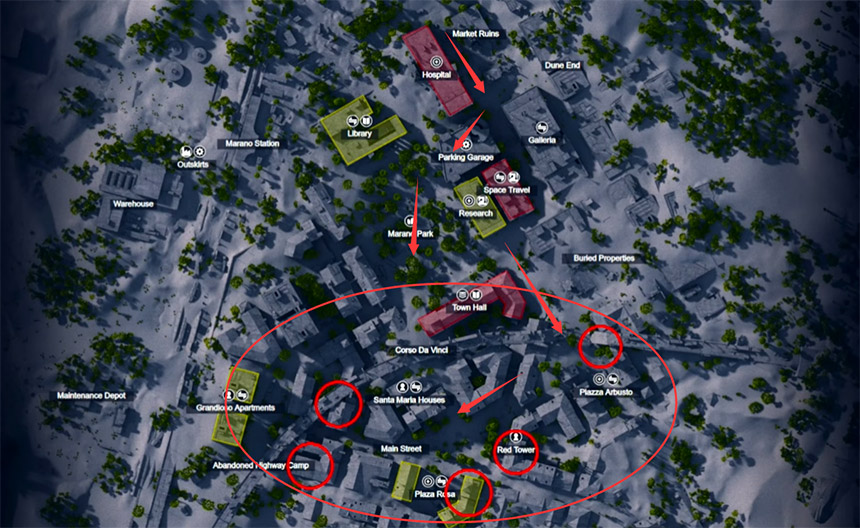
↖ 4.1 The rule that keeps profits high
One big kill per raid.
Why not chase two? Because the second kill often becomes loot we can't carry. In practice, after one big target plus one good room, our bag is already strained—so the extra minutes don't convert into extra sell value efficiently.
↖ 4.2 Loadout we run (cheap, repeatable)
Keep it sustainable. We're farming, not flexing.
| Slot | Budget pick | Why it matters |
|---|---|---|
| Armor/Shield | Modest shield + loot-focused augment | Staying alive cheaply beats dying expensively. |
| Weapon | Any reliable mid-tier gun + basic mag | Finishes weak points; handles trash mobs. |
| Utility | 2–3 Trailblazers (or Deadline) | 3 is safe for imperfect throws. |
| Healing | Light heals + bandages | You're sprinting and occasionally trading hits. |
| Keys | Hatchet key (when relevant) | Saves time, reduces exposure. |
If you're new to the loop, then bring 3 explosives. If your throws are consistent and your aim is clean, you can tighten it later.
↖ 5. Routes by Spawn: Top-Side vs Bottom-Side Decisions
We don't force one route. We adapt based on where the game drops us.
↖ 5.1 If you spawn top-side (or spawn late)
1. Loot whatever is closest (common high-tier zones).
2. Don't race the whole map.
3. Move toward a likely Bastion/Bombarder pathing area.
4. Take the kill, loot parts, extract.
Because late spawns usually mean premium rooms already hit, this means your time is better spent converting a guaranteed kill into guaranteed value rather than checking empty boxes.
↖ 5.2 If you spawn bottom-side
We prioritize unmarked/high-yield rooms that are often ignored, then take the big kill.
1. Hit 1–2 unmarked rooms quickly.
2. Rotate toward a Main Street / Town Hall-adjacent big target.
3. Kill once, loot, leave.
If you find a breach door is already open and stripped, then don't stubbornly search—rotate immediately.
↖ 6. What We Actually Earn (Realistic Numbers)
Let's anchor expectations so you can decide if the loop is worth your time.
↖ 6.1 Per-run expectations
Run length: ~5–9 minutes depending on spawn and contesting.
Sell value per big kill (parts): Commonly 50k–120k range, with variance from drops and how much you can carry.
XP: The kill plus looting parts stacks quickly; looting each part adds meaningful XP, so don't skip it unless you must.
↖ 6.2 Hourly expectations (when executed cleanly)
Assuming fast resets and minimal fighting:
Coins/hour: ~400k–600k consistently.
XP/hour: Often 100k–140k depending on downtime and raid pacing.
These numbers aren't magic—they come from converting a predictable event (one big kill) into a predictable output (parts + XP), instead of gambling on untouched loot rooms.
↖ 7. Optional Profit Booster: Power Cells → Energy Ammo (Min-Max Only)
There's a strong value conversion trick: power cells can become energy ammo, multiplying sale value—but only if you have the craft unlocked.
What changes if you have energy ammo crafting
Power cells become more than nice loot—they become multipliers. You'll care more about batteries as a secondary resource.
Why we don't treat it as mandatory
Because unlocking the craft is a separate progression step and can be annoying, this means the base loop remains profitable without it. Think of energy ammo as an afterburner, not the engine.
↖ FAQ
1. If I keep spawning late, is this still worth running?
Yes—late spawns are exactly why we run it. If rooms are empty, the kill still pays. If you notice multiple doors already breached, then rotate straight toward a big target and stop wasting minutes on drawers.
2. Should we ever go for two Bastion/Bombarder kills in one raid?
Only if your inventory is still light and the second target is basically on your exit line. Otherwise, the time-to-value ratio usually drops because you can't carry enough parts to justify the extra risk.
3. Trailblazer or Deadline for beginners?
Trailblazer. It's generally safer and more forgiving. Deadline can be strong, but it tends to create more I had it… then I didn't situations when positioning goes wrong.
4. What if other players show up during the big kill?
If you sense contesting, then prioritize securing the kill and looting the highest-value parts first, or disengage and extract. A clean 70k is better than a heroic 0k.
5. How many explosives should we bring?
We recommend 3 while learning. If your throws are consistent and your aim is clean, you can drop to 2 for cheaper runs.
6. What's the biggest mistake people make with this farm?
They over-loot early and over-stay late. The loop works because it's fast: one room (maybe two), one kill, out.
↖ Takeaways
We built this guide around a simple truth: we can't control spawns, but we can control conversion. Loot routes are volatile; a big-target kill is reliable. Once we source the explosives and materials on Stella Montis, Buried City becomes a repeatable loop with a clear floor and a scalable ceiling.
Our operating rule: if you get a good spawn, enjoy the extra loot; if you get a bad spawn, take the big kill and leave—either way, the raid produces coins and XP.

Most Popular Posts
- ARC Raiders Riven Tides Key Room Guide: Best Hotel Keys, Loot Routes, Secure & Crane Storage
- ARC Raiders Damage Fireflies Trial Guide: Best Farm Method on Buried City Night Raid
- ARC Raiders Riven Tides Update: New Map & Items, ARC Turbine, Rewards, and Best Early Strategy
- ARC Raiders Bettina Guide: Best Build, Buffs, and How to Use It Against ARC
- ARC Raiders Solo Search Supply Drops Guide: Best Buried City Route, Beacon Locations
- Arc Raiders Season 4 Riven Tides Update, Rewards, Safe Skins, and Release Timeline
Popular Category Lists
- Grow a Garden / (286)
- ARC Raiders / (266)
- CoD: Black Ops 7 / (166)
- Monopoly Go / (146)
- MLB 26 / (145)
- Star Citizen / (116)
- Steal a Brainrot / (89)
- ARK Survival Ascended / (74)
- Sailor Piece / (68)
- Forza Horizon 6 / (63)
- Diablo IV / (61)
- Blox Fruits / (60)
- CoD: BLACK OPS 6 / (55)
- Adopt Me / (53)
- Path of Exile 2 / (48)
- Monster Hunter Wilds / (46)
- Windrose / (44)
- Grow a Garden 2 / (42)
- Path of Exile / (40)
- Bee Swarm Simulator / (36)


