


 0
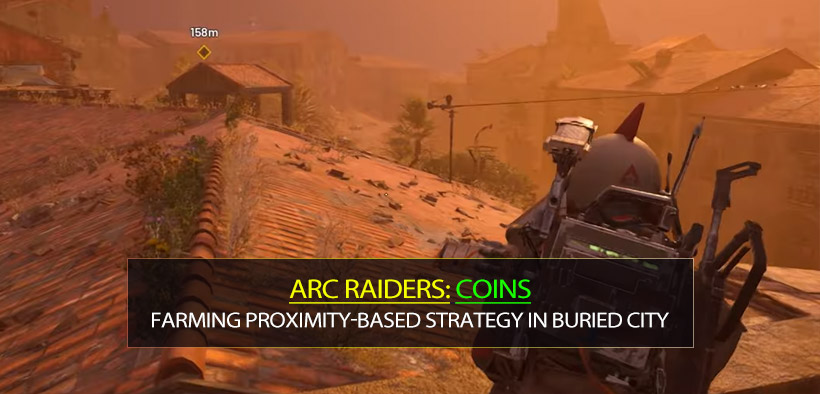
0ARC Raiders Coins Farming Proximity-Based Strategy in Buried City
- KIVRI
- Share
- ARC Raiders
- 12/14/25
- 1064
When the game suddenly tells you, Hey, you need 5 million coins in net worth for your expedition, it feels like a bad joke—especially if you have a job, a family, or homework breathing down your neck. At first, I also thought this requirement was way over the top. Then I stopped playing tourist ARC Raiders and built a strictly proximity-based Coins strategy.
Let's break it down from logic → routes → numbers.
- I. Core Philosophy: Why Short Proximity Runs Print More Money than Roaming
- 1. How Much Time Do You Really Need for 5M?
- 2. Why Proximity + Short Runs Is Better Than Full-Map Sightseeing
- II. Core Map: Buried City Proximity Strategy (Three Regions)
- 1. Universal Prep: Augments, Bag, Stims, and Loadout
- 2. Northeast Spawns: Hospital Route
- 3. West Spawns: Grandioso Apartments + Plan B Building
- 4. South Spawns: Pharmacy + Red Tower & Santa Maria
- 5. Region Comparison Table
- III. Backup Map: Stella Montis Burst Farming
- 1. Where the Money Comes from in Stella Montis
- 2. Recommended Spots: Medical Lobby & Assembly Workshops
- 3. Stella Montis vs Buried City: When to Switch?
- IV. Events: Lush Blooms & Electromagnetic Storm as Value Boosters
- 1. Lush Blooms: Basket Farming for Stacked Profit
- 2. Electromagnetic Storm: Rocketeer Drive Farming
- V. What 5M in a Day Actually Looks Like (with Realistic Numbers)
- 1. Three Efficiency Scenarios
- 2. Real-Life Player Examples
- VI. Advanced Details: Squeezing More Value from Every Run
- 1. Backpack Economics: Less Is More
- 2. Fight vs Flight: When to Commit and When to Run
- 3. Wolf Packs: Turning 5k into 25k
- FAQ
- Conclusion: Proximity Farming Is Built for People Who Have a Life
↖ I. Core Philosophy: Why Short Proximity Runs Print More Money than Roaming
Before diving into maps and buildings, it's worth understanding why this works. Otherwise you'll just slip back into wandering the map and wondering where your Coins went.
↖ 1. How Much Time Do You Really Need for 5M?
Let's build a simple model with conservative numbers.
With proximity runs:
- Typical profit per run (conservative): ~70k
- Realistic profit per run for most players: 90k–120k
- Run duration: ~4–8 minutes
- Runs per hour: ~6–10
What does that translate to?
- Very conservative:
- 70k × 6 runs ≈ 420k/hour
- Normal, decent play:
- 90k × 7 runs ≈ 630k/hour
- Good flow, few mistakes:
- 100k × 8 runs ≈ 800k/hour
Now bake in deaths, bad lobbies, mistakes, PVP disasters.
If you assume a super-safe blended rate of 300k/hour, 5M still takes around:
5,000k ÷ 300k ≈ 16–17 hours
But you don't need to be that unlucky all day.
If you hold something like 500–700k/hour, then:
- 500k/hour → 10 hours for 5M
- 700k/hour → ≈7 hours for 5M
So if you have one big play day—say 6–8 effective hours—and your runs sit around 600k/hour on average, 5M is absolutely achievable.
↖ 2. Why Proximity + Short Runs Is Better Than Full-Map Sightseeing
If you often catch yourself doing this:
Spawn → wander wherever looks interesting → drift from point to point just to see → leave when you're bored or dead…
you're bleeding Coins.
Because:
- The longer you stay, the more already-looted each next spot is.
- Time spent running between spots is time you're not earning.
- The more you roam, the more PVP you naturally force yourself into.
- Every death multiplies the damage: lost loot, lost time, tilted decisions.
So I flipped the logic:
Spawn → sprint to the closest high-density loot building → loot for 3–5 minutes → extract as soon as bag value crosses a target threshold (say 70k) → repeat.
No sightseeing. No just one more building. No hero plays.
Just fast, dense, and close.
That's the core philosophy of the proximity strategy.
↖ II. Core Map: Buried City Proximity Strategy (Three Regions)
Buried City is the main workhorse of this plan.
I mentally split it into three regions based on spawn points:
- Northeast → Hospital
- West → Grandioso Apartments (+ a Plan B building)
- South → Pharmacy (+ Red Tower & Santa Maria backup)
Before we go region by region, let's align on the minimal prep you actually need.
↖ 1. Universal Prep: Augments, Bag, Stims, and Loadout
(1) Looting MK2 Augment – top priority
Any time I seriously farm Coins, my first question is:
Do I have Looting MK2 equipped?
You want this augment because:
- Huge bag space – lets you stretch one run further before extraction.
- Two secure slots – guarantee every run has some profit even if you die.
- Three extra Trinket slots – this is where the real Coins lives.
Take the classic example:
- Blue Playing Cards Trinket:
- ~5k each
- stacks up to 3 per slot → 15k per slot
- Three extra Trinket slots from MK2 → up to 45k just from those slots.
Suddenly, a chunk of your 70–100k run is coming from Trinkets alone.
(2) Adrenaline Shots (movement and disengage)
I always carry a stack of adrenaline:
- To blast between floors and buildings faster.
- To escape PVP when things go south.
It's cheap, and it meaningfully cuts the time you're exposed on the map.
(3) Weapon and meds
- Bring a cheap, reliable gun that you're comfortable with in close quarters.
- Bring basic healing—enough to survive minor mistakes and reach the extract.
This strategy is not about winning every gunfight.
It's about making sure you don't even take most of them.
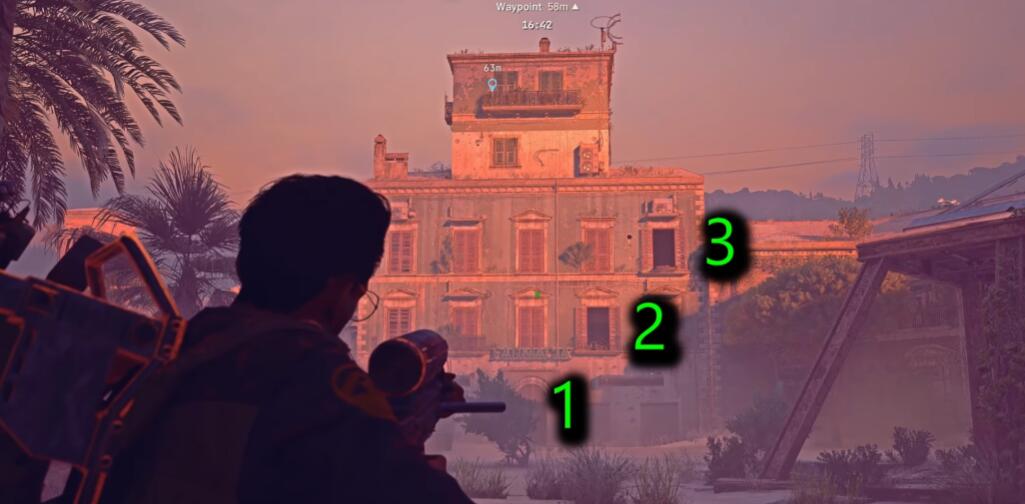
↖ 2. Northeast Spawns: Hospital Route
If you spawn in the northeast Buried City area, your home is the Hospital.
Why the Hospital?
- Big building, two main loot-heavy floors.
- High density of containers: drawers, boxes, and red lockers.
- Trinkets everywhere, and Trinkets are your coin printers.
Think of it as your value bunker.
How I Run Hospital
1. Enter via the southwest entrance of the Hospital if possible:
- This drops you onto the most valuable floor immediately.
- It avoids wasting time on filler areas.
2. On the first main floor:
- Hit every container: drawers, boxes, red lockers.
- Prioritize:
- Trinkets
- Rare items
- Anything with ≥1k value per slot and stackable
3. Once that floor is done, go up to the other main floor:
- Same treatment: open everything that matters.
- Ignore obvious filler once you've learned the building.
4. As soon as your bag looks healthy (70k+ range), leave.
- There's an extract right below the Hospital.
- For day raids, there's also a hatch next to the Hospital, offering an ultra-safe exit if you have or find the key.
Typical profit:
- 70–100k per run, in just a few minutes.
- Variance depends on RNG and how hard your lobbies contest the building.
Low travel time + high loot density + nearby extract =
one of the safest and most consistent Coins spots in the game.
↖ 3. West Spawns: Grandioso Apartments + Plan B Building
If you spawn in the west, you should immediately think:
Grandioso Apartments. Both of them.
They're basically the horizontal twin of the Hospital:
- Multi-story apartments full of loot.
- Tons of Trinkets and valuable items once you know where to look.
- You can chain both buildings for a full run.
Standard Grandioso Loop
1. Start at one Grandioso building from the bottom floors, moving upwards:
- Use the zipline between floors wherever possible.
- Some staircases don't directly link to new loot floors and waste time.
- With zipline, you can precisely drop into open floor sections.
2. Clear that building floor by floor, then use the bridge at the top to cross into the other Grandioso:
- First building: bottom → top.
- Second building: top → bottom (going downward this time).
3. As you get familiar with the layout, you'll learn:
- Which rooms are high-value (containers, lockers, obvious stash spots).
- Which rooms are just fluff to ignore.
4. After both buildings:
- If your bag is around 70–100k, head to the nearest extract and leave.
This alone can carry your runs.
Plan B: The Backup Building
Sometimes, someone enters the other Grandioso building while you're busy, or the loot rolls low and you come out under 50k.
If by the time you finish one building (or both) you're under ~50k, I switch to Plan B:
- Just next to Grandioso there's a building with a compact, high-value top room.
- Almost all the loot you care about is clustered in one small area.
- You can clear it in about 1–2 minutes.
This building is in the strategy for three reasons:
1. It's extremely close to Grandioso, so you can adapt on the fly.
2. It's naturally on the way toward an extract.
3. It almost guarantees your bag is properly full before leaving.
West-side typical profit:
- Grandioso-only or Grandioso + backup building: up to ~100k per run.
- Run time: ~5–7 minutes once you know the layout.
- Extracts are not right under you like the Hospital, but still fairly close.
If your run feels weak, you just throw in the backup building and fix the value.
↖ 4. South Spawns: Pharmacy + Red Tower & Santa Maria
For south spawns, your primary target is the Pharmacy right next to the Plaza Rosa extract.
Pharmacy characteristics:
- Small footprint, very high loot density.
- Lots of containers and loose items in tight spaces.
- Excellent for a dash in, grab everything, dash out run.
Default South Route: Pharmacy Burst
How I handle it:
1. Enter through the front door (breach) or from above via an open window:
- If you suspect people watching the door, top-entry is safer.
2. Clear floor by floor:
- Pay extra attention to low-light areas and open ground: Trinkets can spawn on the floor and are easy to miss.
- Same priority: Trinkets first, then high value/stackable items.
3. Once your bag hits ~70–100k, head straight to Plaza Rosa extract, which is very close.
One caveat:
From my experience, the Pharmacy is more contested than the west or northeast spots.
The upside is the building has multiple entrances/exits and height levels, so you can disengage easily if you don't want to PVP.
South Plan B: Red Tower → Santa Maria Combo
If the Pharmacy is too hot—too many people, constant guns, uncomfortable third parties—then I just switch to:
Red Tower → Santa Maria buildings → Plaza Rosa extract
Why this combo is good:
- Very close to the Pharmacy, so you can flex between them on the fly.
- Combined loot value is roughly on par with the Pharmacy.
- Generally safer with fewer players hard-contesting it.
Again, the goal is not to force a fight.
It's to come out with a solid 70–100k and live.
↖ 5. Region Comparison Table
Here's a quick side-by-side of the three Buried City regions and their main routes:
| Region (Spawn) | Main Spot(s) | Avg Profit/Run | Run Time (practiced) | Risk Level | Best For |
|---|---|---|---|---|---|
| Northeast | Hospital | 70k–100k+ | 4–6 min | Low–Medium | Players who want stability, minimal PVP, high consistency |
| West | Grandioso Apartments + Backup building | 70k–100k+ | 5–7 min | Medium | Players comfortable with multi-floor navigation and some contest |
| South | Pharmacy / Red Tower + Santa Maria | 70k–100k+ | 4–7 min | Medium–High | Players okay with occasional PVP and adaptive routing |
The operating rule is simple:
Look at your spawn → lock onto the closest high-density building group → loot for a few minutes → extract.
No cross-map wandering. No just one more area.
↖ III. Backup Map: Stella Montis Burst Farming
Buried City is your main salary.
Stella Montis is your bonus and variety map.
You won't always want to be in the same city. Sometimes lobbies get weird, or you're just mentally done with the same silhouettes. That's when Stella Montis shines.
↖ 1. Where the Money Comes from in Stella Montis
Unlike Buried City, Stella Montis doesn't rely on Trinkets as heavily.
Instead, it's all about Stella-exclusive rare technological and mechanical items:
- Lots of items with ~3k value each.
- They usually stack 3 per slot.
- Drop rates are high in specific zones (like the ones we'll mention).
This means:
Instead of a few huge Trinkets, you stack clusters of 3k × 3 items and watch your value climb very quickly.
Done right, 50k in 2 minutes is very realistic.
↖ 2. Recommended Spots: Medical Lobby & Assembly Workshops
(1) Medical Lobby
- Good container density.
- Lots of medical and tech rares.
- Easy to understand layout, great for pop in, pop out runs.
(2) Assembly Workshops (my personal favorite)
This is one of my absolute favorite Coins spots in the game:
- Close to a Raider Hatch, giving a very short path to a very safe extraction.
- The yellow container near the hatch tends to drop map-exclusive pinks surprisingly often.
- The surrounding rooms are full of containers that frequently roll high-value tech items.
You can often:
- Spawn → sprint into Assembly Workshops → loot a handful of containers → hit the hatch → be out with a large chunk of value in just a couple of minutes.
↖ 3. Stella Montis vs Buried City: When to Switch?
Some differences to consider:
- Spawn clustering: Stella Montis spawns are closer together, so players bump into each other faster.
- PVP density: Tends to attract more PVP-oriented players.
- Extract safety: You can leave very fast, but if the lobby is sweaty, reaching the exit can get spicy.
So the way I use it is:
- When I feel sharp and want higher tempo → Stella Montis for a few burst runs.
- When the lobby is too PVP-heavy or I'm tilted → back to Buried City proximity loops for consistency.
In other words:
Buried City = Long-term salary
Stella Montis = Short-term high bonus
↖ IV. Events: Lush Blooms & Electromagnetic Storm as Value Boosters
A lot of players underestimate how much events contribute to long-term wealth.
From my own experience, about 20–30% of my net value growth on a grind day comes from using events smartly.
↖ 1. Lush Blooms: Basket Farming for Stacked Profit
Lush Blooms is the chill Coins event:
- The map spawns baskets full of fruits and natural items.
- Many of these stack well and have very high per-slot value.
- With decent routing, it's easy to hit 70k in just a few minutes.
- With strong spawns and good decisions, 100–150k per run is very attainable.
But you need to be smart about three things.
(1) Best Maps for Lush Blooms
Based on terrain and ease of navigation:
- Recommended: Buried City, Spaceport
- Relatively flat and open; baskets are much easier to spot and route.
- Less friendly (especially if you're new): Dam, Bluegate
- More verticality and awkward terrain; baskets can be harder to locate.
I strongly suggest using an interactive map (there are several online) to see basket spawn locations and build quick loops.
(2) Loot Priority Inside Baskets
Your backpack is limited, so you have to treat it like a small shop shelf.
My priority system:
1. Highest priority: Fruits and nature items worth ~1k per unit
- These are your main profit engine.
2. Second priority: Items worth around 640 each but stackable up to 10
- A full stack is still solid value, worth keeping.
3. Third priority: Mass Seeds & Great Mullen
- Generally not worth it unless:
- You're hitting full or near-full stacks (e.g., 30–40+ seeds), or
- You're desperate and everything else is worse.
If your inventory is full and you hit another good basket, this system tells you what to throw away first to maximize value per slot.
(3) Time-Limited Nature: How to Weave Lush Blooms into Your Day
Lush Blooms is only available for limited time windows each day.
So you cannot rely on it as your only Coins plan.
Instead, think of it as a booster you slot into your core routine:
- Event starts → run 1–2 high-value Lush Blooms loops.
- Then go back to Buried City / Stella Montis proximity farming when the event ends or slows down.
The key mindset:
Lush Blooms makes your good hours great.
Buried City keeps your whole day consistent.
↖ 2. Electromagnetic Storm: Rocketeer Drive Farming
The Electromagnetic Storm event covers the map in:
- Breachable Husks
- Couriers
- Probes
The best part?
They tend to spawn in tight clusters, which is perfect for the proximity philosophy.
The main Coins-makers in this event:
- Rocketeer Drives (intact)
- ≈5k each
- stack up to 3 per slot → 15k per slot
- Damaged Rocketeer Drives
- ≈2k each
- also stack up to 3 per slot → 6k per slot
- routinely ignored by other players for no good reason
On top of that, Husks / Couriers / Probes drop various other blue-tier valuables.
Combine all that and you're looking at:
- 70k+ per run as a very realistic baseline,
- With clear upside if you get a dense spawn cluster.
Practical Approach: Focused West Spawn → Old Battleground Sweep
A pattern that's worked well for me:
1. Go in with cheap or even throwaway gear to reduce risk.
2. Aim to spawn on the west side of Dam, for example.
3. Make a beeline for a zone like Old Battleground, which tends to be full of Husks.
4. Methodically clear Husks / Couriers / Probes in that area.
5. Once your bag is heavy with Drives and blues, use one of the two nearby extracts (one usually open) to get out quickly.
And yes, do not sleep on Damaged Rocketeer Drives:
- Even at 2k each, 3 per slot = 6k.
- If you fill several slots passively while targeting intact Drives, you're quietly adding a huge amount of value.
The event is basically the game saying:
Hey, want to convert 10–15 minutes into a bag full of blue tokens?
You just have to show up and not get greedy.
↖ V. What 5M in a Day Actually Looks Like (with Realistic Numbers)
By now, you know the routes, the spots, and the events.
So the obvious question is: what does 5M in one day truly look like in practice?
Let's quantify it in three efficiency tiers.
↖ 1. Three Efficiency Scenarios
| Tier | Net Profit/Hour | Description |
|---|---|---|
| Very conservative | ~300k / hour | You die often, misroute, and mess up PVP and extracts regularly. |
| Normal | 500k–700k / hour | You have occasional fails, but most proximity runs succeed; you leverage events decently. |
| Hot streak | 800k–1M / hour | You know routes well, avoid bad fights, and chain Buried City + events smoothly. |
These numbers already assume some amount of failure baked in.
They're not perfect run fantasy.
↖ 2. Real-Life Player Examples
Let's map this to realistic schedules.
Example A: Weekend grind day
- Morning: 2 hours
- Afternoon: 3 hours
- Evening: 3 hours
- That's 8 hours of actual gameplay (not counting breaks).
At a moderate 600k/hour pace:
- 8 hours × 600k = 4.8M
With just a little extra help from:
- One or two strong Lush Blooms runs, or
- A couple of high-value Buried City runs (~120k+),
you comfortably cross 5M in that day.
Example B: Busy adult / dad gamer schedule (one week)
- Weekdays: 2 hours each night → 5 days = 10 hours
- Weekend: 5 hours on one day
- Total: 15 hours per week of actual farming
Even at a modest 500k/hour average:
- 15 × 500k = 7.5M
So even if you don't reach 5M in a single calendar day, the core message holds:
If you stop roaming and start running proximity-based loops, your wealth curve becomes both fast and stable, even with limited playtime.
↖ VI. Advanced Details: Squeezing More Value from Every Run
To finish, here are some often-overlooked details that quietly decide whether you're stuck or rich.
↖ 1. Backpack Economics: Less Is More
If you often end up with a bag full of low-value junk because you hate wasting items, you will struggle to hit good hourly numbers.
Give yourself a hard rule:
- Items below 1k value each and non-stackable? Usually not worth carrying.
- In high-density buildings (Hospital, Grandioso, Pharmacy):
- Try to keep your bag dominated by Trinkets + high-value stackables.
- When you find something better, drop something worse immediately.
You're not just looting; you're curating a set of items that maximize value per slot.
That mental shift makes a huge difference over dozens of runs.
↖ 2. Fight vs Flight: When to Commit and When to Run
This is the main lever behind your death rate.
Use a simple rule of thumb:
- If your bag is already at or above ~70k and you hear players nearby (footsteps, gunshots, doors):
- Your priority becomes → leave alive.
- Only fight if you absolutely can't avoid it.
- If your bag is almost empty (early in the run):
- You can afford to be a bit more curious, maybe peek, maybe take a favorable fight.
- Losses hurt less, and wins can turbo-charge that run's value.
Over the long run, it's better to extract consistently with 70–90k
than to die every time you try to turn 80k into 120k.
↖ 3. Wolf Packs: Turning 5k into 25k
Sometimes you'll get Wolf Packs during your runs.
Most players undervalue them; I see them as profit multipliers.
The idea:
- Use Wolf Packs to help take down larger ARC units like Bastions or Bombardiers.
- Those big enemies drop specific, high-value pings/Trinkets.
- So you're effectively turning a modest item into a high-value drop.
If you're comfortable killing big ARCs with low-cost tactics:
- It's not unusual to see a run jump from 80k to 120k+ purely from one big ARC kill's loot.
The key is knowing your safe, budget-friendly ARC kill methods so you're not feeding gear for nothing.
↖ FAQ
Q1: I'm terrible at PVP and die constantly. Is this strategy still for me?
Yes. This strategy favors you.
Because it focuses on short, proximity-based runs with nearby extracts, your exposure window to PVP is smaller. Buried City especially lets you choose routes with many escape options. If you apply a strict see people, leave if bag is good rule, your net income will go up even if your individual gunfights don't improve much.
Q2: I don't have the Looting MK2 augment yet. Is everything doomed?
Not at all.
Without Looting MK2, you lose two secure slots and three Trinket slots, which lowers your ceiling, but the routes and logic still hold. Use the same proximity runs, stack what value you can, and treat your early farming as a way to fund Looting MK2 as your first key investment. It pays itself back quickly.
Q3: I'm always greedy. I hit 80k, think just one more room and then die. Any fix other than get good?
The fix is behavioral, not mechanical.
Set a hard threshold—say 70k—and literally tell yourself: The run ends when I cross this number. If it helps, write it on a sticky note on your monitor. Track your last 10 runs' net outcome. You'll see that leaving too early is far more profitable over time than dying trying to squeeze an extra 20k.
Q4: My weapons are weak and killing mobs is slow. Will this wreck my income?
It hurts a bit, but not as much as you think.
Most of your profit comes from opening containers and picking up loot, not fighting. As long as your gun can reliably delete close-range threats and basic mobs, you're fine. If mobs overwhelm you in open terrain, lean harder into indoor routes like Hospital and Grandioso where you can control engagements better.
Q5: I get lost easily. Buried City feels like a maze. How do I learn these routes?
Learn them one building at a time.
For a while, decide: Northeast spawn = Hospital, always. Run it until you can do it with your eyes half-closed. Then add Grandioso as your next target: west spawn → Grandioso. Only after those feel natural, bring the Pharmacy/Red+Maria combo into your muscle memory. The more you repeat, the less you think—the map will start feeling small.
↖ Conclusion: Proximity Farming Is Built for People Who Have a Life
The biggest turning point in my ARC Raiders wealth wasn't a weapon, an augment, or a lucky drop. It was when I stopped treating each raid as a big adventure and started treating it as a short, focused Coins run.
The loop is simple:
- Check spawn → pick the nearest high-density building cluster (Hospital / Grandioso / Pharmacy or Red+Maria).
- Dive in → loot ruthlessly but selectively → hit your target value (say 70k).
- Extract immediately, no hero plays.
- Thread in Lush Blooms and Electromagnetic Storm runs when they're active for bonus spikes.
- Let simple, repeatable math carry you to 5M.

Most Popular Posts
- ARC Raiders Riven Tides Key Room Guide: Best Hotel Keys, Loot Routes, Secure & Crane Storage
- ARC Raiders Damage Fireflies Trial Guide: Best Farm Method on Buried City Night Raid
- ARC Raiders Riven Tides Update: New Map & Items, ARC Turbine, Rewards, and Best Early Strategy
- ARC Raiders Bettina Guide: Best Build, Buffs, and How to Use It Against ARC
- Arc Raiders Season 4 Riven Tides Update, Rewards, Safe Skins, and Release Timeline
- ARC Raiders Solo Search Supply Drops Guide: Best Buried City Route, Beacon Locations
Popular Category Lists
- Grow a Garden / (286)
- ARC Raiders / (262)
- CoD: Black Ops 7 / (166)
- Monopoly Go / (146)
- MLB 26 / (145)
- Star Citizen / (112)
- Steal a Brainrot / (89)
- Sailor Piece / (68)
- ARK Survival Ascended / (67)
- Diablo IV / (61)
- Forza Horizon 6 / (60)
- Blox Fruits / (60)
- CoD: BLACK OPS 6 / (55)
- Adopt Me / (53)
- Path of Exile 2 / (48)
- Monster Hunter Wilds / (46)
- Windrose / (44)
- Path of Exile / (40)
- Grow a Garden 2 / (40)
- Bee Swarm Simulator / (36)


