0
0 Created: Jul 9,2026 | ARC Raiders
ARC Raiders Spaceport Open Containers Guide: 19K+ Solo Trial Route

Spaceport is brutal for open-container trials. The map is too wide, containers spawn with heavy RNG, and solos lose hard if they waste time full-clearing weak buildings.
The winning rule is simple: open the most containers per minute. Not every container. Not every room. Just the dense stuff.
This route hit 19K+ solo on Hidden Bunker using five keys, movement tools, and a late bunker finish.
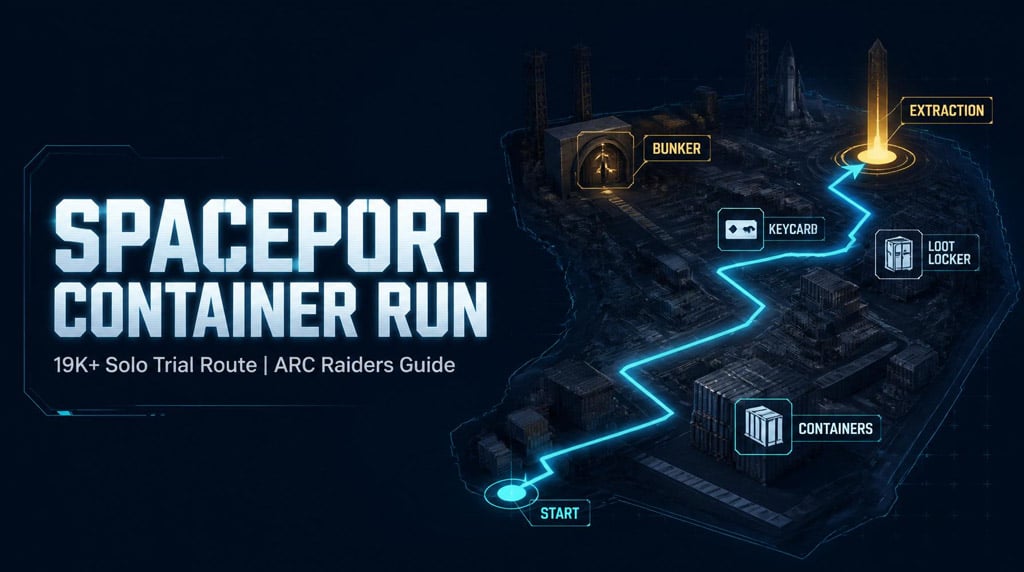
- ARC Raiders Spaceport Trial Basics
- Best Setup for Spaceport Open Containers
- Recommended Loadout
- Best Keys for Spaceport Container Trials
- 19K+ Solo Spaceport Route
- Route Priority Table
- Early Game: Loot Spawn, Then Move
- Shipping Warehouse: Best Early Key Room
- When to Hit Shipping Warehouse
- Trench Towers: Good With Keys, Still Useful Without
- What to Loot
- Arrivals: Good Building, Easy Time Trap
- Launch Towers: Must-Hit Container Zone
- Launch Tower Value
- Container Storage: Good Room, Bad Detour
- Control Tower: Quick Sweep Only
- Departures: Major Score Push
- Departures Loot Priority
- Hidden Bunker: Only Good If It Opens for Free
- Bunker Decision Table
- Final Extraction Rules
- RNG Matters More Than Players Admit
- Practical Rules for Better Solo Scores
- FAQ
- What score should we aim for in the Spaceport open containers trial?
- What is the best event for this ARC Raiders trial?
- Which Spaceport keys are worth using?
- Should we loot the Hidden Bunker?
- Why do Spaceport container scores vary so much?
- Summary
ARC Raiders Spaceport Trial Basics
Each searched container gives 75 trial points.
That means every delay has a real cost.
| Containers Opened | Trial Score |
|---|---|
| 100 | 7,500 |
| 150 | 11,250 |
| 200 | 15,000 |
| 250 | 18,750 |
| 260 | 19,500 |
To break 19K, we need roughly 254 containers.
That is the whole run. Every fight, bad rotation, missed jump, or useless breach is stealing containers from that number.
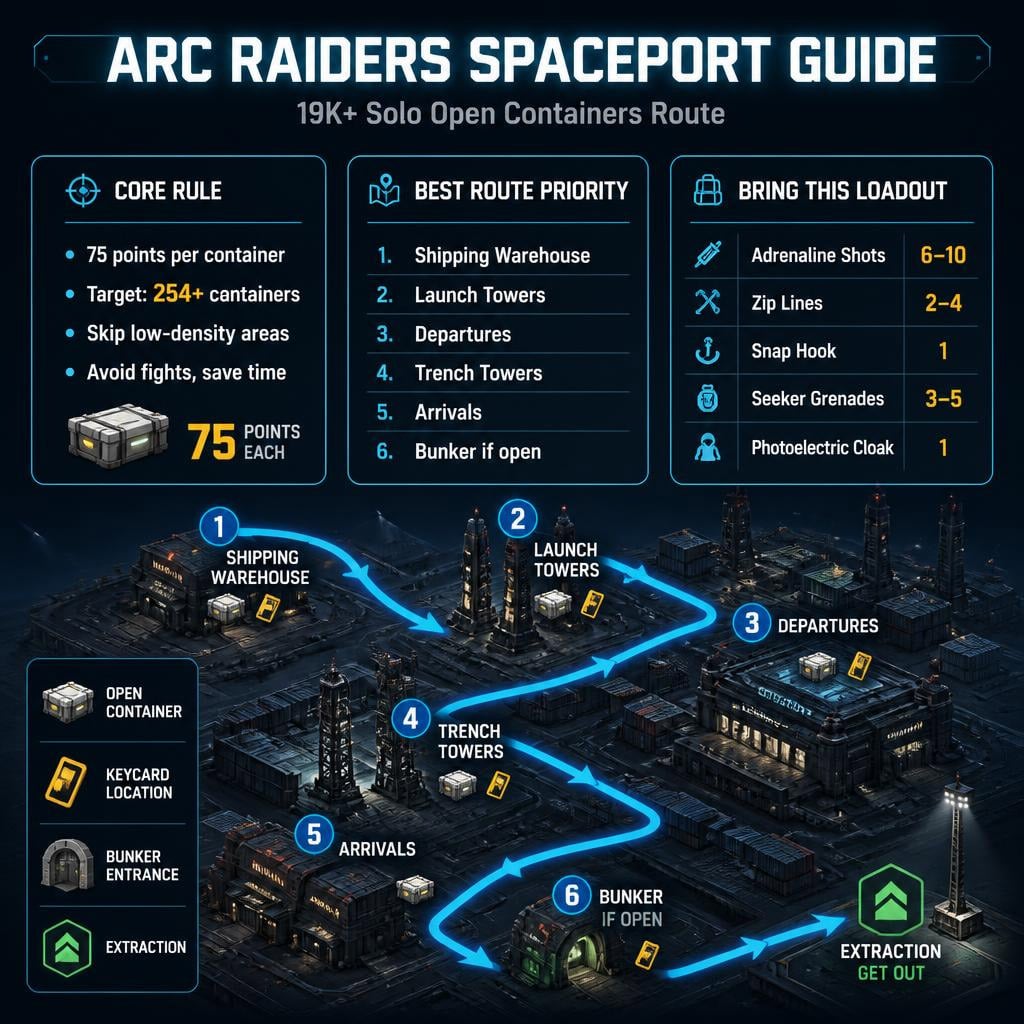
Best Setup for Spaceport Open Containers
Run this on Hidden Bunker.
It gives the full 40-minute timer, which Spaceport badly needs. Standard raids feel too tight for a serious solo score unless the spawn is perfect.
Recommended Loadout
| Item | Amount | Use |
|---|---|---|
| Adrenaline Shots | 6–10 | Sprint uptime, emergency rotations |
| Zip Lines | 2–4 | Faster tower access and map crossing |
| Snap Hook | 1 | Safe vertical movement |
| Seeker Grenades | 3–5 | Clear ARC without long fights |
| Photoelectric Cloak | 1 | Safer final extract |
| Keys | 3–5 | Access dense loot rooms |
Do not bring a fight kit. This is not a PvP run.
Bring tools that save time.
Best Keys for Spaceport Container Trials
Keys matter, but only if the room is dense. A bad key room is just a fancy way to waste your match.
| Key | Priority | Verdict |
|---|---|---|
| Shipping Warehouse Key | High | Best early value. Dense and fast. |
| North Trench Tower Key | High | Strong locker/container density. |
| South Trench Tower Key | Medium | Worth using if route allows. |
| Container Storage Key | Medium | Good room, bad if far away. |
| Control Tower Key | Low | Situational. Often not worth forcing. |
Put rare keys in your safe pocket. Bring duplicates only if you can afford to lose them.
One warning: if a room is already open, avoid blindly using the key prompt. It can still burn the key.
19K+ Solo Spaceport Route
The route is a big zigzag across the map:
1. Spawn area
2. Shipping Warehouse
3. Trench Towers
4. Arrivals
5. Launch Towers
6. Container Storage
7. Control Tower
8. Departures
9. Hidden Bunker
10. Final extraction
Do not force this exact order every raid. Your spawn decides the opening. The principle stays the same: hit dense zones, skip dead space.
Route Priority Table
| Priority | Location | Why It Matters |
|---|---|---|
| 1 | Shipping Warehouse | Fast key-room points |
| 2 | Launch Towers | One of the best container zones |
| 3 | Departures | Huge volume of suitcases/lockers |
| 4 | Trench Towers | Good with keys, usable without |
| 5 | Arrivals | Solid, but easy to overstay |
| 6 | Hidden Bunker | Great late if already open |
| 7 | Container Storage | Worth it only if nearby |
| 8 | Control Tower | Quick sweep only |
Early Game: Loot Spawn, Then Move
Loot your spawn area fast.
Grab:
- Car hoods
- Lockers
- Supply boxes
- Husk probes
- Husk bodies
- Easy wall containers
Then leave.
If you go 30–45 seconds without opening containers, you are losing the run. Rotate to a real building.
Shipping Warehouse: Best Early Key Room
Use Shipping Warehouse Key early if the route makes sense.
This room is strong because it is compact. You open the door, sweep containers, and leave. No maze. No long setup.
When to Hit Shipping Warehouse
| Situation | Action |
|---|---|
| Spawn nearby | Go immediately |
| Have the key | High-value stop |
| No key | Loot outside only |
| Heavy ARC pressure | Grenade, move, do not fight |
| Already open | Loot it, but protect your key |
This is one of the few key rooms that feels clearly worth the time.
Trench Towers: Good With Keys, Still Useful Without
Both Trench Towers can pay off.
The North Trench Tower felt stronger in this run, but container RNG can flip that. If we only have one key, north is the safer first pick.
What to Loot
| Area | Value |
|---|---|
| Locked tower rooms | High |
| Locker clusters | High |
| Upper access rooms | Medium |
| Exterior reachable lockers | Medium |
| Random scattered containers | Low |
No key? Use Zip Line or Snap Hook to reach upper sections and grab the accessible lockers.
Do not spend time hunting every corner. Towers are good because they are quick, not because they are worth a full inspection.
Arrivals: Good Building, Easy Time Trap
Arrivals has plenty of containers, but it is messy.
Sweep the obvious areas:
- Suitcases
- Lockers
- Main rooms
- Fast side rooms
- Wall panels on your path
Leave when density drops.
If you are halfway through the timer and still have Launch Towers, Departures, and Bunker left, stop poking around.
Launch Towers: Must-Hit Container Zone
The Launch Towers are one of the best places on Spaceport for this trial.
You want:
- Bottom lockers
- Top tower containers
- Weapon cases
- Grenade cases
- Any dense case cluster
Use movement tools cleanly. A bad fall costs more than health. It costs score.
Launch Tower Value
| Loot Type | Priority |
|---|---|
| Top containers | High |
| Lockers | High |
| Weapon/Grenade cases | High |
| Breachable containers | Low-medium |
| Scattered single containers | Low |
Do not over-breach. If a breach takes several seconds for one container, that is usually bad value.
Container Storage: Good Room, Bad Detour
Container Storage is worth it only if the route is efficient.
The key room has decent density. The nearby non-key room is also okay. But the travel time can kill the value.
| Condition | Decision |
|---|---|
| Spawn nearby | Loot it |
| Passing through with key | Worth it |
| Far away with low timer | Skip |
| No key | Only if nearby |
| Heavy ARC presence | Grab fast loot and leave |
In a 19K+ run, this is the first location we cut if timing is bad.
Control Tower: Quick Sweep Only
Control Tower is not a priority unless it is already open or directly on the route.
Loot:
- Lockers
- Easy containers
- Main interior rooms
Skip:
- Long roof checks
- Slow side searches
- Any area with poor density
If it feels empty, trust that read and leave.
Departures: Major Score Push
Departures is one of the best late-game buildings.
It has the volume needed to push the score from decent to competitive.
Departures Loot Priority
| Container Type | Priority |
|---|---|
| Suitcases | High |
| Lockers | High |
| Office containers | Medium-high |
| Side rooms | Medium |
| Single scattered containers | Low |
Move floor by floor. Clear clusters. Skip lonely containers unless they are directly on your path.
If you have under 6 minutes, start planning your bunker or extraction decision.
Hidden Bunker: Only Good If It Opens for Free
The bunker is strong, but opening it yourself is usually bad for this trial.
Let other players handle antennas if possible. If an antenna is directly on your route, activate it. Otherwise, keep looting.
There is also a delay after antenna activation before the bunker opens, so do not plan around instant access.
Bunker Decision Table
| Situation | Action |
|---|---|
| Bunker already open | Loot it late |
| Final extract nearby | Strong value |
| One antenna on your path | Activate it |
| Need to open it yourself | Usually skip |
| Under 3 minutes | Enter only if extract is very close |
Inside the bunker, loot fast and keep your exit in mind. It is easy to lose time getting turned around.
At 2 minutes, leave.
No debate.
Final Extraction Rules
Greed kills good runs.
The last minute is not for hero looting unless the container is beside the extract.
| Time Left | Rule |
|---|---|
| 5:00 | Finish current major area |
| 3:00 | Start moving toward extract |
| 2:00 | Leave bunker/deep interiors |
| 1:00 | Be at extract or next to it |
| 0:45 | Stop looting unless it is free |
Watch for Bastions and Bombardiers near extraction. They can erase a run faster than bad RNG.
Use Photoelectric Cloak if the final approach is exposed.
RNG Matters More Than Players Admit
Container spawns vary hard.
The same room can have fewer lockers from one raid to the next. That sounds small until you apply it across Spaceport.
| Missing Containers | Lost Score |
|---|---|
| 10 | 750 |
| 25 | 1,875 |
| 50 | 3,750 |
| 100 | 7,500 |
This is why two clean runs can end thousands of points apart.
A 19K run with bad container RNG may actually be cleaner than a 21K run with perfect spawns. Judge the route by pace, not just the final number.
Practical Rules for Better Solo Scores
Use these rules during the run.
- If you go 30–45 seconds without opening containers, rotate.
- If a room has 3+ containers, clear it.
- If a container requires a long detour, skip it.
- If ARC aggro gets messy, use Seeker Grenades and move.
- If a player is friendly, keep looting. Do not turn the run into PvP.
- If the bunker is not open naturally, do not force it.
- If the timer hits 2 minutes, extract path comes first.
Also watch the XP feed. A fresh container gives scavenging XP. If no XP appears, you already searched it.
That prevents accidental backtracking.
FAQ
What score should we aim for in the Spaceport open containers trial?
A strong solo target is 18K–20K+. Breaking 19K means opening around 254 containers, since each container gives 75 points.
What is the best event for this ARC Raiders trial?
Hidden Bunker is best because it gives the full 40-minute timer. Spaceport is too large to route comfortably with a shorter timer.
Which Spaceport keys are worth using?
The best keys are Shipping Warehouse Key, North Trench Tower Key, and South Trench Tower Key. Container Storage Key is good only if nearby. Control Tower Key is optional.
Should we loot the Hidden Bunker?
Yes, but only if it is already open and near the final extract. Do not waste the run opening it yourself unless an antenna is directly on your path.
Why do Spaceport container scores vary so much?
Container RNG. Some raids simply spawn fewer searchable containers. Losing 50 containers means losing 3,750 points, which explains huge score differences between similar routes.
Summary
For a 19K+ solo Spaceport open containers run, play Hidden Bunker, bring movement tools, protect your best keys, and route through dense container zones.
Best priority order:
1. Shipping Warehouse
2. Launch Towers
3. Departures
4. Trench Towers
5. Arrivals
6. Bunker if already open
7. Container Storage if nearby
8. Control Tower quick sweep
Do not full-clear weak areas. Do not take long fights. Do not gamble the extract for one more container.
The run is won by pace: dense rooms, clean rotations, fast exits, safe extraction.


The GGWTB Editorial Team features 10 full-time gaming editors and 23 specialist contributors, delivering hands-on tested walkthroughs, easter egg breakdowns, and game updates.
ELSA — who spearheads our in-depth COD: BLACK OPS 7, ARC Raiders guides, and patch notes—every guide is rigorously verified on live servers for accuracy.

Most Popular Posts
- ARC Raiders Update 1.42: Phantom Targets Farming Guide (Glitched Wasps, Rewards, Regional Conditions)
- ARC Raiders Hullcracker Blueprints: Fastest Way to Complete The Major's Footlocker
- ARC Raiders Best Pop Trigger Strategy: Fast Phantom Targets Damage Guide
- ARC Raiders Subway Skin Guide: Unlock the Subterranean Outfit
- ARC Raiders Looting Mk. 3 Survivor Blueprint Guide: Best Blue Gate Route and Drop Locations
- ARC Raiders Medium & Heavy Gun Parts Blueprint Guide: Best Farm Route, Locations, and Refiner Crafting
Popular Category Lists
- ARC Raiders / (353)
- Grow a Garden / (294)
- CoD: Black Ops 7 / (167)
- Star Citizen / (162)
- MLB 26 / (159)
- Monopoly Go / (152)
- ARK Survival Ascended / (128)
- Steal a Brainrot / (99)
- Blox Fruits / (74)
- Adopt Me / (74)
- Forza Horizon 6 / (72)
- Sailor Piece / (68)
- Grow a Garden 2 / (68)
- Diablo IV / (62)
- CoD: BLACK OPS 6 / (55)
- Aion 2 / (51)
- Path of Exile 2 / (48)
- Monster Hunter Wilds / (46)
- Windrose / (44)
- Maplestory Classic / (42)