0
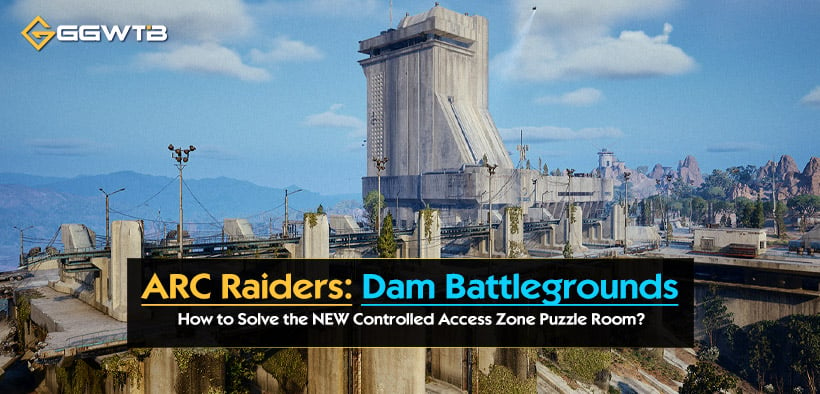
0ARC Raiders Dam Battlegrounds: How to Solve the NEW Controlled Access Zone Puzzle Room?
- KIVRI
- Share
- ARC Raiders
- 02/25/26
- 1489
The new Controlled Access Zone on Dam Battlegrounds looks like a simple locked door = bring key situation—until you realize it's a team-synced puzzle. The good news: once we treat it like a coordinated breach (not a solo scav run), the room opens reliably and the follow-up requirements make sense.
Below is the clean, repeatable way we've been using to get inside—without wandering in circles or arguing over which button counts.
- 1) What You Need?
- 2) Finding the Controlled Access Zone
- 3) Battery & 4 Buttons
- 4) The Follow-Up Gate: Materials You Must Provide
- 5) Loot Inside
- 6) The Extra Locked Door
- FAQs
- 1) Can We Do The Puzzle With Fewer Than 4 Players?
- 2) We Inserted The Battery But The Door Still Won't Open—what Did We Miss?
- 3) Where Does The Battery Usually Spawn?
- 4) What Materials Do We Need After The Buttons?
- 5) Is The Loot Worth Gathering A 4-person Team?
- 6) What About The Deeper Locked Door?
- Closing Notes
↖ 1) What You Need?
Before we even touch the door, we plan like it's a mini-raid objective. This saves time and prevents the classic we found the battery but nobody is on the last button disaster.
| Requirement | Why it matters | Notes from our runs |
|---|---|---|
| 4 players | The puzzle uses 4 separate buttons that must be pressed together | We couldn't complete it consistently with fewer |
| 1 power cell/battery | Powers the button system | We usually found it on the lower level of the zone |
| 1 Leaper Pulse Unit | Needed for the next locked step inside | You'll have to kill a Leaper (or bring one if you already have it) |
| 12 Metal Parts | Same follow-up requirement | Easy to scavenge; we keep a small stack before entering |
| Comms (voice or quick text) | Timing the 4-button press | A simple 3-2-1 press is enough |
This area is less puzzle room and more co-op gate. If you arrive solo, you can still prep everything, but you'll likely stall at the synchronized press.
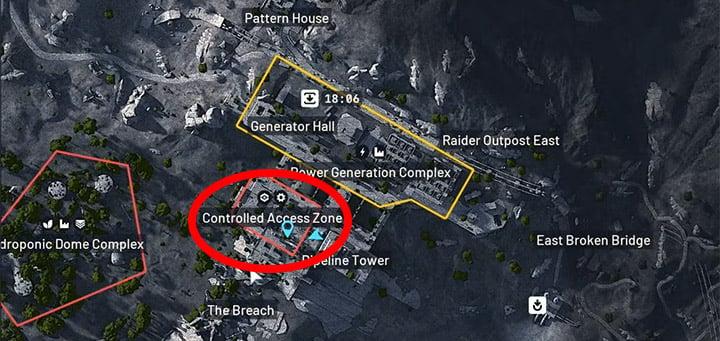
↖ 2) Finding the Controlled Access Zone
We approach from the Dam Battlegrounds side near the Breach and Pipeline Tower area.
- There's a backside entrance that feeds into interior corridors and containers.
- Expect it to be flagged as a high-risk/red zone style area (loot is better, but so is the danger).
Entering from the backside reduces the time you spend exposed while carrying the battery, and it gives you faster access to the lower-floor search lanes.
↖ 3) Battery & 4 Buttons
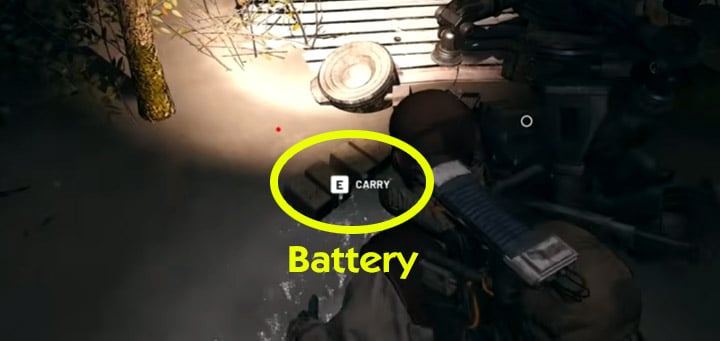
Step 1 — Sweep The Lower Level For The Battery
- Go down to the lower floor and search the ground-level lanes and corners.
- If you spot a battery/power cell, pick it up immediately.
If you don't find it quickly, then widen the sweep to the adjacent lower corridors—this room is big enough that battery visibility can be awkward from certain angles.
Step 2 — Insert The Battery Into The Slot
Carry the battery upstairs to the power slot and insert it.
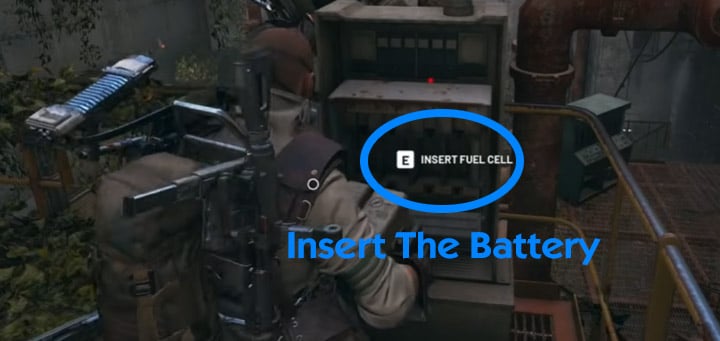
Because the button panel logic appears inactive without power, inserting the battery first prevents wasted test presses.
Step 3 — Assign One Player Per Button
There are 4 buttons distributed around the room. We do a quick role call:
| Role | Positioning rule | Callout |
|---|---|---|
| Button A | Stay planted—don't wander | A ready |
| Button B | Face the button; no early presses | B ready |
| Button C | Confirm you're at a distinct button | C ready |
| Button D | Team lead counts down | D counting |
If two players accidentally stack the same button, then the press will fail even if the timing is perfect. We always confirm 4 unique buttons before the countdown.
Step 4 — Press All 4 Buttons At The Same Time
- Use a simple cadence: 3, 2, 1, press.
- When it works, you'll get the door/lock state change that allows progression.
The puzzle is less about solving and more about synchronized execution. Treat it like a breach charge: Timing Beats Theory.
↖ 4) The Follow-Up Gate: Materials You Must Provide
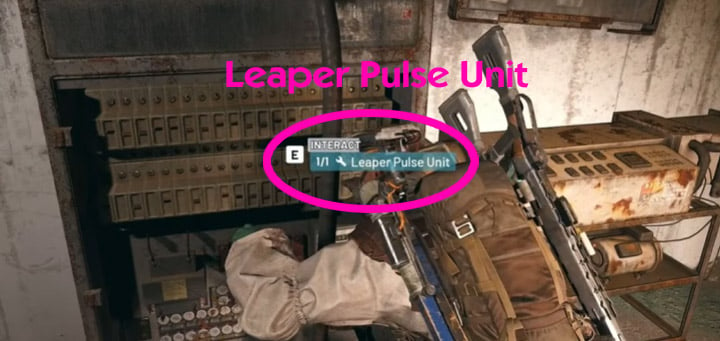
After the synchronized button unlock, there's an additional requirement gate. In our clears, it asked for:
- 1× Leaper Pulse Unit
- 12× Metal Parts
How We Handle It Efficiently?
- We grab metal parts during the initial sweep so we're not backtracking.
- We hunt a Leaper immediately after the button success, then return with the pulse unit.
If another squad is fighting the Leaper, then commit and finish the kill decisively—half-measures often mean you spend ammo and still lose the drop.
↖ 5) Loot Inside
Once inside, we found the room worth doing for:
- Multiple containers
- Weapon crates (we've seen more than one in a single run)
- A layout that supports quick in-and-out looting if your team stays disciplined
The value is real, but the clock is your enemy - 4 people in one spot makes noise, draws attention, and increases third-party risk. We loot on a tight route and leave.
↖ 6) The Extra Locked Door
Inside the area, there can be another locked door that appears to require a separate key (not the button puzzle).
- The button puzzle gets you into the Controlled Access Zone interior.
- The deeper locked room is a key-gated layer.
Don't assume the puzzle is the whole thing. Plan for a two-stage unlock: co-op sync first, key access later.
↖ FAQs
↖ 1) Can We Do The Puzzle With Fewer Than 4 Players?
In practice, we've needed 4 because there are 4 buttons that must be pressed in sync. If you try with fewer, you can still scout, power the system, and stage positions—but the final press is the blocker.
↖ 2) We Inserted The Battery But The Door Still Won't Open—what Did We Miss?
Most failures come from one of these:
- Someone pressed early (timing mismatch)
- Two players were on the same button (not 4 unique inputs)
- A player wasn't fully interacting with the button at press time
Fix: reset positions, confirm 4 distinct buttons, then do a clean countdown.
↖ 3) Where Does The Battery Usually Spawn?
Across our runs, the battery has most often shown up on the lower level, on the ground along the wider lanes. If you don't see it, do a full lower sweep before you assume it's bugged.
↖ 4) What Materials Do We Need After The Buttons?
We've had the follow-up requirement of 1 Leaper Pulse Unit + 12 Metal Parts. Metal parts are straightforward; the pulse unit usually means killing a Leaper (or arriving prepared).
↖ 5) Is The Loot Worth Gathering A 4-person Team?
If you can coordinate quickly, yes: weapon crates and dense containers make it a strong stop. If your team struggles to assemble or communicate, the opportunity cost can outweigh the reward—especially in a hot raid.
↖ 6) What About The Deeper Locked Door?
That door appears to require a key separate from the puzzle. Treat it as a second objective: clear the puzzle first, then pursue the key in later runs or as part of a broader route.
↖ Closing Notes
We get consistent clears by treating the Controlled Access Zone like a coordinated objective: power first, 4 unique buttons, synchronized press, then pay the material gate. Once your squad runs it once, it stops feeling like a maze and starts feeling like a reliable loot detour—just one that punishes sloppy timing.

Most Popular Posts
- ARC Raiders Riven Tides Key Room Guide: Best Hotel Keys, Loot Routes, Secure & Crane Storage
- ARC Raiders Riven Tides Update: New Map & Items, ARC Turbine, Rewards, and Best Early Strategy
- ARC Raiders Bettina Guide: Best Build, Buffs, and How to Use It Against ARC
- Arc Raiders Season 4 Riven Tides Update, Rewards, Safe Skins, and Release Timeline
- Best ARC Raiders Attachments for Every Weapon: Complete Weapon Mod Guide
- ARC Raiders Turbine Boss Guide: Spawn Time, Weak Points, Best Weapons, and Loot
Popular Category Lists
- Grow a Garden / (286)
- ARC Raiders / (267)
- CoD: Black Ops 7 / (166)
- Monopoly Go / (147)
- MLB 26 / (146)
- Star Citizen / (122)
- Steal a Brainrot / (89)
- ARK Survival Ascended / (77)
- Sailor Piece / (68)
- Forza Horizon 6 / (65)
- Diablo IV / (61)
- Blox Fruits / (61)
- CoD: BLACK OPS 6 / (55)
- Adopt Me / (55)
- Path of Exile 2 / (48)
- Grow a Garden 2 / (48)
- Monster Hunter Wilds / (46)
- Windrose / (44)
- Path of Exile / (40)
- Bee Swarm Simulator / (36)