0
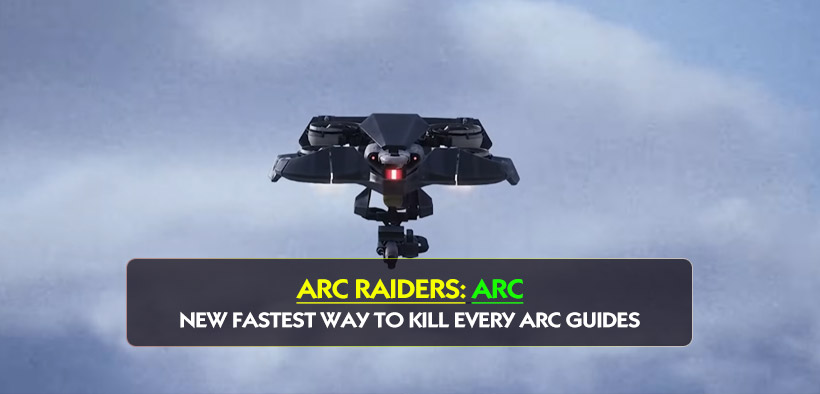
0ARC Raiders New Fastest Way to Kill Every ARC Guides
- KIVRI
- Share
- ARC Raiders
- 03/29/26
- 395
If you've played a few recent runs, you've probably felt it already: some ARC fights now feel much slower unless you use the right angle or weapon type.
That's the real shift. It's not just about bringing a stronger gun. In the current version of ARC Raiders, the fastest kill often comes down to where we shoot from, not just what we shoot with. After testing these fights across normal raid situations, the pattern is pretty clear: a lot of older habits still work, but they're no longer the best option.
- What Matters Most Now
- Fastest Way to Kill Each ARC
- Firefly, Hornet, and Wasp
- Firefly
- Hornet
- Wasp
- Comet
- What works best
- Rocketeer
- Best method
- Bastion, Bombardier, and Leaper
- Bastion
- Bombardier
- Leaper
- FAQ
- What's the best all-around ARC weapon right now?
- Why does Firefly sometimes die quickly and sometimes feel awful?
- Is Anvil bad against ARC now?
- What's the easiest solo ARC to practice on?
This guide keeps things simple. We'll go ARC by ARC and focus on the fastest practical kill method, the most common mistake, and the weapon style that feels most consistent in actual matches.
↖ What Matters Most Now
Before getting into each ARC, here's the main rule: projectile size, angle, and exposed weak points matter more than people think.
A heavy weapon can still be great, but if the weak point sits behind armor, a smaller or faster-firing gun often feels better. We notice this most on targets like Comet, where precision matters more than raw shot size.
| Factor | Why It Matters |
|---|---|
| Angle | Lets us hit weak points without wasting shots on armor |
| Projectile size | Bigger shots can clip armor instead of the core |
| Fire rate | Helps track moving weak points more reliably |
| DPS window | Important when a core opens only briefly |
That's the lens we should use for the rest of the guide.
↖ Fastest Way to Kill Each ARC
Here's the short version first.
| ARC | Best Current Method | What Usually Goes Wrong |
|---|---|---|
| Firefly | Shoot thrusters from above or below | Fighting it from flat ground only |
| Hornet | Hit rear thrusters when it tilts | Wasting shots on body armor |
| Wasp | Shoot the rear weak point | Taking it front-on every time |
| Comet | Use a precise fast weapon on the inner core | Using oversized shots on a tiny opening |
| Rocketeer | Throw Hornet Driver above it | Throwing at the body and disabling the gun instead |
| Bastion | Shoot upper red section from height, or knee then canister | Overcommitting to knees only |
| Bombardier | Clear spotters first, then strip armor and burst center | Ignoring support pressure |
| Leaper | Shoot the eye with heavy ARC pen | Trying to overcomplicate a simple fight |
Now let's make that more useful in practice.
↖ Firefly, Hornet, and Wasp
These three are easier once we stop fighting them at the worst angle.
↖ Firefly
The fastest way to kill a Firefly is still direct thruster damage, but the trick is the angle.
If you're slightly above or below the Firefly, you can often hit the thrusters without first breaking the armor plating. That cuts the fight down fast.
- Best case: 2 shots
- Backup plan: break armor, then destroy thrusters
The yellow canister can work, but in real fights it's less reliable and usually messier than just taking the thrusters.
↖ Hornet
Same logic here.
If you wait for the Hornet to tilt or you crouch for a lower angle, you can line up the rear thrusters and end the fight quickly.
↖ Wasp
The Wasp goes down much faster if you hit the back weak point.
A lot of players drag this fight out because they keep shooting from the front.
| ARC | Best Target | Most Reliable Weapon Style |
|---|---|---|
| Firefly | Thrusters | Medium/heavy with clean angle |
| Hornet | Rear thrusters | Accurate burst weapon |
| Wasp | Rear weak point | High-damage precision shots |
In practical terms, if these enemies feel tanky, it's usually a positioning problem first.

↖ Comet
Comet is the best example of why bigger gun does not always mean better kill speed.
We want to hit the inner core, but the opening is small and partly protected by the outer armor. That means large projectiles can clip the edge and lose damage.
↖ What works best
- Renegade feels very strong here
- A smaller, faster-firing weapon can also work well
- Anvil can hit hard, but it feels less forgiving if your aim is slightly off
If you find yourself hitting Comet but not doing enough damage, this is probably why.
| Weapon Type | Comet Result |
|---|---|
| Fast and precise | Most consistent |
| Heavy and slow | High damage, lower forgiveness |
This is one of the clearest weapon-matchup checks in the game right now.
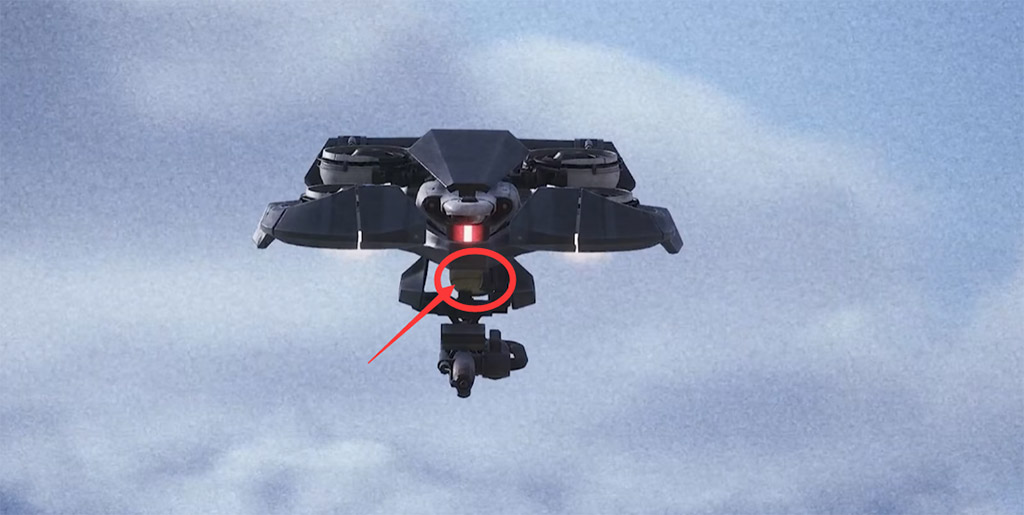
↖ Rocketeer
For Rocketeer, the key is not just using the Hornet Driver—it's using it correctly.
A lot of players throw it directly at the target, which usually disables the weapon system, not the thrusters. That's useful, but it's not the fast kill.
↖ Best method
Throw the Hornet Driver above the Rocketeer so it drops into the thruster area.
Also, stay within about 30 meters. If you're too far away, the throw becomes inconsistent.
| Do This | Avoid This |
|---|---|
| Throw above the Rocketeer | Throw directly at its body |
| Stay within 30m | Trying from long range |
| Aim for multi-thruster disable | Settling for one side hit |
Once you understand the throw angle, the fight becomes much easier.

↖ Bastion, Bombardier, and Leaper
These three are less about clever tricks and more about using the right damage window.
↖ Bastion
Most players focus too hard on the knees. That still works, but it's not always the fastest method.
From real raid experience, the more reliable approach is often:
- get some height,
- shoot the upper red section,
- and stay consistent.
If you have a high-DPS weapon, then the classic knee break into back canister combo is still excellent.
↖ Bombardier
This is still one of the slower fights without ideal gear.
The best practical move is:
1. kill the spotters first,
2. strip the outer armor,
3. dump damage into the center.
If you ignore the support pressure, this fight becomes far more annoying than it needs to be.
↖ Leaper
Leaper is simple:
- bring heavy ARC penetration
- shoot the eye
- keep firing
There isn't much hidden tech here anymore.
| ARC | Best Practical Method | Why It Works |
|---|---|---|
| Bastion | Red upper section from height | Safer and more consistent |
| Bombardier | Clear spotters, then burst exposed center | Creates actual damage windows |
| Leaper | Heavy ARC pen into eye | Straightforward damage check |
↖ FAQ
↖ What's the best all-around ARC weapon right now?
If we're not counting top-end tools like Deadline or Wolfpack, Renegade is one of the best all-around options because it handles moving weak points well and feels more forgiving than slower heavy weapons.
↖ Why does Firefly sometimes die quickly and sometimes feel awful?
Because angle decides the whole fight. If you can see the thrusters cleanly, it dies fast. If you fight it from flat ground into armor, it drags.
↖ Is Anvil bad against ARC now?
No. It's still strong. It just isn't automatically the best choice for every ARC, especially when the weak point is small or recessed.
↖ What's the easiest solo ARC to practice on?
Firefly and Hornet are good practice targets because they teach positioning and angle discipline without forcing a very long fight.
Final Thoughts
The best ARC players aren't always using rarer gear—they're usually just taking the fight from a better angle.
That's why Firefly drops in two shots for one player and feels terrible for another. It's why Comet rewards precision more than raw bullet size. And it's why some ARC fights still feel easy after the latest changes, as long as we stop forcing outdated habits. If we keep the angle clean, use the weapon that matches the weak point, and don't tunnel on the obvious armor plate, most of these fights become much faster and much safer.

Most Popular Posts
- ARC Raiders Riven Tides Key Room Guide: Best Hotel Keys, Loot Routes, Secure & Crane Storage
- ARC Raiders Bettina Guide: Best Build, Buffs, and How to Use It Against ARC
- Best ARC Raiders Attachments for Every Weapon: Complete Weapon Mod Guide
- ARC Raiders Turbine Boss Guide: Spawn Time, Weak Points, Best Weapons, and Loot
- Arc Raiders Patch 1.27: Regional Pricing, Augment Rework, and Expedition Catch-Up
- ARC Raiders Update Guide: Best Nomadic Envoy Trades, Rascal Grenade Launcher, Durability Buffs
Popular Category Lists
- ARC Raiders / (291)
- Grow a Garden / (286)
- CoD: Black Ops 7 / (166)
- MLB 26 / (150)
- Monopoly Go / (148)
- Star Citizen / (129)
- ARK Survival Ascended / (91)
- Steal a Brainrot / (90)
- Sailor Piece / (68)
- Forza Horizon 6 / (67)
- Diablo IV / (62)
- Blox Fruits / (62)
- Adopt Me / (58)
- Grow a Garden 2 / (57)
- CoD: BLACK OPS 6 / (55)
- Path of Exile 2 / (48)
- Monster Hunter Wilds / (46)
- Windrose / (44)
- Path of Exile / (40)
- Bee Swarm Simulator / (37)