0
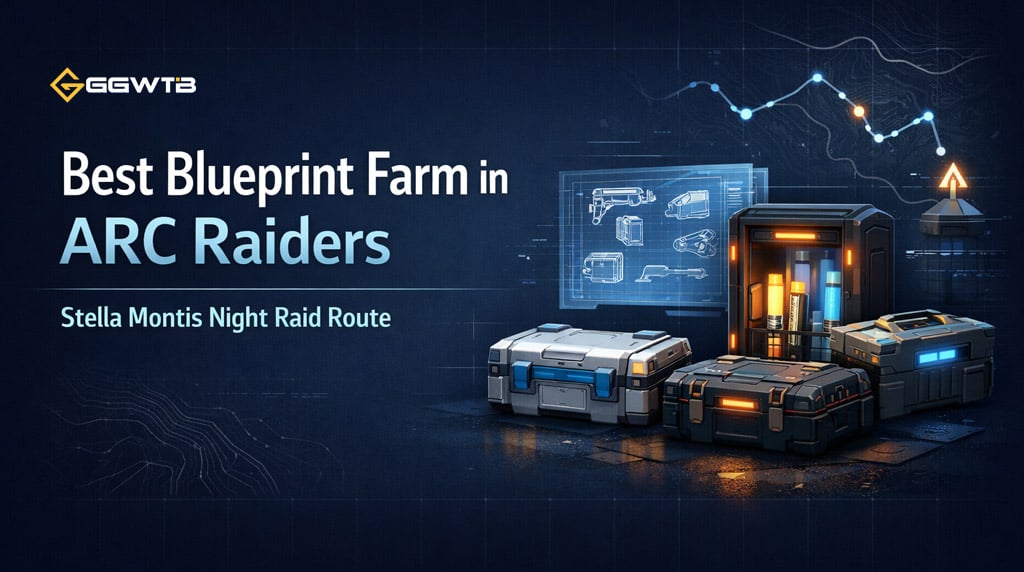
0ARC Raiders Best Blueprint Farm Guides: Stella Montis Night Raid Route
- KIVR
- Share
- ARC Raiders
- 04/27/26
- 760
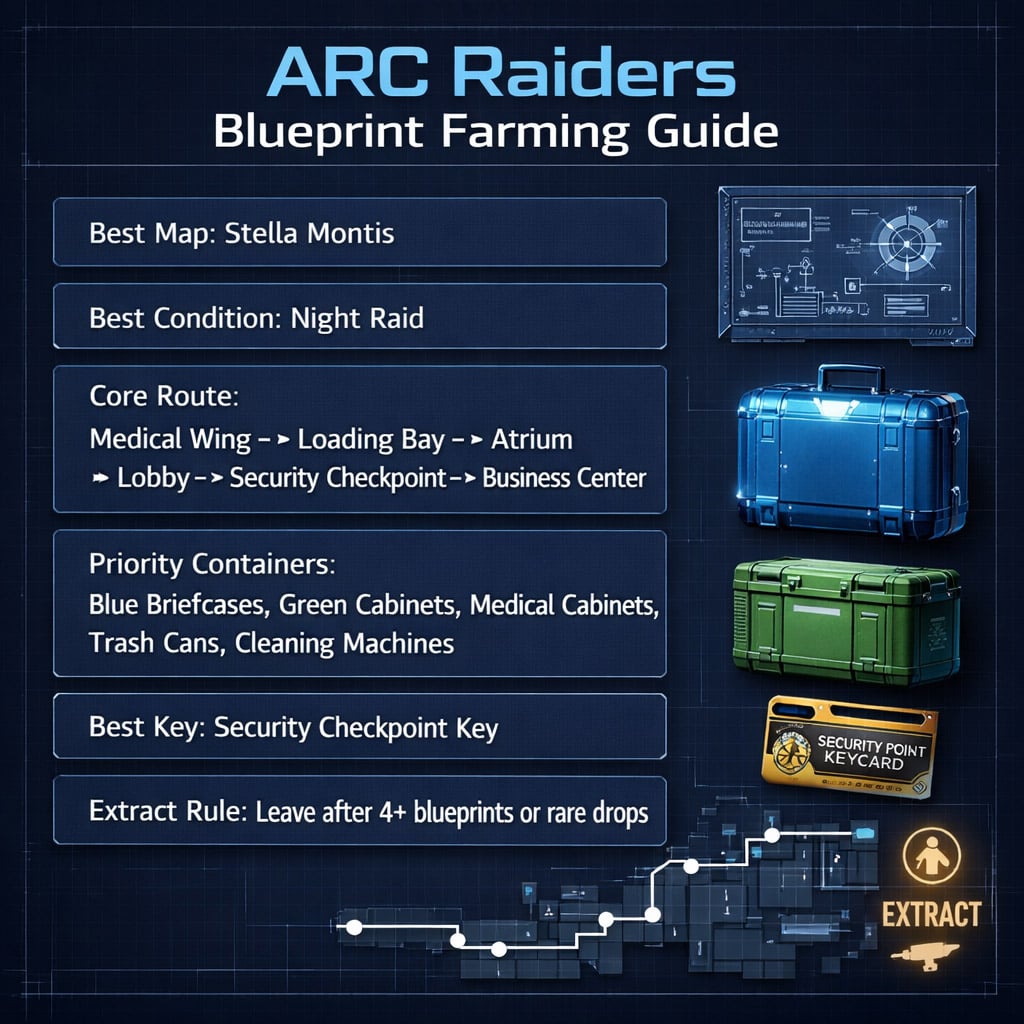
If we want blueprints fast in ARC Raiders, the best place to farm right now is Stella Montis during night raids. The map is smaller than most, the loot rooms are packed tightly together, and the right containers can drop a surprising number of blueprints in one run.
This route is especially useful after an expedition reset, when we need to rebuild our crafting options quickly. It is not a guaranteed nine-blueprint run every time, but from experience, this is one of the most consistent ways to walk out with two to five blueprints, with lucky runs going much higher.
- Why Stella Montis Night Raids Work So Well
- Best Loadout for Blueprint Runs
- Main Stella Montis Blueprint Route
- Best Containers to Open
- Area Breakdown
- Medical Wing
- Loading Bay
- Atrium and Cafeteria
- Lobby
- Security Checkpoint
- Business Center
- When to Extract
- Common Mistakes to Avoid
- FAQ
- What is the best map for blueprint farming in ARC Raiders?
- Are night raids better for blueprints?
- What is the best key for this route?
- Which containers should we always check?
- How many blueprints can we get per run?
- Should new players use this route?
- Summary
↖ Why Stella Montis Night Raids Work So Well
Stella Montis is strong because we spend less time running and more time opening high-value containers. Night raids also tend to have better loot quality, which makes them the best condition for blueprint farming.
The goal is simple: hit dense loot areas early, check the containers players often ignore, then extract before greed ruins the run.
| Factor | Why It Matters |
|---|---|
| Small map size | Faster rotations between loot zones |
| Night raid loot | Better overall loot quality |
| Dense rooms | More blueprint rolls per minute |
| Many overlooked containers | Trash cans and cleaning machines often stay unlooted |
| Key room access | Security Checkpoint can produce strong blueprint drops |
If you spawn near a major loot area, farm that area first. If you spawn far away, do not sprint across the whole map just to find empty cabinets. Someone probably got there before you.
↖ Best Loadout for Blueprint Runs
We do not need a perfect kit for this route. We need enough gear to survive, clear small ARC threats, and defend ourselves if another Raider gets aggressive.
| Slot | Recommended Choice | Reason |
|---|---|---|
| Weapon | Reliable mid-tier gun | Good enough for ARC enemies and emergency fights |
| Key | Security Checkpoint Key | One of the best blueprint rooms on Stella Montis |
| Backpack | Medium or larger | Blueprints and crafting items fill space fast |
| Healing | Basic heals and shield recharge | Keeps the run alive after small mistakes |
Do not bring gear so expensive that you play scared. Blueprint farming works best when we move quickly and make clean decisions.
↖ Main Stella Montis Blueprint Route
The best route depends on spawn, but these are the areas we want to prioritize.
| Priority | Area | What to Loot |
|---|---|---|
| 1 | Medical Wing | Medical cabinets, drawers, bags |
| 2 | Loading Bay | Green cabinets |
| 3 | Atrium | Blue briefcases, cleaning machines |
| 4 | Lobby | Briefcases, trash cans, cabinets |
| 5 | Security Checkpoint | Key room containers |
| 6 | Business Center | Blue briefcases, cleaning machines |
| 7 | Top Floor Rooms | Metal cabinets, weapon cases |
This route works because each stop has multiple containers that can roll blueprints. We are not chasing one magic box. We are stacking chances.
↖ Best Containers to Open
A lot of players miss value because they only check obvious cabinets. From repeated runs, some of the boring containers are absolutely worth opening.
| Container | Priority | Notes |
|---|---|---|
| Blue briefcases | Very High | Great for attachment and weapon-related blueprints |
| Green cabinets | Very High | Can drop grenade, attachment, and utility blueprints |
| Medical cabinets | High | Strong in Medical Wing |
| Trash cans | High | Surprisingly good; never skip them nearby |
| Cleaning machines | Medium-High | Can drop useful materials and occasional strong loot |
| Metal cabinets | Medium-High | Worth checking in upper rooms |
| Ammo boxes | Medium | Can roll certain weapon blueprints |
| Drawers | Medium | Best when grouped together |
If you are short on time, open blue briefcases, green cabinets, medical containers, trash cans, and key room loot first.
↖ Area Breakdown
↖ Medical Wing
Medical Wing is one of the best starts on Stella Montis. It can produce medical, utility, augment, and general blueprint drops.
If you spawn here, loot it immediately. Check every cabinet, drawer, bag, and nearby trash can. This area gets cleared fast, so arriving late usually means slim pickings.
Best finds here often include:
- Medical blueprints
- Utility blueprints
- Mine-related drops
- Augment-style blueprints
- Defib-related items
If you pull two or three blueprints early, start thinking about extraction instead of forcing the whole map.
↖ Loading Bay
The green cabinets in Loading Bay are better than they look. They can drop useful blueprints, keys, and crafting items.
If you pass through this area, check the green cabinets every time. It takes very little time, and the upside is high.
↖ Atrium and Cafeteria
The Atrium is close to the Lobby and has several containers players often rush past.
Look for:
- Blue briefcases
- Cleaning machines
- Trash cans
- Drawers
- Weapon case spawns
The Cafeteria is more of a quick side check. If it is unlooted, open the drawers and small containers. If everything is already touched, move on.
↖ Lobby
The Lobby is one of the strongest blueprint zones on the map. It has tons of briefcases, trash cans, cabinets, and side rooms.
The catch is that it is popular. If you spawn near Lobby, hit it early. If you arrive late, go upstairs and check the rooms people often ignore.
Good Lobby habits:
- Check all blue briefcases.
- Open every nearby trash can.
- Look for metal cabinets upstairs.
- Check side rooms before leaving.
- Do not skip the darker top-floor area.
This is often where a normal run turns into a great one.
↖ Security Checkpoint
If we bring one key, it should usually be the Security Checkpoint Key.
This room can be very good for augment-style blueprints and other high-value drops. It does not always explode with loot, but over repeated runs, it is one of the better locked rooms for blueprint farming.
| Key Room | Why It Is Worth It |
|---|---|
| Security Checkpoint | Strong chance at useful augment and rare blueprint drops |
| No key route | Still very viable if we farm Medical Wing, Lobby, and Business Center |
If you already have several blueprints and the key room is far away, extract instead. A safe backpack beats a risky maybe.
↖ Business Center
Business Center is packed with blue briefcases, which makes it a great late-route stop.
The main danger here is ticks. Clear them before looting. If one jumps you while you are carrying an item or distracted, the run can go bad quickly.
Once safe, check:
- Blue briefcases
- Cleaning machines
- Trash cans
- Ammo boxes
- Nearby drawers
If this room is untouched, it can easily add one or two extra blueprints to a run.
↖ When to Extract
This is where many blueprint runs fall apart. We find good loot, get excited, push one more room, and lose everything.
Use this simple rule:
| Situation | Best Decision |
|---|---|
| 0–1 blueprints | Keep farming if safe |
| 2–3 blueprints | Continue only if nearby rooms are untouched |
| 4+ blueprints | Start planning extraction |
| Rare blueprint found | Extract unless the exit path is unsafe |
| Lobby feels active | Leave instead of gambling |
If your bag already has value, the run is successful. Do not let one extra cabinet turn into a loading-screen regret.
↖ Common Mistakes to Avoid
Blueprint farming is mostly about discipline. The route is simple, but small mistakes cost runs.
| Mistake | Better Play |
|---|---|
| Ignoring trash cans | Open them when nearby |
| Running across the whole map late | Farm your spawn side first |
| Skipping upper floors | Check overlooked rooms and cabinets |
| Staying too long after good drops | Extract once the bag is valuable |
| Fighting every player | Avoid fights unless necessary |
| Forgetting ticks in Business Center | Clear threats before looting |
If you notice an area has already been looted, do not force it. Rotate to overlooked containers or leave.
↖ FAQ
↖ What is the best map for blueprint farming in ARC Raiders?
Stella Montis is one of the best maps for blueprint farming because it is compact and has many high-value containers close together.
↖ Are night raids better for blueprints?
Yes. Night raids generally offer better loot quality, which makes them the preferred condition for blueprint farming.
↖ What is the best key for this route?
The Security Checkpoint Key is the best key to bring for this route because the room can drop strong augment and rare blueprint options.
↖ Which containers should we always check?
Prioritize blue briefcases, green cabinets, medical cabinets, trash cans, and key room containers. Cleaning machines are also worth checking when safe.
↖ How many blueprints can we get per run?
Most solid runs give around two to five blueprints. Lucky runs can go higher, especially if Medical Wing, Lobby, and Business Center are still unlooted.
↖ Should new players use this route?
Yes. This route is great for new or returning players because it helps unlock practical crafting options quickly after resets or expeditions.
↖ Summary
The best blueprint farm in ARC Raiders is a focused Stella Montis night raid route built around Medical Wing, Loading Bay, Atrium, Lobby, Security Checkpoint, Business Center, and top-floor side rooms.
The logic is simple: spawn close, loot fast, prioritize the right containers, and extract once the backpack is worth protecting. We do not need to clear the whole map. We need to make every minute count.
For consistent results, farm the high-density rooms, never ignore trash cans, bring the Security Checkpoint Key when possible, and leave before a good run turns into a lost one.

Most Popular Posts
- ARC Raiders Riven Tides Key Room Guide: Best Hotel Keys, Loot Routes, Secure & Crane Storage
- ARC Raiders Riven Tides Update: New Map & Items, ARC Turbine, Rewards, and Best Early Strategy
- ARC Raiders Bettina Guide: Best Build, Buffs, and How to Use It Against ARC
- Arc Raiders Season 4 Riven Tides Update, Rewards, Safe Skins, and Release Timeline
- Best ARC Raiders Attachments for Every Weapon: Complete Weapon Mod Guide
- ARC Raiders Turbine Boss Guide: Spawn Time, Weak Points, Best Weapons, and Loot
Popular Category Lists
- Grow a Garden / (286)
- ARC Raiders / (267)
- CoD: Black Ops 7 / (166)
- Monopoly Go / (147)
- MLB 26 / (146)
- Star Citizen / (122)
- Steal a Brainrot / (89)
- ARK Survival Ascended / (77)
- Sailor Piece / (68)
- Forza Horizon 6 / (65)
- Diablo IV / (61)
- Blox Fruits / (61)
- CoD: BLACK OPS 6 / (55)
- Adopt Me / (55)
- Path of Exile 2 / (48)
- Grow a Garden 2 / (48)
- Monster Hunter Wilds / (46)
- Windrose / (44)
- Path of Exile / (40)
- Bee Swarm Simulator / (36)