0
0Arc Raiders Shrouded Sky Update: Defeating Comets, Fireflies & More
- KIVRI
- Share
- ARC Raiders
- 02/26/26
- 542
Here is a structured overview of the current state of combat in Arc Raiders. A while back, certain tactics worked flawlessly, but Embark Studios has recently nerfed many of our favorite cheat codes. Wolfpacks, while still the undisputed god-tier option for dealing with any Arc, are now significantly harder to craft since you need a rocketeer driver.
What this means for us is that relying solely on explosive spam is no longer viable. Furthermore, the Shrouded Sky update introduced two massive headaches: the Comet and the Firefly. If you find yourself short on wolf packs or struggling with the recent balance changes, this guide is built specifically for you. We are going to break down the most efficient, ammo-saving, and reliable methods to take out every single Arc currently roaming the map.
Let's unpack these strategies step by step, categorized by the type of threat you will face.
- The Ground Fodder: Ticks, Pops, Comets, and Surveyors
- The Aerial Threats: Snitches, Wasps, Hornets, and Fireflies
- High-Risk Rocketeer Tactics
- The Heavy Hitters: Turrets, Shredders, and Leapers
- The Behemoths: Bastions, Bombaders, Queens, and Matriarchs
- The Mounting Strategy (Bosses)
- Frequently Asked Questions
- Final Tactical Takeaways
↖ The Ground Fodder: Ticks, Pops, Comets, and Surveyors
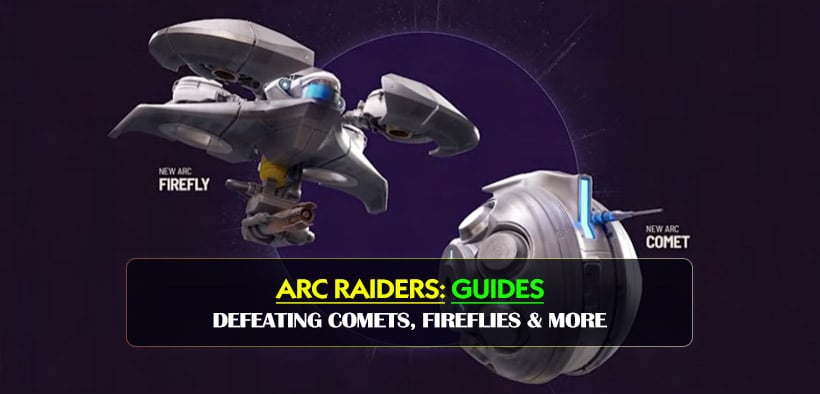
These ground-based Arcs might seem manageable, but they can quickly overwhelm you if handled improperly. The Comet, one of the newest additions, acts as a much deadlier version of the Pop.
Because Surveyors will immediately roll away upon taking damage, you must approach them with a specific trap-and-destroy mindset. Here is the breakdown of how to handle the light-to-medium ground units.
| Arc Type | Primary Threat | Optimal Weapon / Tool | Best Kill Strategy |
|---|---|---|---|
| Tick | Ambush from ceilings/walls | Melee Tool or Light Ammo | Jump and smack with melee for a quiet kill, or shoot them off the ceiling. |
| Pop | Suicide bombing | Any firearm | Shoot the round center of the body before they reach you. Do not shoot the resilient outer ring. Alternatively, dodge at the last second. |
| Comet (New) | Heavy suicide bombing | Environment / Cover | They take 5 Anvil shots to destroy. It is much safer to bait their charge-up explosion near cover, then leap behind it. |
| Surveyor | Fleeing and alerting | Heavy Ammo (Anvil/Pharaoh) | Sneak up while transmitting to shoot unarmored parts. If using light ammo, bait them into an object, deploy barricades to trap them, and dismantle. |
| Fireball | Rolling fire attacks | Heavy Ammo (Anvil/Pharaoh) | One-shot center mass with heavy ammo. If using light ammo, wait for it to roll up, expose its armor to attack, shoot the core, and immediately roll away to avoid the fire pool. |
↖ The Aerial Threats: Snitches, Wasps, Hornets, and Fireflies
Taking control of the skies requires precision. Why waste multiple seeker grenades on a Snitch when a few well-placed bullets do the trick? The key to defeating flying Arcs usually lies in destroying their mobility.
The Firefly is the second new Arc added in 2026, essentially acting as a Hornet on steroids with a devastating close-range flamethrower. Always prioritize breaking the turbines of these enemies before they can close the distance.
| Arc Type | Primary Threat | Optimal Target Area | Best Kill Strategy |
|---|---|---|---|
| Snitch | Alerting other Arcs | The Wings | Shoot and break 2 of its 3 wings to make it crash. Do not use seeker grenades (it takes 2) or shoot the center body (wastes ammo). |
| Wasp | Aerial harassment | Turbines | 1 Seeker grenade kills it instantly. Otherwise, shoot 2 of its 4 turbines. Sometimes breaking 1 turbine causes it to crash into objects and explode. |
| Hornet | Electric stun charge | Back Turbines | Shoot the 2 unarmored back turbines to make it crash. If aiming front, you must break the protective armor first. Dodge the telegraphed stun attack. |
| Firefly (New) | Close-range Flamethrower | Turbines or V-Armor | 2 shots from an Anvil/Pharaoh. Break 2 turbines, or shoot the V-shaped black armor above its eyes and repeatedly shoot the exposed area before it gets close. |
| Rocketeer | High-speed rocket barrages | V-Armor / Turbines | Engage from extreme distance with an Anvil 4/Pharaoh 4 to confuse its AI (it will hover gently instead of swooping). Break the V-shaped armor above the eye and shoot the exposed core. |
↖ High-Risk Rocketeer Tactics
If you are feeling incredibly bold, you can use a snap hook to latch onto a Rocketeer, climb on top, plant a deadline mine on its back, and jump off. This will one-shot the Rocketeer, but it requires a safe landing strategy and is only recommended for veteran players.
↖ The Heavy Hitters: Turrets, Shredders, and Leapers
This is where the recent Embark Studios nerfs are felt the most. Why did fire stop working against Leapers? Because the developers realized it was a complete cheat code. In 2026, dumping flame sprays or blaze grenades into a Leaper will just waste your inventory.
When dealing with stationary or heavily armored targets, positioning and heavy ammo are your best friends.
| Arc Type | Primary Threat | Optimal Weapon / Tool | Best Kill Strategy |
|---|---|---|---|
| Turret | Suppressive fire | Snap Blast Grenade | 1 Snap blast grenade destroys it. Alternatively, 2 bullets from an Anvil/Pharaoh, or spam light ammo at its back when it looks away. |
| Sentinel | Heavy telegraphed fire | Snap Blast / Blaze Grenade | Wait for the highly telegraphed charge-up animation, then hit it with a Snap blast or Blaze grenade from behind cover. |
| Shredder | Heavy stationary damage | Synth Fuel / Holecracker | Throw 1 red can of synth fuel near it and shoot the can, finish with gunfire. Or use 2 quick shots from a Holecracker. Always shoot center mass engines, never the tiny wing flaps. |
| Leaper | Aggressive melee leaps | Trailblazer / Heavy Ammo | Fight them near doorways (they struggle to pass through). Hit with 1-2 Trailblazer grenades, then repeatedly shoot the center of their big red eye with heavy ammo. |
↖ The Behemoths: Bastions, Bombaders, Queens, and Matriarchs
At the very top of the food chain sits the Matriarch, requiring absolute precision and situational awareness to defeat. Engaging these massive Arcs requires patience, a lot of space, and preferably heavy weaponry.
If you are hunting the Queen, doing it in a solo lobby is highly recommended. Trio lobbies often devolve into heavy PvP griefing, whereas solo players are much more likely to organically group up and take down the boss together.
| Arc Type | Primary Threat | Optimal Weapon / Tool | Best Kill Strategy |
|---|---|---|---|
| Bastion / Bombader | Massive AoE and armor | Wolf Packs / Deadline Mine | Throw 2 Wolf packs from directly above (ensure clear airspace). Budget method: Shoot yellow leg joints to stun -> shoot yellow back canister until it breaks -> shoot exposed red core. |
| The Queen | Extreme damage / Fire | Heavy / Energy / Holecracker | Use the Harvester as cover. Strip her outer armor with heavy weapons until she looks like a metal skeleton, then shoot the core. Alternatively, shoot the yellow joints underneath her. |
| The Matriarch | Rockets and reinforcements | Equalizer / Aelion / Jupiter | Armor rolls back from the front. Strip the front armor with high-tier weapons to permanently expose the core. Be ready to heal instantly, as she will fire her own rockets at you even if you mount her. |
↖ The Mounting Strategy (Bosses)
Just like the Rocketeer, you can use the snap hook to get on top of the Queen or Matriarch. Shoot the metal plate at the top of their body until it breaks, place a deadline mine, and get out. It takes about 8-9 deadlines to kill a Queen this way, but even planting one deals massive damage. However, riding the Matriarch is exceptionally dangerous because she frequently calls in Rocketeer or Bombader backups.
↖ Frequently Asked Questions
Are Wolf packs still worth using?
Yes, they remain the most powerful tool in the game. If you throw one at a Rocketeer, it will completely kill it. However, if there are other Arcs nearby, the Wolf pack projectiles will divide among targets, leaving the Rocketeer alive and angry. Always ensure your target is isolated.
How many Trailblazer grenades does it take to kill a Bastion now?
Following the recent nerfs, it now takes around six Trailblazer grenades to kill a Bastion or Bombader, up from the previous three.
What should I bring to a Queen or Matriarch fight?
Always bring a backup shield in your backpack. These bosses hit incredibly hard and can completely break your shield beyond repair mid-fight.
↖ Final Tactical Takeaways
Surviving the 2026 meta requires a shift from brute-force explosive spam to surgical precision. By memorizing the exact weak points—like the V-shaped armor on Rocketeers, the unarmored back turbines on Hornets, and the yellow joints on Bastions—you will save precious heavy ammo and drastically increase your survival rate.
Always dictate the terms of the engagement. Engage Rocketeers from maximum distance to break their AI charging behavior, fight Leapers near doorways to exploit their pathing issues, and bait Comets into exploding harmlessly against cover. Equip your Anvil or Pharaoh, manage your distance, and you will clear the map with ease.

Most Popular Posts
- ARC Raiders Riven Tides Key Room Guide: Best Hotel Keys, Loot Routes, Secure & Crane Storage
- ARC Raiders Riven Tides Update: New Map & Items, ARC Turbine, Rewards, and Best Early Strategy
- ARC Raiders Bettina Guide: Best Build, Buffs, and How to Use It Against ARC
- Arc Raiders Season 4 Riven Tides Update, Rewards, Safe Skins, and Release Timeline
- Best ARC Raiders Attachments for Every Weapon: Complete Weapon Mod Guide
- ARC Raiders Turbine Boss Guide: Spawn Time, Weak Points, Best Weapons, and Loot
Popular Category Lists
- Grow a Garden / (286)
- ARC Raiders / (267)
- CoD: Black Ops 7 / (166)
- Monopoly Go / (147)
- MLB 26 / (146)
- Star Citizen / (122)
- Steal a Brainrot / (89)
- ARK Survival Ascended / (77)
- Sailor Piece / (68)
- Forza Horizon 6 / (65)
- Diablo IV / (61)
- Blox Fruits / (61)
- CoD: BLACK OPS 6 / (55)
- Adopt Me / (55)
- Path of Exile 2 / (48)
- Grow a Garden 2 / (48)
- Monster Hunter Wilds / (46)
- Windrose / (44)
- Path of Exile / (40)
- Bee Swarm Simulator / (36)