0
0How to Unlock ARC Raiders Controlled Access Zone Puzzle Room in Dam Battlegrounds?
- KITE
- Share
- ARC Raiders
- 02/25/26
- 1312
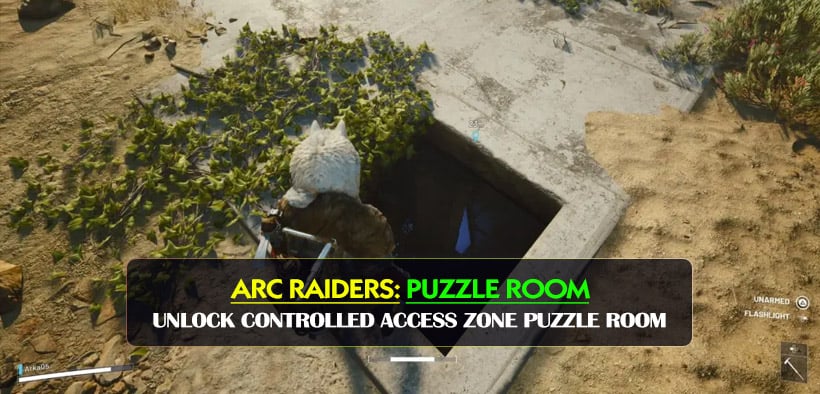
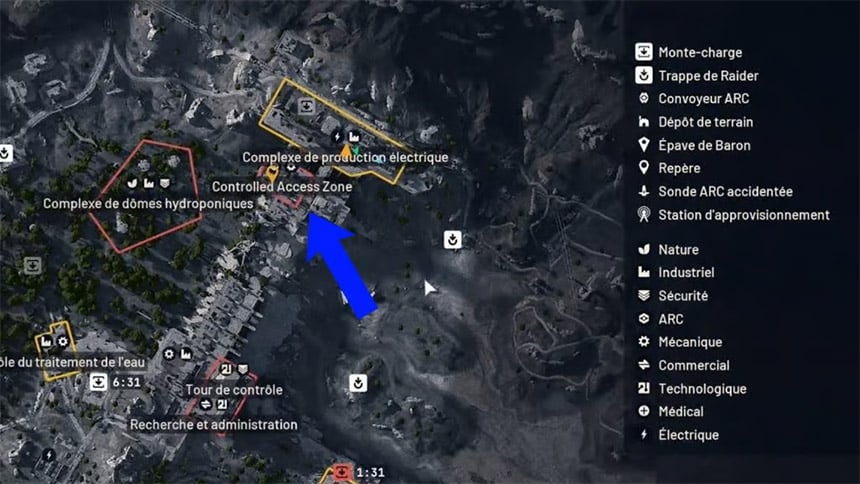
If you've been exploring the Dam Battlegrounds recently, you've likely noticed the new Controlled Access Zone near the Breach and Pipeline Tower. It's imposing, locked down tight, and frankly, a bit confusing at first glance.
We've spent some time cracking this puzzle, and here is the reality: this isn't a solo stealth mission. While you can start the process alone, finishing it requires coordination, specific resources, and a full squad. If you are tired of wondering what's behind those heavy doors, here is exactly how we get in, what you need to bring, and how to maximize your loot run.
- Preparation: What to Bring
- Phase 1: The Fuel Cell (Solo-able)
- Phase 2: The Four-Button Synchronization
- Button Locations Breakdown
- Phase 3: The Resource Check & The Vault
- Is the Loot Worth It?
- Frequently Asked Questions
- Final Thoughts
↖ Preparation: What to Bring
Before you even head to the Dam, you need to check your inventory. There is nothing worse than solving the mechanical puzzle only to realize you are missing the ARC Raiders key to the final vault.
To fully clear the zone, ensure your squad is carrying:
| Item | Quantity | Purpose |
|---|---|---|
| Leaper Pulse Unit | 1 | Required for the final terminal (Phase 3). |
| ARC Power Cells | 3 | Required to power the final door. |
| Weaponry | High Tier | Expect resistance from other players and mobs. |
Note: Some reports suggest needing Metal Parts (approx. 12) depending on map variations, but the Leaper Pulse Unit is the non-negotiable hard gate.
↖ Phase 1: The Fuel Cell (Solo-able)
The first barrier is a locked door with an empty power slot. This part is straightforward and can be done before your full team assembles.
You need to find a Fuel Cell. We don't need to bring this from outside; it spawns locally within the building area.
1. Check the Swamp: Look at the bottom of the building in the swampy/muddy pit area. This is the most common spawn point we've encountered.
2. Check the Stairs: Occasionally, the cell spawns on the staircases leading up.
3. Insert and Unlock: Once you have the cell, bring it to the top of the building and insert it into the controller.
What happens next?
The first door unlocks. Loot this room immediately. It contains high-tier loot, but more importantly, it grants access to one of the four buttons required for the next phase.
↖ Phase 2: The Four-Button Synchronization
This is where many runs fall apart. You cannot progress past this point without four players. If you are running a solo or duo queue, you will need to use voice chat to recruit friendly randoms in the lobby (which, as we know, is a gamble).
There are four buttons scattered around the area. All four must be pressed at the exact same time.
↖ Button Locations Breakdown
Assign one team member to each of the following spots:
| Button # | Specific Location | Hazard / Tip |
|---|---|---|
| 1 | Inside the Unlocked Room | The safest spot. Use the room you just opened in Phase 1. |
| 2 | Beside Staircase Pillar | High Risk. You must jump over the railing to reach it. Be careful not to fall into the pit. |
| 3 | Left of Fuel Cell Controller | Located near where you inserted the battery in Phase 1. |
| 4 | Main Door Front | Directly in front of the second locked door you are trying to open. |
The Strategy:
Get everyone in position. Do a clear countdown over voice comms (3, 2, 1, Press). If done correctly, the second heavy door will slide open.
↖ Phase 3: The Resource Check & The Vault
You've opened the second door, but you aren't done yet. Inside, you will face the Final Door. This isn't a mechanical puzzle; it's a toll booth.
This is why we told you to bring the Leaper Pulse Unit.
To unlock this final barrier:
1. Approach the terminal next to the inner door.
2. Insert the Leaper Pulse Unit and the required ARC Power Cells (or Metal Parts).
3. The door opens, revealing the main vault.
↖ Is the Loot Worth It?
Inside, you will typically find:
2 Gun Cases (High rarity potential)
Container Bags
Red Lockers
Loose High-Value Loot
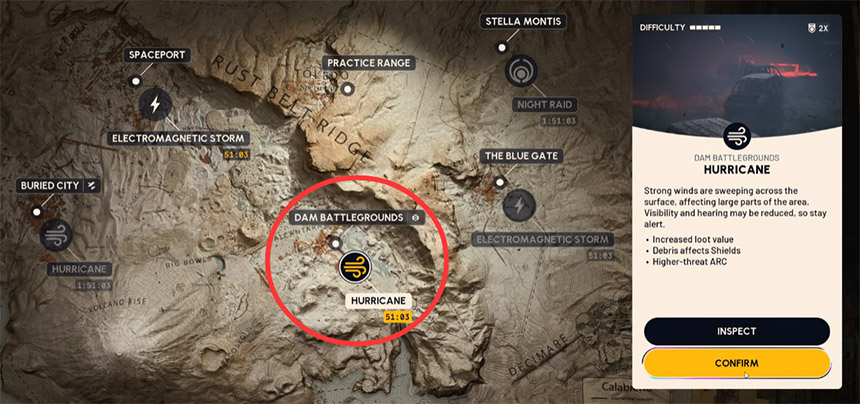
We have noticed that the loot quality seems to scale with map conditions—the more dangerous the raid, the better the payout. However, be aware that there is another locked room inside this vault that requires a specific Dam Control Access Key. If you haven't found that key elsewhere on the map, you won't be able to access that specific sub-room, but the main vault loot is still yours for the taking.
↖ Frequently Asked Questions
Q: Can I do this with just 3 people?
A: No. The four buttons for Phase 2 are too far apart to be speed-run by fewer than four people. You must trigger them simultaneously.
Q: I forgot the Leaper Pulse Unit. Can I find one nearby?
A: Technically, yes. Leapers do spawn in the Dam area (listen for the barking/mechanical sounds). However, hunting a Leaper while carrying high-tier loot and trying to coordinate a puzzle is risky. It is much safer to bring one in your backpack.
Q: Where exactly is the Fuel Cell if it's not in the swamp?
A: If the swamp pit is empty, check the landings of the metal staircases. It rarely spawns outside the immediate footprint of the puzzle building.
Q: Is this area a PvP hot zone?
A: Absolutely. The Controlled Access Zone is marked red on the map. Expect campers waiting for you to do the hard work of unlocking the doors before they engage. Keep your guard up.
↖ Final Thoughts
The Controlled Access Zone on Dam Battlegrounds is one of the most interesting additions to ARC Raiders because it forces cooperation in a game that usually encourages shooting first and asking questions later.
If you can manage the social engineering required to get four people to cooperate—and if you remember to pack that Leaper Pulse Unit—the loot payout can set you up for your next five raids. Just remember: once those doors open, you still have to extract. Good luck, Raider.

Most Popular Posts
- ARC Raiders Riven Tides Key Room Guide: Best Hotel Keys, Loot Routes, Secure & Crane Storage
- ARC Raiders Riven Tides Update: New Map & Items, ARC Turbine, Rewards, and Best Early Strategy
- ARC Raiders Bettina Guide: Best Build, Buffs, and How to Use It Against ARC
- Arc Raiders Season 4 Riven Tides Update, Rewards, Safe Skins, and Release Timeline
- Best ARC Raiders Attachments for Every Weapon: Complete Weapon Mod Guide
- ARC Raiders Turbine Boss Guide: Spawn Time, Weak Points, Best Weapons, and Loot
Popular Category Lists
- Grow a Garden / (286)
- ARC Raiders / (267)
- CoD: Black Ops 7 / (166)
- Monopoly Go / (147)
- MLB 26 / (146)
- Star Citizen / (122)
- Steal a Brainrot / (89)
- ARK Survival Ascended / (77)
- Sailor Piece / (68)
- Forza Horizon 6 / (65)
- Diablo IV / (61)
- Blox Fruits / (61)
- CoD: BLACK OPS 6 / (55)
- Adopt Me / (55)
- Path of Exile 2 / (48)
- Grow a Garden 2 / (48)
- Monster Hunter Wilds / (46)
- Windrose / (44)
- Path of Exile / (40)
- Bee Swarm Simulator / (36)