


 0
0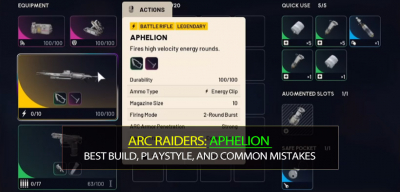
ARC Raiders Aphelion solo review: best attachment pick (Lightweight Stock), why Heavy Shield fits its slow ADS, 10-round ammo discipline, secondary pistol choice, and practical don’t die for free positioning rules.

A solo-friendly Harvest Plants Rank Points route for Damn Battlegrounds during electromagnetic storms. 54 plants = 16K points in 30 minutes. Includes loadout, spawn logic, no-backtrack loop, and risk control.

ARC Raiders guide covering the free Goalie Raider Deck (every reward, what to claim first, what to sell for stash upgrades), Embark’s known bugs and player-side fixes, plus a magazine-threshold and repair-cost breakdown of Bobcat—and a useful “player boost” trick.
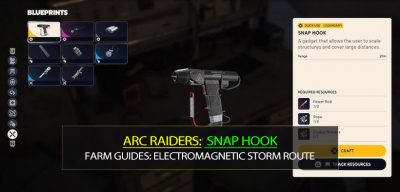
Learn a repeatable, high-consistency route to farm the Snap Hook Blueprint in Arc Raiders. Use the Electromagnetic Storm condition, run light with adrenaline shots, hit specific lockers/drawers in Research/Admin, and extract safely—fast.
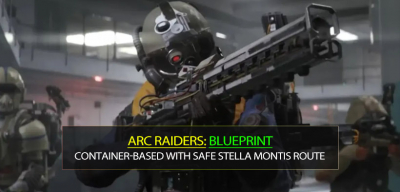
Stop fighting over the same Bluegate room. Blueprint drops in ARC Raiders are tied to container types, not just locations. Learn which containers can roll augment blueprints, plus a practical Stella Montis loot route and risk-control tips.

ARC Raiders guide with the fastest takedowns for Leaper, Shredder, Bastion, Bombardier, Rocketeer, Wasps, and Hornets using Trailblazer/Deadline/Seeker/Wolfpack—plus a Stella Montis Lobby route to farm the blueprints and materials you'll actually run out of.
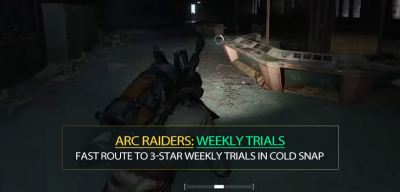
Dam Battlegrounds route to 3-star Cold Snap Trials in ARC Raiders within 2–3 matches. Prioritize the Hydroponics Leaper (8-min respawn), secure non-respawning plants, farm ticks efficiently, and split Cold Snap containers into a dedicated run.
Practical after-wipe blueprint farming guide for ARC Raiders: proven loadouts, when to go naked vs barebones, best map spots (Buried City/Bluegate/Dam), and a loot-rule framework to plan routes smarter and faster.
Arc Raiders Mobility skill guide with tested comparisons: which perks are mandatory (stamina + roll), which are situational (slide, wall tech), which to skip, plus point-path templates for solo and squads.
ARC Raiders expedition wipe rebuild guide: best loot routes for magnets/wires/processors, workshop upgrade materials, where key blueprints drop (Anvil, Ventor, Augments), and a skill tree priority path to stabilize early economy and XP.
Practical solo ARC Raiders skill tree guide from level 1 to 75+ with priority unlocks, point-by-point path, and optional Expedition bonus points. Focus: fast XP, stamina, carry weight, safer looting, and consistent solo extracts.
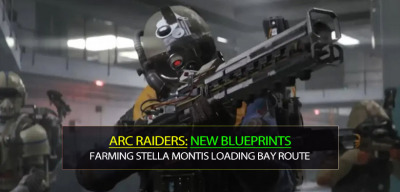
Want consistent new blueprint drops in ARC Raiders? I tested runs across duo/trio and day/night and found a reliable Stellar Montis Loading Bay breach room. Loot order, risk control, and a repeatable route inside.

Most Popular Posts
- Arc Raiders Canto Guide: Best Build, Solo vs Trios Tips, and Blueprint Farm
- ARC Raiders Assessors Guide: Easy Solo Loot Strategy With or Without Smoke Grenades
- ARC Raiders Riven Tides Key Room Guide: Best Hotel Keys, Loot Routes, Secure & Crane Storage
- ARC Raiders Damage Fireflies Trial Guide: Best Farm Method on Buried City Night Raid
- ARC Raiders Scrappy Guide: Best Fruits, and What Apricots & Agave Actually Drop
- ARC Raiders Riven Tides Update: New Map & Items, ARC Turbine, Rewards, and Best Early Strategy
Popular Category Lists
- Grow a Garden / (283)
- ARC Raiders / (248)
- CoD: Black Ops 7 / (164)
- Monopoly Go / (145)
- MLB 26 / (133)
- Star Citizen / (99)
- Steal a Brainrot / (87)
- Sailor Piece / (67)
- CoD: BLACK OPS 6 / (55)
- Forza Horizon 6 / (54)
- Blox Fruits / (54)
- ARK Survival Ascended / (50)
- Path of Exile 2 / (48)
- Adopt Me / (47)
- Monster Hunter Wilds / (46)
- Diablo IV / (45)
- Windrose / (43)
- Path of Exile / (40)
- Battlefield 6 / (34)
- Bee Swarm Simulator / (32)
